Let’s Get Real
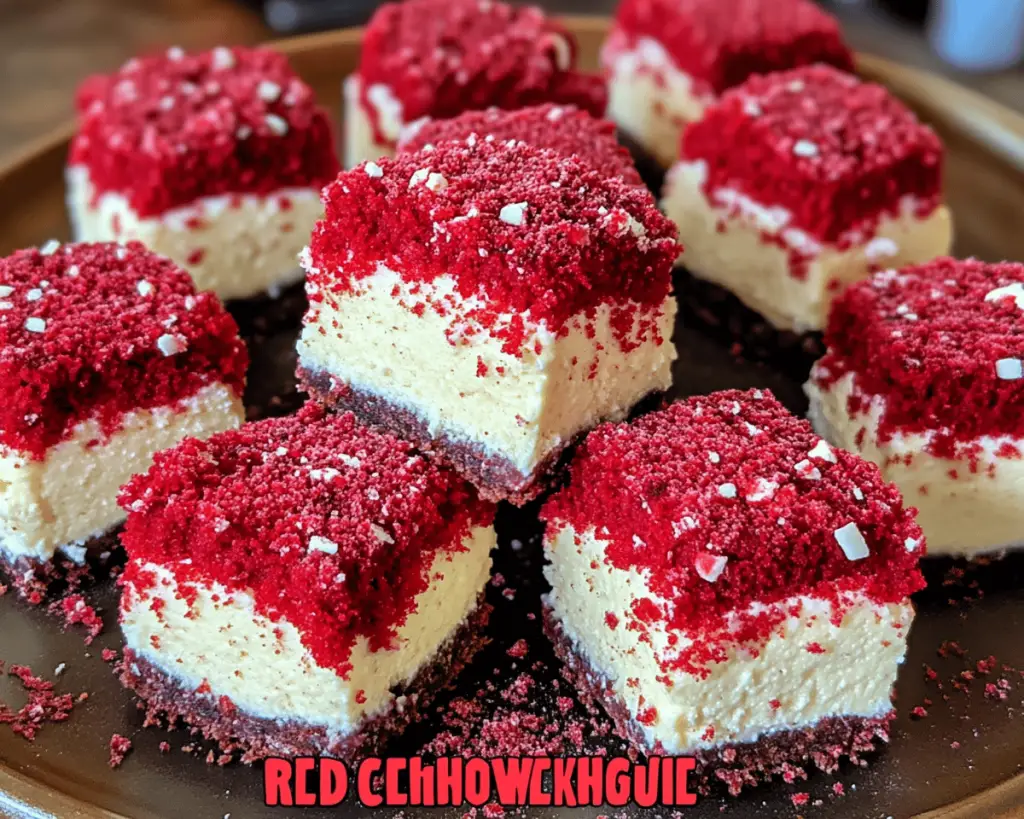
Oh dear folks, let me tell you about Red Velvet Cheesecake Bites. If there’s a dessert that can make the clouds part and a chorus of harp-strumming angels float down from the heavens, it’s this one. You know how every Christmas, your relatives try to convince you that the fruitcake they brought is actually delicious? Yeah, well, this isn’t that. This is, in fact, the soulful, velvety reincarnation of love wrapped up in a bite-sized treat. And boy, did I put my heart into these little beauties.
If you’d told me as a child that one day I would be eating (and raving about) something as sinfully rich as a red velvet cheesecake, I would have rolled my eyes and asked for a chocolate chip cookie instead. But fast-forward to today, and I’m throwing intimate dinner parties where I hover around the dessert table like a paparazzo at a celebrity wedding. I am a changed person, my friends!
However, life has thrown me a few curveballs along the way — like the time I forgot the cream cheese at the grocery store and the whole city was out of it. Do you know the panic! I had to improvise with some yogurt and an extra sprinkle of hope. Spoiler alert: it didn’t ruin the day. If anything, it added to my local legend of “that one time I made dessert without a crucial ingredient.” But hey, even if chaos ensues, you will find yourself grasping divine bites of cheesecake and raised eyebrows of appreciation.
Ingredients, Unfiltered
What’s Really in Red Velvet Cheesecake Bites
Let’s break down what we need to conjure this sweet spell. But don’t worry, I’ll keep it real about these ingredients!
Red Velvet Cake Mix: The foundation of this dessert! There’s no shame in using a cake mix. In fact, I embrace it. You get to enjoy the velvety goodness without worrying about flour ratios — hallelujah!
Butter: Because butter makes everything better. If someone tells you otherwise, they’re lying! I recommend using unsalted, but let’s be honest, if you drop a pinch of salt into the madness, you won’t have to call the cops on yourself.
Eggs: Just a couple of eggs, friends. Not more, not less. They tie everything together like the mother hen of this dessert.
Cream Cheese: The MVP here, no question about it. Go full fat, my dears. We’re not in this for health benefits; we’re here for the taste.
Sugar: Because the heart wants what it wants — and in this case, it wants sugar. Don’t skimp on it unless you’re a robot programmed to eat cardboard.
Vanilla Extract: It’s the magic elixir that whispers sweet nothings into the ear of your cheesecake batter.
Heavy Whipping Cream: Because we want something divine that could potentially rival the cloud on which Julia Child ascended to heaven.
Red Food Coloring: Use it sparingly – a few drops should suffice to turn things into that signature gorgeous red. If you overdose, your bites might end up looking like they’ve been dunked in a horror movie set!
Let’s Talk Health (or Not)
Is This Even Healthy? Let’s Discuss
Oh, boy! Do I even need to answer this? We have cake mix, butter, eggs, and cream cheese, people. We’re not building a health food empire here. Sure, you might as well invite your dentist for an appointment if you’re making these. But let’s chill for a second — if we’re reaching for something to satisfy that sweet tooth, does it have to be filled with kale? (If your answer is yes, I’m probably not the right blog for you.)
The truth is, this dessert is like a hug from an old friend you haven’t seen in years (but maybe should have kept in touch with — you know who you are). I have peace in my heart saying that every now and then, it’s worth diving into the cheesecake realm, regardless of health implications. Sure, there’s butter. And yes, I sleep just fine at night knowing it’s there. This is indulgence wrapped in a bite-sized blanket of happiness.
Your Grocery List
Here’s What You’ll Need
– 1 box of Red Velvet Cake Mix (15.25 oz)
– ½ cup unsalted butter, melted
– 2 large eggs
– 8 oz cream cheese, softened (full fat, please)
– 1 cup powdered sugar
– 1 tsp vanilla extract
– 1 cup heavy whipping cream
– Red food coloring (just a few drops, unless you want a horror movie cake!)
This recipe yields approximately 24 cheesecake bites, which means you’ll either have an epic dessert for a party or one very intense evening of binge-eating. No judgment here.
The Actual Cooking Part
Okay, Let’s Make This
Alright, let’s dive head-first into this delicious pit of red velvet cheesecakery!
1. **Preheat the Oven**: Set that lovely beast of yours to 350°F (175°C). We want it warm enough to turn our creations into golden clouds of joy.
2. **Prepare the Cake Mix**: In a large bowl, combine your red velvet cake mix, melted butter, and eggs. Whisk it like you’ve never whisked before! The aim is to make a thick, velvety batter that has you questioning your life choices surrounding meal prep. Trust me, it’s gonna be messy, but this is where the magic happens.
3. **Baking**: Grab a mini muffin pan and grease those adorable muffin cups well! Spoon your rich red velvet batter into each well (fill them about 3/4 full). Bake for about 12-15 minutes until they’re firm to the touch. Pro tip: forget the timer, but will they be done just right? Maybe! Channel your inner psychic if this seems daunting.
4. **Chill Time**: Let them cool completely before removing them from the muffin tin. This is where things get a bit tragic; it’s vital to let these little gems set before we enter the cheesecake territory.
5. **Whip It Good**: While the bites are cooling, let’s whip up the cream cheese filling! In that same bowl (yes, I said it), beat your softened cream cheese until it’s smooth and creamy. Gradually add your powdered sugar, and once that’s combined, toss in your vanilla extract.
6. **Whipping Cream Fitness**: In another bowl, whip your heavy whipping cream until you attain stiff peaks. This is not a “barely there” situation, folks. Go all in! Gently fold that whipped cream into your cream cheese mixture until you create a lush cloud that gives you butterflies when you look at it.
7. **Fill ‘em Up**: Once your cake bites have cooled and deflated (like my hopes for getting a dog during childhood), grab your cheesecake filling and indulge yourselves! Spoon the cheesecake filling onto the top of each red velvet base. Don’t skimp! Treat them like a millionaire’s snack.
8. **Chill Out**: It’s time for a cool-down session. Pop these bad boys into the fridge for at least one hour. Let the cream cheese filling stiffen up and meld with that decadent cake layer below.
9. **Finish the Decor**: This is your call. Drizzle a little melted chocolate on top, sprinkle some more bottom-of-the-sugar-bag sugar, or maybe even some crushed nuts for that crunch factor. Just don’t go getting too fancy on me.
10. **The Taste Test**: Finally, it’s the moment we’ve all been waiting for. Pull these little bites out of the fridge and plate them up! You might want to prepare a dialogue for when your friends ask how you made them — a little sprinkle of mystery is always entertaining!
Side Notes & Sassy Hacks
Bonus Tips You Didn’t Ask For
– **Barter for Justice**: Not really with people, but with ingredients! If you can’t find red food coloring, you could go rogue and use beet juice instead. It won’t have that overpowering sweetness, but you’ll feel like a culinary pioneer.
– **Freeze for Later**: Want to stock up on these little gems for a rainy day? Freeze them! Just remember to store them in an airtight container. When you’re having a bad day, defrost a few, and instantly feel like a rockstar again.
– **Crowd Control**: If you find yourself with too many bites to handle, these little suckers are perfect for sharing. Stick one in the pocket of your best friend as a surprise or bring a box to work. Just try not to play favorites — no one likes that coworker!
– **Plating is Key**: Slide these bites onto a colorful plate or rustic wooden board for that Pinterest-ready look. Add some fresh berries or mint leaves for a pop of color. Is that a gourmet establishment in your kitchen? You bet it is!
Final Words of (Culinary) Wisdom
So there you have it—the perfect recipe for Red Velvet Cheesecake Bites that’ll give even the most seasoned dessert lovers a run for their money. These bite-sized treasures scream love, decadence, and a hint of mischief. If you try this recipe out, please tag me! I’d love a mental high-five. And if you have any chaotic moments in the kitchen (which I can almost guarantee), hit me up in the comments — I promise, you’re not alone in this delicious adventure! Whether you’re celebrating a special occasion or soothing a rough day with sugar, these little bites are sure to deliver bliss in every single nibble. Cheers to that!


