Prep time: 15 minutes
Cook time: 15 minutes
Total time: 30 minutes
Servings: 6
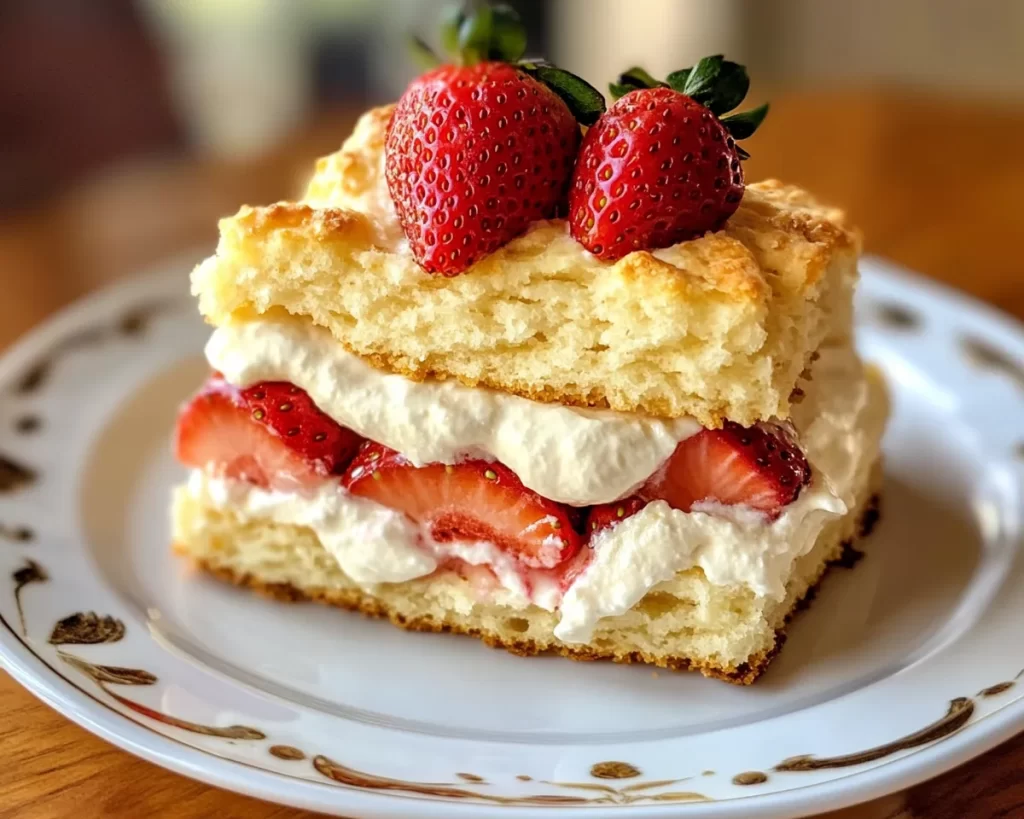
Strawberry shortcake is a treat synonymous with warm weather celebrations, charming picnics, and family gatherings. This classic dessert combines the sweetness of ripe strawberries with the flaky goodness of buttermilk biscuits, all topped off with a generous dollop of whipped cream. The exciting part? You can whip up this delicious Strawberry Shortcake in just 30 minutes! Perfect for busy parents or anyone looking to impress without spending hours in the kitchen.
What Is Strawberry Shortcake: Classic Buttermilk Biscuit Strawberry Shortcake in 30 Minutes?
Strawberry shortcake traditionally features layered biscuits, fresh strawberries, and whipped cream. This specific version emphasizes the delightful contrast between the tartness of the strawberries and the rich buttermilk biscuits. The biscuits are easy to make and lend a satisfying crunch that complements the juicy strawberries beautifully. It’s a dessert that can bring everyone to the table and make any gathering feel special.
Why You’ll Love This
This recipe is not only quick and easy to prepare, but it also offers versatility for any occasion—from picnics to family gatherings. The tactile enjoyment of making biscuits from scratch allows you to engage with your food, and the aroma that fills your kitchen while they bake is simply unbeatable. Additionally, who doesn’t love the fresh burst of strawberries paired with light, fluffy whipped cream? This dish is a rainbow of flavors and textures, making it a hit every time.
Ingredients You’ll Need
- 2 cups of all-purpose flour: This forms the base for your biscuits, providing the structure needed to hold up against the fruits and cream.
- 1 tablespoon baking powder: This helps the biscuits rise and become fluffy, giving them a light texture.
- 1/4 cup granulated sugar: A touch of sweetness to balance the natural tartness of the strawberries.
- 1/2 teaspoon salt: Enhances flavor and balances the sweetness.
- 1/2 cup unsalted butter (cold): Creates tenderness and richness in your biscuits.
- 3/4 cup buttermilk: Adds moisture and a slight tang, making the biscuits even more delightful.
- 2 cups fresh strawberries (sliced): The star of the show, adding refreshing sweetness.
- 1 cup heavy whipping cream: For that luscious topping that ties everything together.
- 2 tablespoons powdered sugar (optional): Sweetens the whipped cream without adding too much sweetness overall.
How to Make
- Start by preheating your oven to 425°F (220°C). This high temperature is crucial for getting those biscuits perfectly baked with a golden crust.
- In a large mixing bowl, combine the flour, baking powder, granulated sugar, and salt. Stir these dry ingredients together to ensure they’re well mixed; this is essential for even flavor distribution.
- Next, cut the cold butter into small cubes and add it to the dry mixture. Using a pastry cutter or your fingers, work the butter into the flour until you have a crumbly texture. This step is vital as it creates those delightful flaky layers in your biscuits.
- Pour in the buttermilk and gently mix until the dough just comes together. Be careful not to overwork the dough—this can lead to tough biscuits. It should be slightly sticky but manageable.
- Turn the dough onto a lightly floured surface and gently pat it into a rectangle about 1-inch thick. Use a biscuit cutter or a glass to cut out biscuits, placing them on a lined baking sheet.
- Bake in your preheated oven for 12 to 15 minutes until they’re golden and cooked through. Keep an eye on them to avoid overbaking! When finished, let them cool slightly.
- While the biscuits cool, whip the heavy cream in a separate bowl using an electric mixer. Once it starts to thicken, add the powdered sugar (if using) and continue whipping until soft peaks form.
- To assemble your strawberry shortcakes, slice the baked biscuits in half, layer them with sliced strawberries, and top with a generous dollop of whipped cream. Serve immediately for the best texture and flavor.
Variations & Substitutions
Gluten-Free Variation: For a gluten-free twist, substitute the all-purpose flour with a 1:1 gluten-free baking blend. Be sure to check for specific instructions on the blend you’re using, as some may require additional binding agents. The rest of the ingredients can remain the same, and you’ll still achieve a delicious biscuit that’s safe for those with gluten sensitivities.
Dairy-Free Variation: To make this dessert dairy-free, replace the buttermilk with a plant-based alternative, such as almond or coconut milk mixed with a splash of vinegar for that tangy flavor. Additionally, use vegan butter for the biscuits and whip coconut cream instead of heavy whipping cream. This alternative still provides a rich taste but caters to dairy-free diets.
Fruit Variations: While strawberries are the traditional fruit used, feel free to experiment! Blueberries, raspberries, or a mix of summer berries work beautifully in this recipe. Adjust the amount of sugar slightly based on the tartness of the fruit you choose; this keeps the dessert perfectly balanced.
Berry Broth: Enhance the fruit experience by macerating your berries in a bit of sugar and lemon juice for about 30 minutes before assembly. This creates a delicious syrup that can be drizzled over the shortcake, adding moisture and flavor depth.
Common Mistakes to Avoid
One common error is overmixing the dough, which leads to tough biscuits instead of tender ones. Remember to mix just until combined; this allows for that desired flakiness. Another is not using cold butter—room temperature butter will melt too fast and isn’t ideal for flaky textures. Lastly, ensure your biscuits are not crowded on the baking sheet; they need space to rise properly and develop that golden crust.
Storage, Freezing & Reheating Tips
Once assembled, this dessert is best enjoyed immediately to retain the biscuit’s texture. However, if you have leftovers, store the unassembled components in separate airtight containers. The biscuits can be kept at room temperature for up to 2 days, while the strawberries and whipped cream should be refrigerated and consumed within 2 to 3 days. For long-term storage, you can freeze the unbaked biscuits. Once you’ve cut them out, place them in the freezer on a baking sheet, then transfer to a bag for up to 3 months. Bake from frozen, adding a couple of extra minutes to the baking time.
Frequently Asked Questions
Can I make the biscuits ahead of time? Yes! You can prepare the biscuits ahead of time. Just store them in an airtight container at room temperature for up to 2 days, or freeze them for up to 3 months. Simply reheat in the oven to restore their flakiness.
What type of strawberries work best? For the best flavor, use fresh, ripe strawberries. Look for firm strawberries that have a deep red color. These will be naturally sweeter and juicier, perfect for shortcake. Avoid using overripe or mushy strawberries, as they may turn the dessert soggy.
Can I use whipped topping instead of making my own whipped cream? Absolutely! Store-bought whipped topping can be a time saver and provides a similar texture and taste. Just make sure to select a high-quality product for the best experience.
How do I know when the biscuits are done baking? Biscuits are typically done when they are golden brown and firm to the touch. You can also do the toothpick test—insert a toothpick into the center of a biscuit: if it comes out clean or with just a few crumbs, they’re ready!
Is there a way to make this dish healthier? Yes! You can replace half of the all-purpose flour with whole wheat flour for added nutrition. Using less sugar or a sugar substitute in the whipped cream is another way to make this dessert lighter without sacrificing too much sweetness.
Conclusion: Strawberry shortcake made with buttermilk biscuits is an absolute crowd-pleaser that you can prepare in just 30 minutes! It’s a delightful balance of flaky biscuits, fresh strawberries, and whipped cream that will make any meal special. Whether you are serving this for a holiday gathering, a simple family dessert, or a summer picnic, it’s sure to become a favorite. Try this recipe and create your own sweet memories!