Let’s Get Real
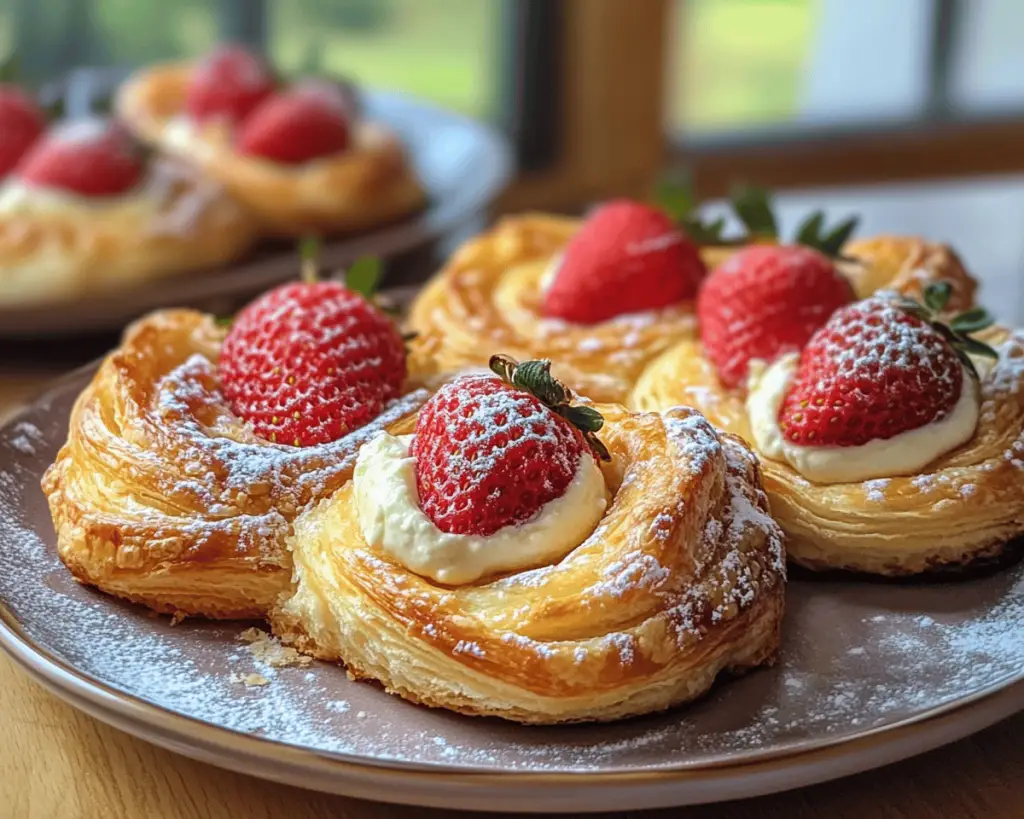
So, the other day, I was enjoying a moment of blissful laziness while scrolling through my Instagram feed (you know, the place where my to-do list magically transforms into a recipe board). Amidst the endless reels of food prep and cute dog videos, I stumbled upon a gorgeous image of Strawberry Cheesecake Danishes. Excuse me while I drool and mentally kick myself for not being the one to prepare something so whimsical! Those flaky pastries oozing with cheesecake filling and topped with glistening strawberries? I mean, who can resist such a glorious creation?
Flashback to my childhood—my grandma used to make something like this, but let me tell you, it was an absolute disaster more times than not! The dough was tougher than my uncle’s old leather boots, and the filling could’ve doubled as cement. As a kid, I forced down every last bite mostly because, well, it was the polite thing to do. But deep down inside, I swore off danishes—until recently. So, what did I do? I said, “Challenge accepted,” and now I’m back with a recipe that could put those sad attempts to shame and send your taste buds into a joyful frenzy. The ultimate “flaky, cheesy, fruity goodness” is finally here, and I’m ready to share every messy detail!
Ingredients, Unfiltered
What’s Really in Strawberry Cheesecake Danishes
Let’s break down these ingredients, shall we? Grab your notepad (or just mentally prepare) because things are about to get delicious!
Frozen Puff Pastry: Ah, the backbone of these danishes. I’m not about to sit here and pretend to be a pastry wizard; you won’t catch me rolling out dough when I can just grab a box of frozen puff pastry from the store. It’s flaky, it’s buttery, and it basically does the heavy lifting for you.
Cream Cheese: This is where the magic happens! It’s rich, it’s creamy, and it brings that cheesecake flavor we all know and love. A bit of a splurge, sure, but I have zero regrets when it comes to cream cheese. The grocery store even has something called “Neufchâtel,” which is a lower-fat version but let’s be real—live a little! You also can’t spell “delicious” without CREAM!
Sugar: Ah, the sweet, sweet stuff that makes life worth living! Depending on taste, you might want to adjust the sugar level. I have a sweet tooth, so I go heavier. But just know, you and I are on the same sugar coma path together.
Vanilla Extract: This adds soul to the filling. I might have a minor obsession with vanilla; it provides that kick that says, “I care about this dessert.” I’m also picky about my brands—if you’re using imitation vanilla extract, we need to talk. Real vanilla is the only way to go.
Sour Cream: Because regular cream wasn’t enough, I throw in sour cream for a good measure! It adds a slight tang that balances all that sweetness, and we need balance in life, am I right?
Strawberries: Here’s the star of our show! Fresh, juicy, and bursting with flavor—basically, little jewels of happiness. Please opt for fresh strawberries when you make these, because no one wants to bite into mushy, sad strawberries that have seen better days.
Egg: Our trusty friend to help us achieve the golden finish for the puff pastry. This is also where I accidentally spill half the egg on my countertop (and my shoe…ugh!). Let’s try not to spill this time okay? Maybe.
Powdered Sugar: Now for the glaze. It’s delightful and makes everything just a bit fancier. You’ll be feeling like a pastry chef when you drizzle this on top. And yes, it is magically delicious.
Let’s Talk Health (or Not)
Is This Even Healthy? Let’s Discuss
Okay, let’s get this out in the open. No, this is not a health food. And if you came here looking for kale and quinoa, bless your heart but you’ve stumbled onto the wrong recipe. We’re talking about buttery pastry, cream cheese, and sugar. So, yes, this is pure indulgence!
But you know what? Life is too short to skip dessert! I firmly believe that every now and then, we should throw caution to the wind and embrace the scrumptiousness. Sure, there’s butter. And yes, I sleep just fine at night. So, live a little, my friends, and enjoy those darn danishes! Just promise you’ll take a walk afterward… or nap, I don’t judge.
Your Grocery List
Here’s What You’ll Need
– 1 box (2 sheets) frozen puff pastry, thawed
– 8 oz cream cheese, softened
– 1/2 cup granulated sugar (adjust to taste)
– 1 tsp vanilla extract
– 1/4 cup sour cream
– 1 cup fresh strawberries, chopped
– 1 egg (for egg wash)
– 1 cup powdered sugar
– 1-2 tablespoons milk (for glaze)
How many people will this feed? Well, let’s just say that if you’re making these for a brunch gathering, you might want to double the batch; it serves about 6 people, unless you are like me and just consume two at a time while standing at the kitchen counter.
The Actual Cooking Part
Okay, Let’s Make This
Alright, my baking bandits, it’s time to roll up those sleeves and dive in! Don’t panic if this looks messy — it’s supposed to be a little chaotic when the delicious is at stake!
1. **Thaw the Puff Pastry:** First things first, let’s get that puff pastry out of the freezer. You want to give it around 30-40 minutes to thaw. Make yourself a coffee, or sit back and scroll through Instagram. That works too.
2. **Preheat the Oven:** Preheat your oven to 400°F (200°C). This is where the magic happens, but let’s remember to avoid burning down the house.
3. **Make the Filling:** In a medium bowl, mix together your softened cream cheese, sugar, vanilla extract, and sour cream. Use a hand mixer or a sturdy spatula until it’s creamy, smooth, and heavenly. I can’t stress enough: make sure the cream cheese is softened! I once forgot to take it out early and tried to whip cold cream cheese. Let’s just say it was a lumpy disaster.
4. **Roll Out the Puff Pastry:** After about forty minutes (or until you’ve finally found the courage to face your pastry), carefully unroll the thawed sheets. Using a rolling pin, roll them a tiny bit to make them thinner, but don’t go crazy—leaving some thickness is essential for that flaky magic. Cut each sheet into four squares, like a pizza.
5. **Create the Pastry Base:** Now it’s time to form our beautiful danish shape. Take each square, and with a sharp knife, cut a smaller square inside each larger square, leaving a border of about an inch. Don’t slice all the way through—just make a visual guide. Think of it as giving your pastry some flair!
6. **Add the Cheesecake Filling:** Put about a tablespoon of that luscious cream cheese filling right in the center of each square. There’s no such thing as “too much” here; let your baker flag fly!
7. **Top with Strawberries:** Now, sprinkle chopped strawberries on top of the cream cheese filling. This is where your danishes get their fabulousness!
8. **Fold the Pastry:** Grab the corners of the outer square and fold them toward the center, pinching just to hold them. Honestly, they can look a little disheveled but remember, if they look perfect, you might have given them a false sense of hope about not devouring the entire batch yourself.
9. **Egg Wash Time:** Beat that egg with a tiny splash of water (just to hydrate the poor thing). Brush the egg wash over your danishes for that golden glow. This step is crucial if you want to take Instagram-worthy photos later.
10. **Bake:** Plop those beauties onto a parchment-lined baking sheet and slide them into the oven. Bake for about 15-20 minutes or until they’re puffed up and golden brown. Try not to hover over the oven the entire time like a mother hen; give them some space to shine!
11. **Make the Glaze:** While the danishes are baking, it’s time for the fun part! In a small bowl, whisk together the powdered sugar and milk until it’s smooth and pourable. The consistency should be that of a lovely drizzle, not a thick paste! You’re not trying to glue anything here.
12. **Cool and Drizzle:** When the danishes are out of the oven, let them cool for a few minutes (or about five seconds if your patience is wearing thin). Drizzle that glorious glaze over the top, watching it cascade like a beautiful waterfall of sweetness.
And voila! You have successfully created something extraordinary. Cue the applause because you just made Strawberry Cheesecake Danishes like a pro.
Side Notes & Sassy Hacks
Bonus Tips You Didn’t Ask For
– **Substitutions Galore:** Don’t have strawberries? Get creative! Use whatever fruit is in season. Raspberries, blueberries, peaches—go wild! Just keep in mind that softer fruits might need a sprinkle of cornstarch to help with moisture.
– **Pre-made Filling:** If you’re in a pinch, you could also use store-bought cheesecake filling. But let’s be real—where’s the fun in that? Don’t skimp on the homemade love; that’s what makes a good danish great!
– **Freezer-Friendly:** These danishes freeze like a dream! Just bake them, let them cool, and then package them individually in a freezer-safe bag. When those late-night sugar cravings hit you, just pop one in the microwave for 20-30 seconds, and boom—instant pastry delight!
– **Leftover Glaze?** Use that leftover glaze on your morning coffee cake, pancakes, or even vanilla ice cream. Who doesn’t love a drizzle of sugary goodness?
Final Words of (Culinary) Wisdom
If you try this recipe (and I really hope you do), you are in for a treat! Please tag me in your creations or just send me a mental high-five. I’m sharing my kitchen adventures with you, and nothing makes me happier than seeing the joy these Strawberry Cheesecake Danishes bring to your table. Just remember, if you embark on this delicious adventure, don’t be surprised when everyone begs you for the recipe. So get those pastry vibes flowing, because once you make these, there’s no going back. Happy baking, my friends!