Prep time: 20 minutes
Cook time: 15 minutes
Total time: 35 minutes
Servings: 4
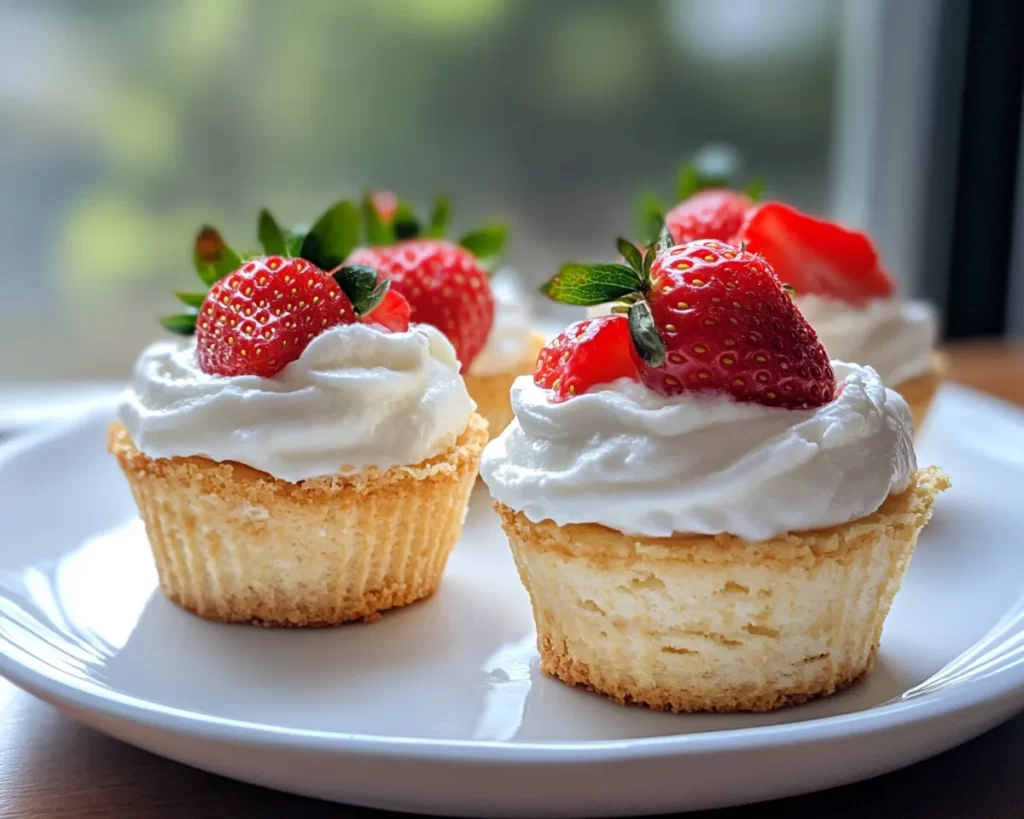
Spring is here, and with it comes the delightful opportunity to whip up vibrant, fresh desserts that celebrate the season. One of my absolute favorites is the Strawberry Shortcake Cups. These treats are perfect for casual gatherings, picnics, or simply endearing moments at home with loved ones. Imagine biting into a light and fluffy biscuit that crumbles in your mouth, layered with luscious whipped cream and juicy strawberries. The delightful combination of textures and flavors is simply irresistible. What makes this recipe extra special is its ease—perfect for busy parents or beginners looking to impress without the stress.
In this article, you’ll learn about the origins of Strawberry Shortcake Cups, why these desserts are so beloved, how to prepare them, and even some variations to suit various dietary needs. You won’t need to be a master baker to achieve perfection; just a little patience and some fresh ingredients will take your dessert game to new heights!
What Is Spring Desserts: Strawberry Shortcake Cups?
The Strawberry Shortcake Cup is a modern twist on the classic strawberry shortcake. Traditionally, this dish consists of sweet biscuits or sponge cakes layered with strawberries and whipped cream. However, in this version, we serve it in delightful cups, making it easier to enjoy and perfect for serving at gatherings.
Originating in the United States, the strawberry shortcake has a rich history that dates back to the 19th century. With its strawberry filling, fluffy whipped cream, and buttery biscuit base, it embodies the essence of spring and summer flavors. The production of strawberries at this time creates a natural harmony with the cool and creamy textures of the cream. The process of creating these cups allows for a more refined presentation, making it an ideal dessert for various occasions—from simple family meals to extravagant celebrations.
The flavor profile is quite extraordinary. You experience a delightful contrast of sweet and tart from the strawberries against the rich creaminess of the whipped topping, all rested on a buttery base. This dish is undoubtedly a celebration of fresh ingredients and seasonal produce.
Why You’ll Love This
There are countless reasons to love these Strawberry Shortcake Cups. For one, they balance deliciousness with simplicity; most ingredients are easy to source and require minimal effort. Also, the fresh strawberries provide a tremendous boost of flavor while being packed with vitamins and antioxidants, making them a healthier choice for dessert.
Additionally, homemade desserts often taste better than store-bought options. You control the sweetness, the creaminess, and the flavors. Some misconceptions suggest that desserts like these are overly complicated; the truth is, you can create a stellar dessert without spending hours in the kitchen. The versatility of this recipe allows for various adaptations, whether you are vegan, gluten-free, or simply craving something different. Substituting key ingredients can ensure that anyone at the table can enjoy this delightful dessert.
Moreover, these cups are visually stunning, boasting layers of color and texture that are sure to impress your guests. You can easily assemble them ahead of time, taking the stress out of your next gathering. So, whether you are a busy parent juggling multiple tasks or a beginner looking to impress, this recipe has got you covered.
Ingredients You’ll Need
To create these scrumptious Strawberry Shortcake Cups, you will need the following ingredients:
- Fresh Strawberries: About 2 cups, hulled and sliced. The sweetness of the strawberries is essential, so opt for ripe, in-season berries whenever possible. If strawberries are not available, consider substitutes like raspberries or blueberries to keep the recipe interesting.
- All-Purpose Flour: 1.5 cups. This will form the base of your biscuits. For gluten-free options, you can use a gluten-free all-purpose flour blend.
- Sugar: 1/4 cup for the biscuits and 2 tablespoons for the strawberries. Sugar boosts the sweetness while balancing the tartness of the strawberries.
- Baking Powder: 2 teaspoons. This leavening agent will ensure your biscuits rise and become fluffy; don’t forget to check the expiration date for effectiveness.
- Salt: 1/2 teaspoon, just to enhance sweetness and balance flavors. If you are watching sodium intake, you can reduce this amount.
- Unsalted Butter: 1/2 cup, chilled and cubed. Fresh butter adds a rich flavor to your biscuits. For a dairy-free option, substitute with coconut oil or a vegan butter alternative.
- Heavy Cream: 1 cup for the whipped topping. Whipping cream creates a light and airy texture that complements the other layers beautifully; if you’re looking for a healthier version, try using Greek yogurt instead.
- Vanilla Extract: 1 teaspoon. This adds depth and enhances the sweetness of the whipped cream; however, if you’re sensitive to vanilla or have an allergy, consider leaving this out or exploring almond extract.
These ingredients can be easily adjusted to suit personal preferences or dietary restrictions, ensuring that everyone can enjoy the classic taste of strawberry shortcake.
How to Make
Making Strawberry Shortcake Cups is a delightful experience. Follow these step-by-step instructions, and you’ll soon be enjoying a delicious treat.
- Prepare the Strawberries: Start by washing and hulling your strawberries. Slice them into quarters and place them in a bowl. Sprinkle 2 tablespoons of sugar over the strawberries and gently mix them. Allow the strawberries to sit for 10-15 minutes at room temperature to macerate. This process brings out their natural juices, enhancing the flavor.
- Preheat the Oven: While the strawberries are macerating, preheat your oven to 425°F (220°C). Preheating the oven ensures that your biscuits will start rising immediately upon being placed inside, leading to a fluffier texture.
- Mix the Dry Ingredients: In a large bowl, mix together the all-purpose flour, 1/4 cup sugar, baking powder, and salt. Whisk these ingredients together thoroughly to make sure the baking powder is evenly distributed; this will help your biscuits rise uniformly.
- Add the Butter: Next, add the chilled, cubed unsalted butter to the dry ingredients. Using a pastry cutter or your hands, cut the butter into the flour mixture until it resembles coarse crumbs. You want to achieve a texture where the butter is evenly distributed yet still visible in small pea-sized clumps, providing flakiness in the final product.
- Add the Cream: Pour in the heavy cream and mix the dough until it just comes together. Be careful not to overmix, as this can lead to tough biscuits. The dough should be slightly sticky; if it feels too dry, add a splash more cream until you reach the desired consistency.
- Shape the Biscuits: Turn the dough onto a floured surface and gently pat it into a rectangle about 1-inch thick. Cut out your biscuits using a biscuit cutter or a glass, gently pressing straight down without twisting to maintain the layers. Place the biscuits on a parchment-lined baking sheet about 1 inch apart.
- Bake the Biscuits: Place the baking sheet in the preheated oven and bake for 12-15 minutes or until the tops are golden brown. Keep an eye during the last 2 minutes, as the baking time may vary based on your oven. When done, the biscuits will look fluffy and have a slightly crisp exterior.
- Whip the Cream: While the biscuits are cooling, prepare your whipped cream. In a clean mixing bowl, combine the remaining cup of heavy cream and the vanilla extract. Use an electric mixer on medium speed to whip the cream until soft peaks form. Be cautious not to over-whip as this can lead to a grainy texture.
- Assemble the Cups: Once everything has cooled, it’s time to assemble your cups. Take a biscuit and cut it in half horizontally. Place the bottom half in a serving cup or bowl, spoon some of the macerated strawberries onto the biscuit, followed by a generous dollop of whipped cream. Place the top half of the biscuit over this layer, then top with more strawberries and whipped cream. Feel free to garnish with a fresh strawberry on top for an extra touch of elegance!
Be sure to take your time assembling each cup. The layering gives a beautiful aesthetic that enhances not only the taste but the visual appeal of your dessert.
Variations & Substitutions
Making your Strawberry Shortcake Cups versatile opens a world of flavor and creativity. Here are some fun variations and substitutions you might consider.
Vegan Strawberry Shortcake Cups: For a fully plant-based version, substitute dairy ingredients with alternatives. Use coconut cream instead of heavy cream for whipping and almond milk combined with a plant-based yogurt for biscuits. You can find marvelous results by utilizing ripe bananas to sweeten the recipe naturally. Opt for agave syrup to replace sugar for both the biscuits and the macerated strawberries. This change not only caters to vegan preferences but also adds a delightful twist in flavor.
Gluten-Free Strawberry Shortcake Cups: If you’re avoiding gluten, exchanging regular flour with a gluten-free all-purpose flour blend is a simple solution. Ensure that the blend contains xanthan gum, as this will provide necessary structure and stability to your biscuits. You can also use almond flour combined with a little coconut flour for a nutty flavor. Pay close attention to baking times, as gluten-free products may require minor adjustments.
Chocolate Strawberry Shortcake Cups: For an indulgent twist, consider incorporating chocolate. Substitute a portion of the flour with cocoa powder (start with 1/4 cup) to create a chocolate biscuit base. You can also add chocolate chips to the batter for an extra decadent element. The rich flavor of chocolate harmonizes exquisitely with the sweet strawberries, creating a luxurious experience.
Cheesecake Strawberry Shortcake Cups: For something a bit more decadent, consider whipping up a cheesecake-style whipped cream. Combine cream cheese with the heavy cream and whip until soft peaks form. This adds a velvety creaminess that pairs wonderfully with the fresh strawberries, enhancing the flavors to another level. Use a graham cracker crust layer on the bottom of the cup for that classic cheesecake base.
These variations allow you to adjust the recipe to meet varied tastes and dietary requirements, ensuring that everyone can enjoy this spring dessert.
Common Mistakes to Avoid
As with any recipe, there are some pitfalls to be aware of when making your Strawberry Shortcake Cups. One common mistake is overmixing the biscuit dough. Too much mixing will lead to tough, dense biscuits rather than light and fluffy ones. Always mix until the ingredients are just combined.
Another issue can arise from improperly measuring the flour. It’s easy to overpack flour in a measuring cup, which could lead to dry dough. Always spoon the flour into your measuring cup and level it off with a knife for the most accurate measurement.
Lastly, be cautious of your whipped cream. Overwhipping can cause it to turn grainy, ruining that luscious texture you desire. Stop whipping as soon as you see soft peaks to ensure a delightful consistency.
Storage, Freezing & Reheating Tips
When storing your Strawberry Shortcake Cups, it’s best to keep them assembled in the fridge for up to 2 hours. This prevents the biscuits from becoming soggy from the strawberry juices. Once you prepare them for longer storage, it’s advisable to keep the components separate.
You can store the biscuits in an airtight container at room temperature for 1-2 days, while the strawberries can be kept in the fridge for up to 3 days. As for the whipped cream, it’s best used right away but can be stored in the fridge for a maximum of 24 hours. Simply rewhip it gently before serving if it separates.
Freezing is a fantastic option if you want to prepare ahead of time. However, freeze the components individually. The whipped cream can be frozen in dollops on a baking sheet, then transferred to a freezer bag once solid. The biscuits can also be frozen once fully cooled. For best results, consume them within a month of freezing. When ready to enjoy, defrost them in the refrigerator overnight.
Frequently Asked Questions
Can I use frozen strawberries instead of fresh? Yes, you can use frozen strawberries, especially if fresh ones aren’t in season. Simply thaw them completely and drain any excess juice before using them in your recipe. However, keep in mind that frozen strawberries may have a softer texture when thawed compared to fresh ones.
Can I make these cups ahead of time? While you can prepare individual components beforehand, it’s best to assemble them no more than 2 hours before serving. This ensures that the biscuits remain crisp and do not absorb too much moisture from the strawberries and cream.
Is there a way to reduce sugar in this recipe? Absolutely, you can reduce the sugar amount in the biscuits and macerated strawberries. Consider using natural sweeteners like honey or maple syrup for additional flavor. Keep in mind that the sweetness of the strawberries plays a significant role, so be sure to taste as you go.
How can I make the biscuits flaky? The key to achieving flaky biscuits lies in the cold butter and careful mixing. Ensure butter is cold when integrating it into the flour mix, and avoid overmixing the dough to maintain the distinct layers necessary for flakiness.
Can I use a different type of fruit? Yes, you can substitute strawberries with other fruits like blueberries, raspberries, or peaches. Each fruit will add its distinct flavor and texture, offering delightful variations to this classic dish.
Conclusion:
If you are looking to impress your friends and family with a deliciously fresh dessert, the Strawberry Shortcake Cups are the way to go. They combine ease of preparation with vibrant flavors that embody the spirit of spring, making them a versatile option for any occasion. Don’t hesitate to customize this recipe to suit your specific tastes or dietary needs; the joy of cooking often lies in experimentation and creativity. So grab your ingredients, hit the kitchen, and enjoy the delightful satisfaction of creating this charming dessert. Share your creations and experiences with others, as nothing spreads joy quite like homemade desserts!