Prep time: 20 minutes
Cook time: 0 minutes
Total time: 20 minutes
Servings: 8
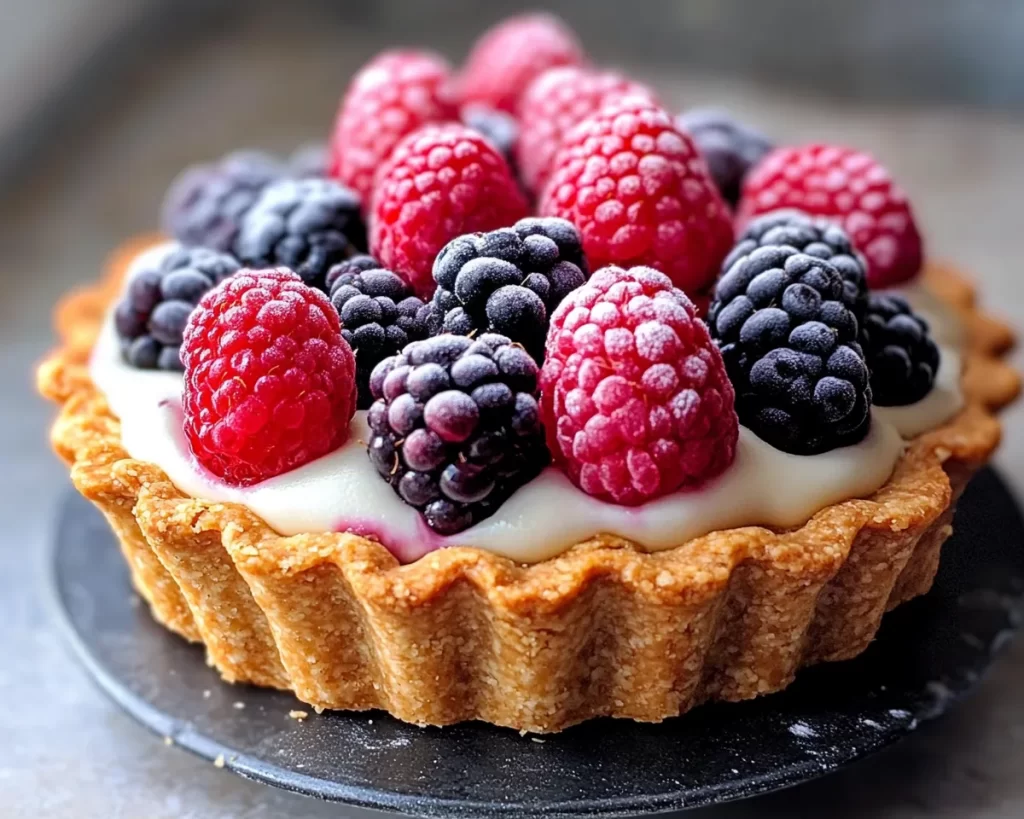
Spring brings a fresh burst of flavors and vibrant colors, making it the perfect season for delightful treats. One standout option for those looking to enjoy a delicious dessert without the fuss of baking is the **No-Bake Berry Tart**. This delightful treat features a crumbly, buttery crust filled with luscious cream cheese and topped with a medley of colorful berries. With just five simple ingredients, this tart is not only a feast for the eyes but also a quick and easy way to treat yourself and your loved ones.
What Is Spring Desserts: No-Bake Berry Tart in 5 Ingredients?
The **No-Bake Berry Tart** is a simple yet elegant dessert that showcases the season’s freshest berries. It’s a perfect choice whether you’re entertaining guests or just satisfying your sweet tooth. The tart has a buttery crust made from crushed cookies, a creamy filling, and an inviting topping of assorted berries, providing a delightful contrast in textures. The best part is it requires no oven, making it ideal for warmer days when you want to keep the kitchen cool.
Why You’ll Love This
There are countless reasons to adore this **No-Bake Berry Tart**. First, it’s incredibly easy to prepare, making it perfect for busy parents or kitchen beginners. With only five ingredients, it’s an excellent option for budget-conscious cooking without sacrificing flavor or presentation. The vibrant colors of the berries create a visual appeal that everyone will love. Plus, it’s a guilt-free dessert option, packed with natural sweetness, perfect for those looking to indulge responsibly.
Ingredients You’ll Need
- Granola or Digestive Biscuits (1 cup, crushed) – These provide the crumbly base of the tart, which is rich in flavor and texture.
- Melted Butter (1/4 cup) – Butter binds the crushed cookies together and adds richness to the crust.
- Cream Cheese (8 oz, softened) – This is the creamy filling that gives the tart its smooth texture.
- Powdered Sugar (1/2 cup) – This sweetens the cream cheese filling, enhancing the overall flavor.
- Mixed Berries (2 cups – strawberries, blueberries, raspberries) – The fresh, juicy berries add a vibrant pop of color and flavor to the tart.

How to Make
- Prepare the Crust: Start by crushing the granola or digestive biscuits in a food processor until fine, or place them in a zip-lock bag and crush with a rolling pin. Combine the crushed biscuits with the melted butter in a mixing bowl until the mixture resembles wet sand.
- Shape the Base: Press the crumb mixture into the bottom and sides of a tart pan evenly, ensuring it’s tightly packed. Use the back of a spoon to smooth out the surface for a neat finish.
- Make the Filling: In a separate bowl, beat the softened cream cheese until it’s smooth and free of lumps. Gradually add the powdered sugar while mixing until fully incorporated. The mixture should be creamy and sweet, with a velvety texture.
- Assemble the Tart: Spread the cream cheese filling evenly over the crust in the tart pan. Use a spatula to ensure it’s level. This creaminess will serve as the perfect base for the beautiful berries!
- Add the Berries: Gently wash and dry your mixed berries. Scatter them artfully on top of the cream cheese filling, pressing them down slightly for a secure topping. The vibrant colors of the berries will create an eye-catching finish.
- Chill: Cover the tart loosely with plastic wrap and place it in the refrigerator for about 2 hours. This step is crucial for setting the filling and allowing the flavors to meld.
Variations & Substitutions
Nut Butter Variation
Consider replacing cream cheese with a nut butter, such as almond or peanut butter, for a different flavor profile. This twist will bring a nutty richness to the tart, added health benefits, and pair beautifully with berries. Just remember to balance the sweetness with more powdered sugar or maple syrup.
Fruit Variety Variation
While mixed berries are delightful, you can experiment with other fresh fruits. Sliced peaches, mangoes, or even kiwis can offer a unique taste and texture. Feel free to mix and match based on your preference or seasonal availability, creating a fresh fruit tart that’s uniquely yours.
Vegan Option Variation
For a vegan-friendly version, swap cream cheese for a vegan cream cheese alternative. Beeswax can be replaced with coconut oil or a plant-based butter substitute. Choose sweetener options like agave syrup instead of powdered sugar to maintain the dessert’s delightful sweetness without animal products.
Common Mistakes to Avoid
One common mistake is not allowing the cream cheese to soften adequately. If it’s too cold, it won’t blend smoothly, leading to a lumpy filling. Always give the cream cheese time to reach room temperature for a smooth consistency.
Another issue arises from packing the crust too loosely. If it’s not tightly packed, the tart may crumble when sliced. Ensure you press it firmly and evenly. Lastly, don’t skip the chilling step! This is essential for the tart to set, providing the desired texture and firmness.
Storage, Freezing & Reheating Tips
To store your no-bake berry tart, simply cover it with plastic wrap or aluminum foil and keep it refrigerated. It’ll stay fresh for about 3-4 days. If you plan to make it ahead, consider assembling the crust and filling but add the berries on the day of serving to maintain their freshness and vibrant appearance.
If you want to freeze the tart, assemble only the crust and the filling. Wrap it well in plastic and place it in an airtight container before freezing. When ready to serve, thaw it in the refrigerator overnight, then top with fresh berries just before serving. This method ensures your tart remains delicious and eye-catching.
Frequently Asked Questions
Can I use frozen berries instead of fresh ones?
Yes, you can use frozen berries, but it’s recommended to thaw and drain them well before using. Frozen berries can release more moisture, which might affect the tart’s texture, so be sure to blot them dry with paper towels to absorb excess liquid.
How can I make the crust gluten-free?
To create a gluten-free crust, opt for gluten-free cookies or oats. Many stores offer gluten-free digestive biscuits, or you can use crushed nuts mixed with coconut oil for a healthy, low-carb substitute. Adjust the proportions according to the base you choose, ensuring it remains crumbly yet firm.
What should I serve with the no-bake berry tart?
Pair the tart with a dollop of whipped cream or a scoop of vanilla ice cream to elevate its flavors further. A drizzle of chocolate or caramel sauce can add extra sweetness and a gourmet touch, making it an exquisite dessert experience.
Can I prepare the tart the day before?
Absolutely! Making the tart ahead of time can enhance the flavors as they meld together. Just make sure to keep it covered in the fridge. Add fresh berries on the day of serving to ensure they remain fresh, vibrant, and beautiful.
How do I know when the tart is set?
The tart should feel firm to the touch and hold its shape when sliced. After refrigerating for at least 2 hours, gently press the filling with your finger; it should slightly bounce back, indicating it’s set. If it feels overly soft, give it a bit more time in the fridge.
Conclusion: The **No-Bake Berry Tart in 5 Ingredients** is a wonderfully fresh dessert that encapsulates the beauty of spring. With its vibrant berries, smooth filling, and crunchy crust, it promises joyful moments around the table with family and friends. Try this delicious dessert at your next gathering and make lasting memories!