Prep time: 15 minutes
Cook time: 15 minutes
Total time: 30 minutes
Servings: 12 servings
Spring brings a delightful array of flavors, and one of the best ways to celebrate the season is with a sweet treat like mini strawberry tarts. These charming little desserts are not only visually appealing but also bursting with fresh fruit flavor. They come together in just five simple steps and are sure to impress anyone you serve them to, from busy parents looking for a quick dessert to guests at a spring gathering. The blend of crisp pastry, creamy filling, and juicy strawberries makes them an irresistible choice.
What Is Spring Desserts: Mini Strawberry Tarts in 5 Steps?
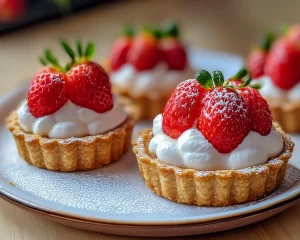
Mini strawberry tarts are a light and refreshing dessert option perfect for any spring occasion. These delightful tarts consist of a buttery crust filled with a luscious custard-like filling, topped with ripe strawberries. They provide a perfect balance of sweetness and creaminess, all while being easy to prepare. This recipe breaks down the process into five clear steps, making it accessible even for beginner bakers.
Why You’ll Love This
One of the compelling reasons to try mini strawberry tarts is their versatility. Whether you’re hosting a brunch, picnic, or cozy family dinner, these tarts will fit right in. The fresh strawberries deliver a burst of flavor that perfectly complements the creamy filling. Additionally, making them mini-sized allows for easy serving and a delightful presentation. Plus, they are relatively light compared to many other dessert options, making them a smart choice for those looking to enjoy something sweet without feeling too heavy afterward.
Ingredients You’ll Need
- All-purpose flour: 1 ½ cups. This is the base of the tart crust, providing structure and a flaky texture.
- Unsalted butter: ½ cup (1 stick), chilled and cut into cubes. Butter gives richness to the crust and enhances the flavor.
- Sugar: ¼ cup for the crust and an additional 2 tablespoons for the filling. Sugar sweetens the dessert and balances flavors.
- Salt: ½ teaspoon. A pinch of salt enhances all the flavors.
- Egg yolks: 2 large, for binding the filling and providing richness.
- Milk: 1 cup. Milk helps create a smooth filling, lending a creamy consistency.
- Fresh strawberries: 2 cups, hulled and sliced. The star ingredient, strawberries add vibrant color and sweetness.
- Vanilla extract: 1 teaspoon. This adds a warm, aromatic flavor to the filling.

How to Make
- Prepare the crust: In a large mixing bowl, combine the all-purpose flour, sugar, and salt. Add the chilled butter cubes and mix with a pastry cutter or your fingertips until the mixture resembles coarse crumbs. This step is crucial for achieving a flaky texture.
- Form the dough: Add 3 to 4 tablespoons of ice water gradually, mixing until the dough comes together. Be careful not to overmix, as this can make the crust tough. Form the dough into a disk, wrap it in plastic wrap, and refrigerate for at least 30 minutes to allow it to relax.
- Make the filling: In a medium saucepan, whisk the egg yolks and sugar together until light and fluffy. Gradually stir in the milk and vanilla extract. Cook over medium heat, stirring constantly until the mixture thickens. This should take about 5-7 minutes, and you’ll know it’s ready when it coats the back of a spoon.
- Roll out the dough: Preheat your oven to 350°F (175°C). On a floured surface, roll out the chilled dough to about ¼ inch thick. Cut out circles using a round cutter and press them gently into the mini tart pans.
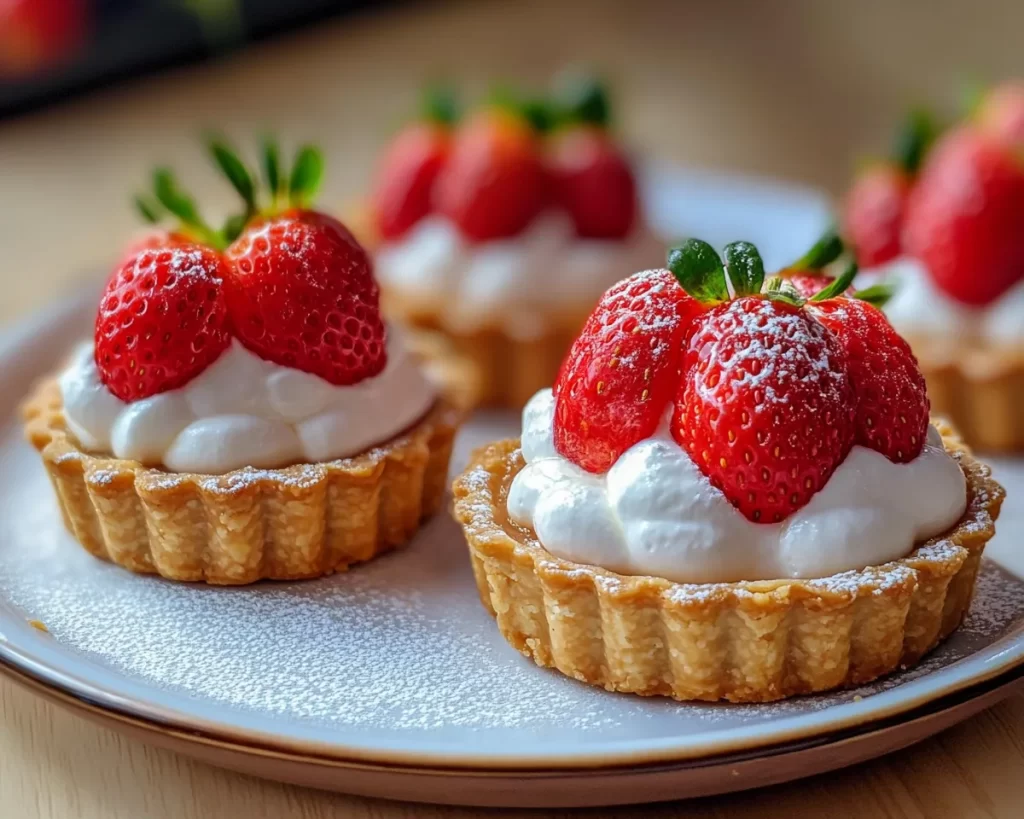
- Bake and assemble: Blind bake the tarts for 15 minutes or until lightly golden. Remove them from the oven and allow them to cool completely. Once cool, fill each tart shell with the prepared filling and top with the sliced strawberries, arranging them decoratively.
Variations & Substitutions
Berry Medley Variation: For a delightful twist, consider using a mix of berries such as blueberries and raspberries in addition to strawberries. This not only enhances the visual appeal but also adds different flavors and textures to each bite. Blueberries can add a delightful sweetness, while raspberries bring a tartness that complements the creaminess of the filling.
Gluten-Free Option: If you or your guests have gluten sensitivities, you can substitute the all-purpose flour with a gluten-free flour blend. Ensure that your sugar and other ingredients are also gluten-free certified. The texture may vary slightly, but you’ll still achieve a delicious tart that caters to diverse dietary needs.
Vegan Version: To create a vegan-friendly version of these tarts, substitute unsalted butter with coconut oil and replace the egg yolks with flaxseed meal mixed with water as an egg replacer. Use almond or coconut milk instead of regular milk for the filling. The fresh strawberries will still shine as the main topping, providing a burst of sweetness and freshness.
Common Mistakes to Avoid
One of the primary pitfalls is overworking the dough. This can lead to a tough crust instead of a flaky one. Handle the dough gently and only mix until it’s combined. Another common issue is filling the tarts while they are too warm. Doing so can cause the filling to become too runny, making the tarts slippery and difficult to handle. Allow the tarts to cool completely before adding the filling to ensure the best texture and appearance.
Storage, Freezing & Reheating Tips
To keep your mini strawberry tarts fresh, store them in an airtight container in the refrigerator for up to 3 days. For longer storage, you can freeze the unbaked tart shells; just wrap them tightly in plastic wrap and then foil. When ready to bake, add the filling and toppings after baking the shells directly from the freezer, allowing for extra time in the oven. Reheating the tarts can be done in the oven at a low temperature to maintain their texture.
Frequently Asked Questions
Can I prepare the tart shells in advance? Yes! You can prepare and bake the tart shells a day ahead of time. Just make sure to cool them completely before storing them in an airtight container. When you’re ready to serve, simply fill them with the custard and top with strawberries.
What types of strawberries work best for this recipe? For the best results, use ripe, fresh strawberries. Look for berries that are bright red, firm, and free of blemishes. You can also opt for organic strawberries if preferred.
Can I use frozen strawberries instead of fresh? While fresh strawberries are recommended for the best flavor and texture, you can use frozen strawberries if necessary. Just be sure to thaw them completely and drain any excess moisture to avoid sogginess.
Can these tarts be made mini-sized? Absolutely! If you have mini tart pans, you can easily scale down the size. Just be sure to adjust the baking time as smaller tarts will cook more quickly.
How do I prevent the crust from getting soggy? To prevent a soggy crust, consider blind baking the tarts until they are golden brown and firm. Additionally, adding the filling while the crust is fully cooled will help keep the crust crisp.
Conclusion:
Mini strawberry tarts are the perfect spring dessert that showcases the delightful flavors of fresh strawberries wrapped in a rich, creamy filling and buttery crust. Easy to make in just five steps, they’re ideal for any occasion, from a casual family dessert to a fancy gathering. With a few simple variations, you can cater to different tastes and dietary preferences. So roll up your sleeves and indulge in the joy of baking these stunning tarts, sharing them with friends and family for a delightful treat that embodies the essence of spring!