Prep time: 10 minutes
Cook time: 20 minutes
Total time: 30 minutes
Servings: 8
Spring is a fantastic time for light, zesty flavors, and nothing captures that essence better than a delightful **lemon curd tartlet**. Whether you’re hosting a spring gathering or just looking for a refreshing dessert to enjoy at home, these tartlets come together in a blink of an eye—just 30 minutes!
Not only are they easy to make, but they also present beautifully, making them perfect for impressing guests. The tartness of homemade **lemon curd** combined with a buttery, flaky crust will tantalize your taste buds and keep you coming back for more. Plus, these tartlets can be made ahead of time, allowing you to spend less time in the kitchen and more time enjoying your spring days.
What Is Spring Desserts: Lemon Curd Tartlets in 30 Minutes?
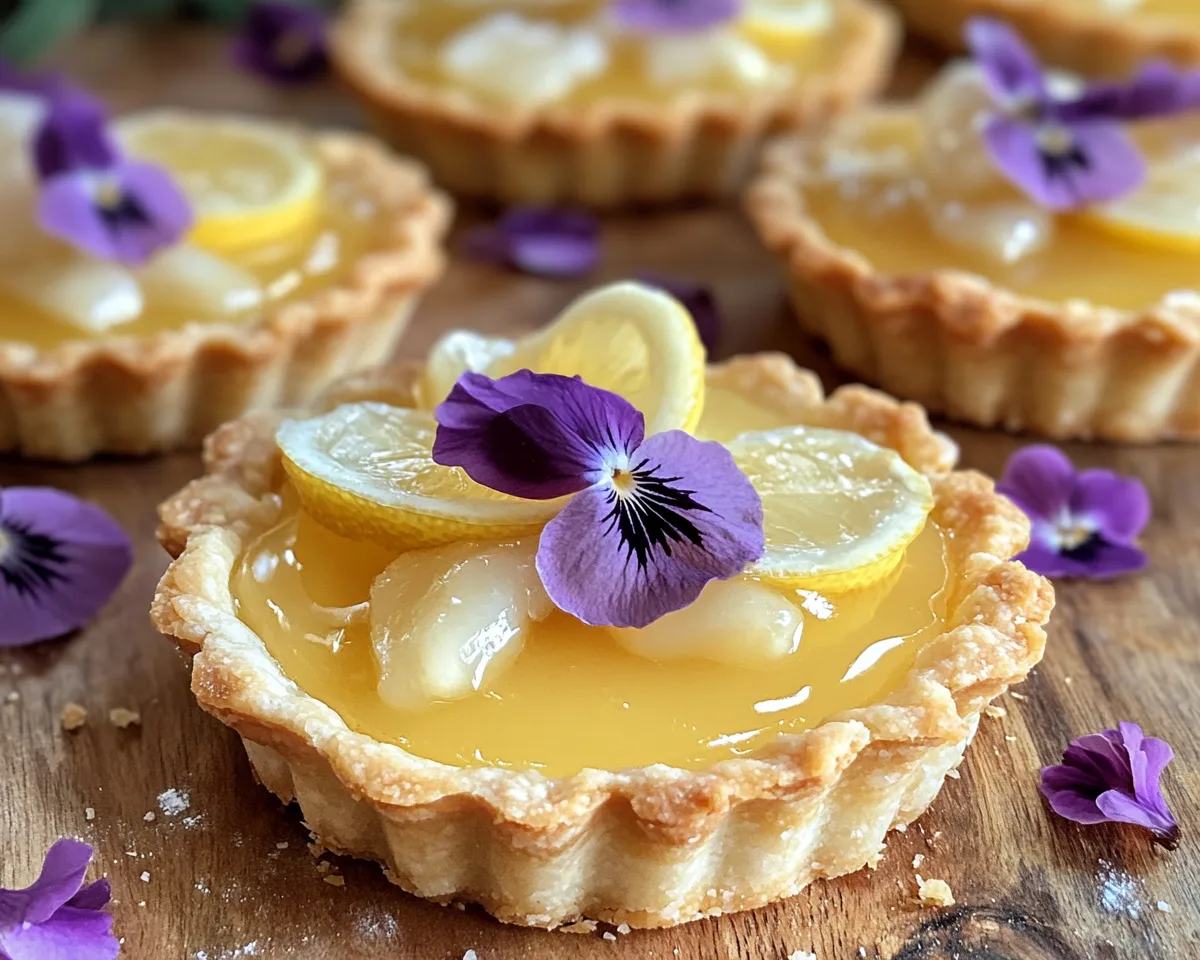
Spring Desserts: Lemon Curd Tartlets in 30 Minutes are small, individual pastry shells filled with **bright, zesty lemon curd**. These tartlets are not only quick to prepare but also offer a delightful dessert experience that balances sweet and tart flavors perfectly.
The foundation is a crisp crust, which is made with simple ingredients like flour, butter, and sugar. The star of the show is undoubtedly the lemon curd, made with fresh lemon juice, zest, sugar, eggs, and butter, creating a luscious filling that complements the crust beautifully. Topped off with a sprinkle of powdered sugar or some whipped cream, these tartlets are bound to become a favorite in your dessert rotation.
Why You’ll Love This
There are countless reasons to love these lemon curd tartlets.
- Quick Preparation: Ready in just 30 minutes, making them an ideal choice for busy parents or kitchen beginners.
- Fresh Ingredients: Made with fresh lemons, they offer a burst of flavor that is both **refreshing** and uplifting.
- Versatility: These tartlets can easily be modified with various fillings or toppings, allowing for creativity in your kitchen.
- Impressive Presentation: Perfect for entertaining guests or special occasions, they look elegant and sophisticated.
- Light and Airy: The lemon curd filling is not only delightful but also provides a light, enjoyable end to any meal.
Ingredients You’ll Need
- All-Purpose Flour: 1 ½ cups – The base for your tartlet crust, providing structure and texture.
- Unsalted Butter: ½ cup (1 stick), cold and cubed – Gives the crust a rich, buttery flavor.
- Granulated Sugar: ¼ cup + 1 tablespoon – Adds sweetness to the crust and balances the tartness of the lemon curd.
- Salt: ¼ teaspoon – Enhances the flavors in the crust.
- Ice Water: 3 to 4 tablespoons – Helps bring the dough together without making it too wet.
- Fresh Lemons: 3 large (for about ½ cup of juice and zest) – Essential for creating that tangy, delightful curd.
- Granulated Sugar (for curd): 1 cup – Sweetens the lemon curd to perfection.
- Eggs: 3 large – Adds richness and helps set the curd.
- Unsalted Butter (for curd): 6 tablespoons, cut into pieces – Creates a smooth and creamy finish to the lemon curd.
- Powdered Sugar: for serving – A light dusting is optional, but it elevates the tartlets visually.
How to Make
- Start by preparing the crust. In a mixing bowl, combine the all-purpose flour, granulated sugar, and salt. Adding **cold, cubed butter**, use a pastry cutter or your fingers to mix until the mixture resembles coarse crumbs. The cold butter creates a flaky texture, so handle it gently.
- Add ice water, one tablespoon at a time, mixing until the dough just comes together. You want to avoid overmixing to keep the crust tender. Once formed, shape the dough into a disk, wrap it in plastic, and refrigerate for about **15 minutes** to allow it to chill.
- While the crust is chilling, make the lemon curd. In a saucepan, whisk together the fresh lemon juice and granulated sugar over medium heat until the sugar is dissolved. This releases the tart essence of the lemons, which is vital for flavor.
- Next, whisk in the eggs until fully combined. Continue cooking the mixture over low heat, stirring constantly until it thickens and coats the back of a spoon. It should take about **5-7 minutes**. Watch carefully to avoid scrambling the eggs.
- Once thickened, remove from heat and add in the pieces of unsalted butter, stirring until melted and combined. The result is a smooth, glossy curd. Strain the curd to remove any lumps and let it cool.
- Preheat your oven to **350°F (**175°C**)**. Roll out the chilled tartlet dough on a floured surface to about **1/8-inch** thick, and cut out circles to fit into your tartlet pans. Press them firmly into the molds, making sure there are no air bubbles.
- Bake the tartlet shells for **15 minutes** or until they are lightly golden. Be watchful, as the crust can brown quickly. Once baked, let them cool completely before filling.
- Finally, fill the cooled tartlet shells with the lemon curd, smoothing the tops with a spatula. You can now either serve them immediately or chill them until you’re ready to enjoy. Before serving, dust with powdered sugar for a finishing touch.
Variations & Substitutions
Coconut Lemon Tartlets: For a tropical twist, you can substitute half of the all-purpose flour with coconut flour. This brings a delightful flavor and pairs beautifully with the lemon curd. Additionally, consider adding some shredded coconut to the curd while cooking for an extra flavor dimension.
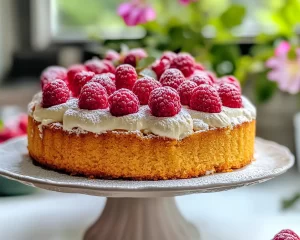
Berry-Topped Tartlets: Add your favorite berries on top of the lemon curd after filling the tartlet shells. Fresh strawberries, blueberries, or raspberries not only add texture but also enhance the spring theme. Their natural sweetness balances the tartness of the lemon perfectly.
Ginger Lemon Tartlets: Incorporate finely grated fresh ginger into the lemon curd for a spicy twist. Ginger adds warmth and complexity to the flavor profile, making it even more refreshing.
Vegan Lemon Curd Tartlets: Swap the eggs for a mixture of cornstarch and almond milk to create a vegan-friendly version of the lemon curd. The texture will differ slightly, but the flavors can remain vibrant and fresh. Use coconut oil instead of butter to maintain that creamy goodness.
Chocolate-Dipped Tartlets: For chocolate lovers, dip the tops of the tartlet shells in melted chocolate and let them set before adding the lemon curd. This gives an unexpected flavor combination that’s simply delightful!
Common Mistakes to Avoid
Making **lemon curd tartlets** can be quite simple, but there are a few common pitfalls you’ll want to avoid.
Overbaking the Crust: One of the biggest mistakes is leaving the crust in the oven too long. It’s essential to monitor the baking time to ensure a crisp shell without burning. Look for a light golden color.
Scrambling the Eggs: When making the lemon curd, it’s vital to cook on low heat and stir constantly. High heat can lead to scrambled eggs—something you absolutely want to avoid in a smooth curd.
Using Bottled Lemon Juice: For the freshest flavor, always use fresh lemons. Bottled juice simply cannot compare, lacking the vital oils and essence found in fresh zest.
Overmixing the Dough: When making your tartlet crust, mix just until combined. Overworking the dough can lead to tough textures rather than the melt-in-your-mouth flakiness desired.
Storage, Freezing & Reheating Tips
To maximize shelf life, store your **lemon curd tartlets** in an airtight container in the fridge. They will keep well for up to **3 days**. The lemon curd may release some moisture over time; however, this should not significantly impact flavor.
For longer storage, consider freezing the tartlet shells separately from the lemon curd. Wrap them tightly in plastic wrap and place them in a freezer-safe container. They can be stored for up to **2 months**. To reheat, simply thaw the shells at room temperature before filling with curd.
Avoid freezing the assembled tartlets, as the moisture from the curd can lead to a soggy crust once defrosted. Always assemble just before serving for the freshest taste and texture.
Frequently Asked Questions
Can I use store-bought lemon curd instead of making it at home?
Absolutely! Using store-bought lemon curd can save time if you’re in a pinch. However, homemade curd is often fresher and richer in flavor, making it worth the effort if you have the time.
What can I do if my curd doesn’t thicken?
If your lemon curd hasn’t thickened, it may require additional cooking. Return it to low heat and stir until it reaches the desired consistency. Remember that it will continue to thicken as it cools, so be patient!
Can I make these tartlets gluten-free?
Yes! Simply swap the all-purpose flour with a gluten-free all-purpose blend. Make sure to check that the other ingredients, such as baking powder or butter, are also gluten-free.
How do I get a rich lemon flavor?
Using fresh lemons is crucial for a vibrant, zesty flavor. Don’t forget to include the zest in your lemon curd; it contains essential oils that enhance the lemony essence.
What is the best way to serve lemon curd tartlets?
Lemon curd tartlets can be served fresh on their own, garnished with fresh berries or a dollop of whipped cream for extra flair. A light dusting of powdered sugar can also add an elegant touch.
Conclusion:
These **lemon curd tartlets** are the perfect way to embrace the fresh flavors of spring. They are simple to make, perfect for any occasion, and endlessly adaptable. Whether you enjoy them for family gatherings, brunch parties, or just a quiet evening at home, these bites of sunshine are sure to delight. Embrace the season and savor each delicious bite!