Prep time: 20 minutes
Cook time: 25 minutes
Total time: 45 minutes
Servings: 12 cupcakes
Spring cupcakes are a delightful treat that brings a burst of flavor and joy to any celebration. These Coconut Cream Cupcakes are not just visually appealing with their fluffy textures and creamy frosting, but they also ooze a tropical vibe that makes them perfect for springtime gatherings. Whether you’re planning a birthday party, a baby shower, or a simple family dessert night, these cupcakes will surely impress everyone. With every bite, you’ll experience a luscious combination of coconut sweetness and fluffy cake that melts in your mouth. Let’s dive into what makes these cupcakes so special and how you can whip them up in your own kitchen.
What Is Spring Cupcakes: Coconut Cream Cupcakes in 7 Steps?
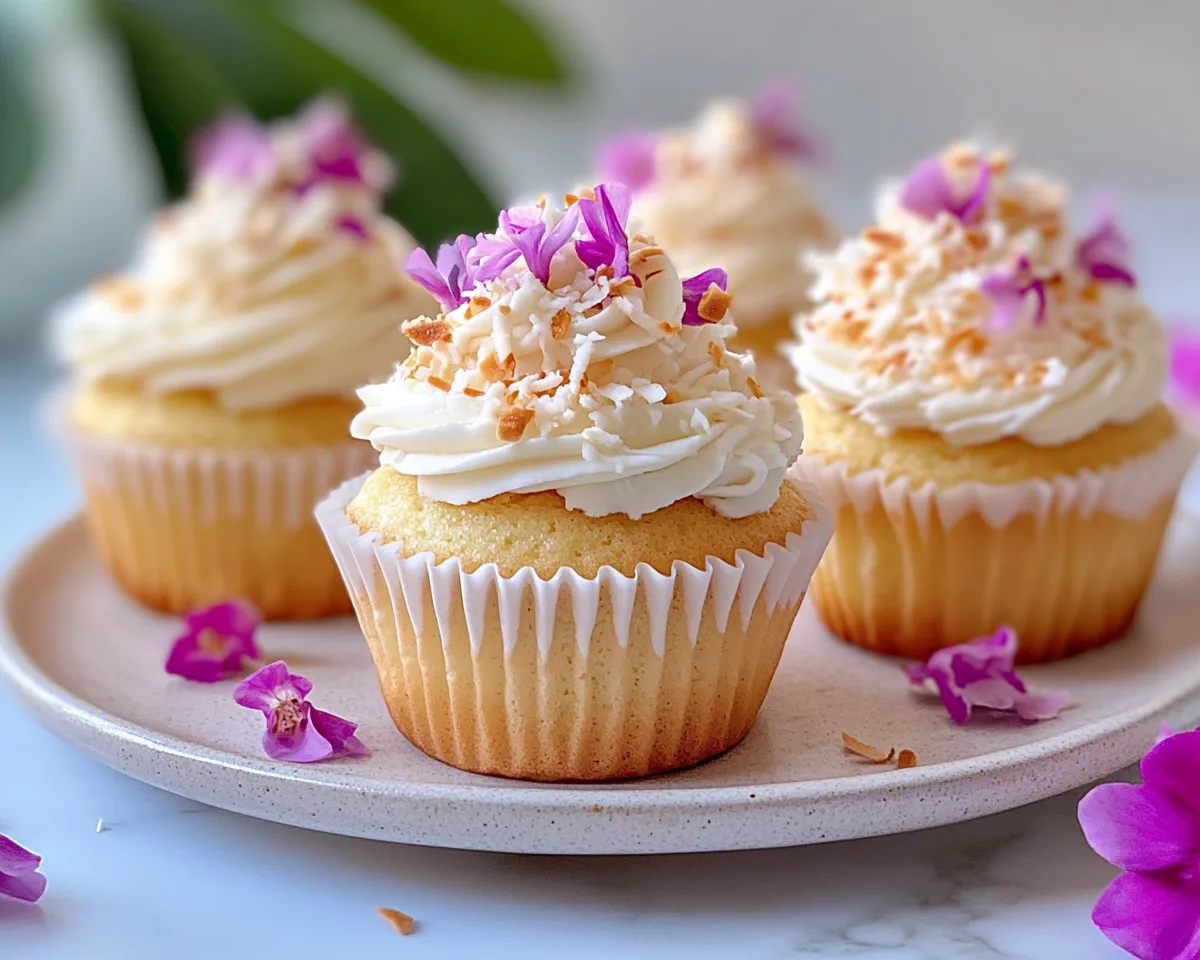
Spring Cupcakes: Coconut Cream Cupcakes are light, airy cupcakes that are infused with the rich, delightful flavor of **coconut**. Topped with **coconut cream** frosting, these treats evoke the refreshing taste of tropical beaches. Each cupcake is made from basic baking ingredients, but the unique addition of coconut cream adds sophistication and a **luscious texture** to the overall experience. This recipe will walk you through the process to create your own batch step by step.
Why You’ll Love This
There are countless reasons to fall in love with these Coconut Cream Cupcakes. First and foremost, the **flavor profile** is unbeatable. The moist and fluffy cake pairs wonderfully with the creamy coconut frosting, creating an indulgent dessert that delights the senses. Also, these cupcakes are visually stunning with their creamy white frosting and suggested coconut garnishing, making them perfect for any occasion. Additionally, they’re incredibly versatile; feel free to adapt and dress them up according to your event’s theme. Moreover, they are relatively easy to make, allowing even kitchen beginners to showcase their baking skills confidently. Lastly, they are a delightful way to **bring a tropical flair** to your celebrations.
Ingredients You’ll Need
To create these amazing Coconut Cream Cupcakes, gather the following ingredients:
- 1 ½ cups all-purpose flour: Provides the structure of the cupcake.
- 1 cup sugar: Sweetens the batter, making it moist and tender.
- ½ cup unsalted butter: Adds richness and moisture; be sure it’s softened for easy mixing.
- 2 large eggs: Binds the ingredients together and contributes to the richness.
- ½ cup coconut milk: Infuses the cupcakes with a delightful coconut flavor.
- 1 tsp vanilla extract: Enhances the flavor profile of the cupcakes.
- 1 ½ tsp baking powder: Helps the cupcakes rise to a perfect fluffiness.
- 1/4 tsp salt: Balances the sweetness and enhances flavors.
- 1 cup heavy cream: Essential for the lush frosting; makes it rich and creamy.
- ½ cup shredded coconut: This adds texture to the frosting and makes for a beautiful topping.
How to Make
Making these cupcakes is an enjoyable and rewarding process. Follow these outlined steps to achieve coconut cupcake perfection:
- Preheat your oven to 350°F (175°C) and line a cupcake tin with paper liners. This step ensures your cupcakes won’t stick and allows for easy removal.
- In a large mixing bowl, cream together the softened butter and sugar until the mixture is light and fluffy. This process typically takes about 4-5 minutes. You’ll know it’s ready when it has a pale color and a smooth texture.
- Add the eggs one at a time, mixing well after each addition. The mixture should be smooth and well incorporated before moving on. Adding eggs gradually helps to emulsify and create a uniform batter.
- In a separate bowl, whisk together the flour, baking powder, and salt. Gradually add this dry mix to the wet ingredients, alternating with coconut milk and vanilla extract. Start and finish with the flour mixture, and mix just until combined. Overmixing can lead to dense cupcakes!
- Divide the batter evenly into the prepared cupcake tins, filling each liner about two-thirds full. This allows room for them to rise without overflowing.
- Bake for 20-25 minutes or until a toothpick inserted into the center of a cupcake comes out clean. Be sure not to open the oven door too frequently, as this can cause the cupcakes to collapse.
- Remove them from the oven and allow them to cool in the tin for about 5 minutes, then transfer them to a wire rack to cool completely before frosting. This cooling phase is essential to prevent the frosting from melting.
Variations & Substitutions
Coconut Lime Variation: For a refreshing twist, add the zest of one lime to the batter. This will impart a citrus flavor that complements the coconut beautifully. Top with a lime-infused cream for an extra zing.
Chocolate Coconut Cupcakes: If you’re a chocolate lover, consider adding cocoa powder to the batter. Reduce the flour by half a cup and add three tablespoons of unsweetened cocoa powder. This transforms the cupcakes into rich chocolate treats with a coconut twist.
Pineapple Coconut Cupcakes: For an even more tropical experience, mix in crushed pineapple into the batter. Just make sure to drain it well to avoid excess moisture. The pineapple adds a burst of sweetness and pairs harmoniously with the coconut.
Gluten-Free Coconut Cupcakes: Replace the all-purpose flour with a gluten-free flour blend. Ensure it contains xanthan gum, which mimics the elasticity of gluten, giving you that perfect cupcake texture.
Common Mistakes to Avoid
One common pitfall is underbaking, which can lead to doughy cupcakes. Always use a toothpick to check for doneness – it should come out clean. Another mistake is overmixing your batter; this can result in tough cupcakes instead of light, airy ones. Be gentle when incorporating dry ingredients. Lastly, not allowing the cupcakes to cool completely before frosting can lead to melted frosting, ruining your beautiful presentation.
Storage, Freezing & Reheating Tips
For optimal freshness, store your Coconut Cream Cupcakes in an airtight container at room temperature for up to 3 days. If you need to store them longer, they can be frozen. To freeze, wrap each cupcake tightly in plastic wrap and place them in a freezer-safe bag. They can last up to 2 months. When ready to enjoy, let them thaw at room temperature for a couple of hours. For reheating, you may place them in a microwave for about 10-15 seconds, but be careful not to overheat as this could alter their texture.
Frequently Asked Questions
Can I use fresh coconut instead of shredded coconut? Absolutely! Fresh coconut will add an amazing flavor and freshness to your cupcakes. Just ensure it’s finely grated.
What can I use if I don’t have coconut milk? If coconut milk isn’t available, you can substitute with whole milk or almond milk, though the flavor will differ slightly. For a closer match, consider mixing half and half with some coconut extract.
Why did my cupcakes sink in the middle? This is often caused by underbaking or opening the oven door too soon. Make sure to bake them for the entire recommended time and avoid checking until the minimum time is up.
Can I make the frosting in advance? Yes! The coconut cream frosting can be made ahead of time and stored in the refrigerator for up to three days. Just beat it again before frosting the cupcakes to restore its fluffiness.
How can I tell when my cupcakes are done? Utilize a toothpick; insert it into the center of a cupcake, and if it comes out clean, they are done. Additionally, the tops should spring back lightly when touched.
Conclusion: These Coconut Cream Cupcakes are not only a delightful treat that captures the essence of spring, but they also offer an exciting baking experience for both seasoned bakers and novices. The soft texture and rich coconut flavor make them irresistible, while the numerous variations ensure that you can customize them to suit your preferences or any occasion. Enjoy making these delectable cupcakes and share them with friends and family for memorable moments of joy. Happy baking!