Prep time: 20 minutes
Cook time: 25 minutes
Total time: 45 minutes
Servings: 16 bars
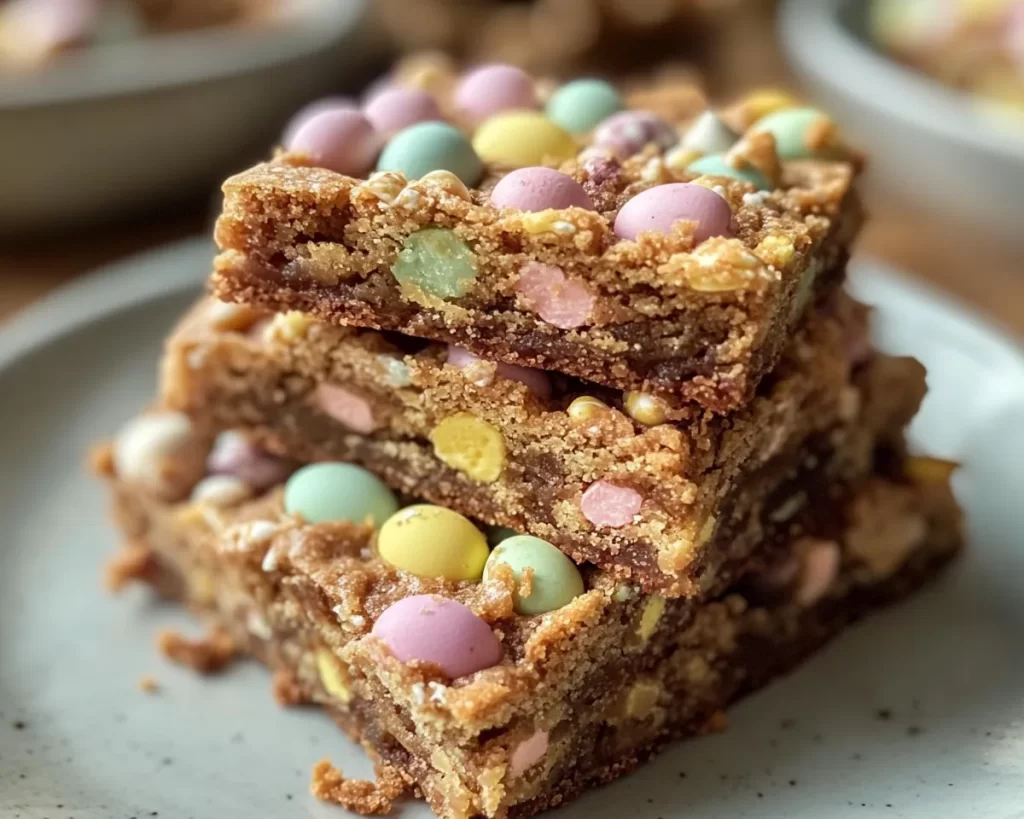
Indulging in sweet treats during the spring season brings a sense of joy and celebration, especially when it comes to family gatherings or festive occasions like Easter. One recipe that perfectly captures this spirit is the Spring Cookies: Mini Egg Cookie Bars. Imagine biting into a soft, chewy bar filled with delicious chocolate mini eggs, sweetened dough, and a delightful crunch that embodies the flavors of the season. These cookie bars are more than just a dessert; they hold a special place in many people’s hearts, reminiscent of family traditions and the joy of sharing something sweet with loved ones.
What makes these cookie bars truly special is their vibrant, festive appearance along with their mouth-watering flavors. The combination of creamy chocolate eggs and buttery cookie dough creates a delightful treat that appeals to both children and adults alike. You’re not just learning to make a cookie; you’re creating a memory. In this article, I will guide you through every step, share valuable tips, and explore exciting variations that will make this recipe a family favorite for years to come.
What Is Spring Cookies: Mini Egg Cookie Bars (Easter)?
Spring Cookies: Mini Egg Cookie Bars are a fun spin on traditional cookie recipes, inspired by the vibrant colors and flavors that emerge during the spring season. Originating from a mix of classic cookie dough and the famous chocolate mini eggs often associated with Easter celebrations, these bars serve as an excellent way to enjoy the Easter spirit. The bars are soft and chewy, forming a delightful contrast to the smooth, chocolatey mini eggs sprinkled throughout. When baked, the cookie dough develops a beautiful golden hue, while the mini eggs provide a pop of color and flavor.
The flavor profile of Mini Egg Cookie Bars is a delightful blend of buttery sweetness, chocolate richness, and vanilla warmth. Each bite offers a sturdy cookie base complemented by the crunchy texture of the mini eggs, making for a unique culinary experience that everyone will love. Whether served at an Easter brunch, a spring picnic, or simply to satisfy a sweet craving, these cookie bars are sure to brighten any occasion with their cheerful presentation.
Why You’ll Love This
You’re going to love this recipe for numerous reasons, making it a staple in your spring dessert repertoire. Firstly, they are incredibly easy to make. With straightforward instructions and a short list of ingredients, even novice bakers can confidently whip up a tempting treat. Secondly, the flavor is off the charts! The delightful combination of chewy cookie dough with creamy, chocolatey mini eggs means you’re about to enjoy a dessert that is both sweet and satisfying.
Another great reason to dive into this recipe is its versatility. While they are perfect for Easter, these cookie bars can be adapted for any occasion, making them a go-to dessert year-round. Simply change the type of chocolate or even the type of candy on top to customize the bars for birthdays, holidays, or just because.
Many might think that care must be taken with special variations or dietary concerns, but these cookie bars can easily fit a range of preferences. Want gluten-free? That’s doable! Vegan? You can do that too! The health factor also can be enhanced if you decide to throw in some oats or use whole grain flour, transforming them into a dessert that can be enjoyed without feeling guilty. This recipe ultimately bridges the gap between indulgence and practicality!
Ingredients You’ll Need
To create these delicious Spring Cookies: Mini Egg Cookie Bars, gather the following ingredients:
- 1 cup unsalted butter, softened – This adds flavor and moisture to the cookie bars. You can substitute it with a plant-based butter for a dairy-free version.
- 1 cup granulated sugar – Sweetener that helps in achieving soft and chewy bars. You can also use brown sugar for a richer flavor.
- 1/2 cup brown sugar, packed – Adds moisture and chewiness; for lighter flavor, method use light brown sugar.
- 2 large eggs – Binds the ingredients together and gives a fluffy texture; for eggless versions, substitute with flaxseed meal mixed with water.
- 2 teaspoons vanilla extract – Enhances the overall flavor of the cookie bars; you can use almond extract for a twist.
- 3 cups all-purpose flour – Forms the structure of the cookie bars; whole wheat flour can be used for a healthier option.
- 1 teaspoon baking soda – A leavening agent that helps the cookies rise; baking powder can work as an alternative.
- 1/2 teaspoon salt – Balances sweetness; omit if using salted butter.
- 1 cup mini chocolate eggs, roughly chopped – Adds sweetness and texture; feel free to substitute with any chocolate candies you prefer.
Making these cookie bars is as easy as gathering the ingredients, and the right substitutions can make this recipe fit any dietary need. Get creative with your additions!
How to Make
Now let’s dive into the step-by-step guide for making these delightful cookie bars. With ample detail and tips, even beginner bakers can create a delicious batch with ease.
- Preheat your oven: Begin by preheating your oven to 350°F (175°C). This is a crucial step because a properly preheated oven ensures that your cookie bars cook evenly. While the oven is warming, gather your ingredients and prepare your baking pan.
- Prepare your baking pan: Line a 9×13-inch baking pan with parchment paper, allowing some overhang on the sides. This will make it easier to lift the cookie bars out after baking, allowing for simple cutting. Lightly grease the parchment paper with non-stick cooking spray for good measure.
- Mix the wet ingredients: In a large mixing bowl, combine the softened butter, granulated sugar, and brown sugar. Using an electric mixer, beat these ingredients together on medium speed until the mixture is light and fluffy. This usually takes about 2-3 minutes. Next, add in the eggs one at a time, mixing well after each addition, and then stir in the vanilla extract.
- Combine dry ingredients: In a separate bowl, whisk together the all-purpose flour, baking soda, and salt. This step allows for an even distribution of the leavening agent and salt throughout the flour, essential for achieving the right texture. Gradually add the dry ingredients to the wet mixture, mixing just until combined. Overmixing can lead to tough cookie bars, so stop as soon as you no longer see flour.
- Add the mini eggs: Gently fold in the chopped mini chocolate eggs until they are evenly distributed throughout the dough. Be careful not to crush the eggs too finely, as they should provide a delightful crunch in the finished bars.
- Spread the cookie dough: Using a spatula, spread the cookie dough evenly into the prepared baking pan. Smooth the top with the back of the spatula for an even surface. Make sure it reaches the corners; this will ensure even baking.
- Bake: Place the pan in the preheated oven and bake for about 25-30 minutes. You want the edges to be lightly golden and the center to be just set. Use a toothpick to test for doneness; it should come out mostly clean but with a few moist crumbs attached.
- Cool and cut: Once baked, remove the cookie bars from the oven and allow them to cool in the pan for about 10 minutes. Then, use the edges of the parchment paper to lift them out onto a cooling rack. Allow them to cool completely before slicing into bars. This cooling time helps them firm up nicely, making cutting easier.
These steps guide you through the entire process of creating spring cookie bars. The aroma wafting through your kitchen while they bake is simply irresistible, and the outcome will leave everyone clamoring for more!
Variations & Substitutions
Creating variations of your Spring Cookies: Mini Egg Cookie Bars allows for endless customization. Below are several options to elevate your cookie experience!
Chocolate Chip Variation:
Swap out the mini eggs for semi-sweet chocolate chips or a combination of dark and milk chocolate chips. This gives a classic chocolate chip cookie flavor and remains just as chewy and soft. Perfect for bespectacled chocolate lovers or those looking for a less festive, yet equally tasty treat.
Nutty Delight Variation:
If you or your guest love a crunchy texture, consider adding chopped nuts, like walnuts or pecans, to the cookie dough. In this variation, reduce the amount of chocolate mini eggs to half a cup and substitute with a cup of chopped nuts. Not only does it enhance the flavor profile, but it also adds a satisfying bite to each bar. Those who enjoy a bit of heartiness in their treats will surely appreciate this option.
Vegan Variation:
A vegan version of these cookie bars is both delicious and easy to create. Replace the butter with a plant-based alternative, use flaxseed meal mixed with water as an egg substitute (1 tablespoon of flaxseed mixed with 2.5 tablespoons of water per egg), and opt for dairy-free mini chocolate eggs. Not only will you cater to vegan friends, but you’ll learn that these cookie bars can retain their delightful texture and flavor even minus the dairy products.
Gluten-Free Variation:
The base can easily be made gluten-free by using a 1-to-1 gluten-free flour blend in place of the all-purpose flour, ensuring you choose a brand that contains xanthan gum. This change permits those with gluten sensitivities to enjoy the bars without compromising taste. Remember to check the labels on your chocolate eggs for hidden gluten too!
Seasonal Flavor Variation:
Feel free to swap out the mini eggs for seasonal candies, like pumpkin spice candies in the fall or refreshing mint candies during winter holidays. Each variation changes the bars’ essence, making them relevant for various holidays and seasons throughout the year.
Each of these variations provides you with a fresh take on the original recipe while allowing you to cater to different tastes and dietary needs. Experiment with these options to find the ultimate combination that your family loves!
Common Mistakes to Avoid
When making Spring Cookies: Mini Egg Cookie Bars, be aware of a few common pitfalls that can lead to disappointing outcomes.
One crucial mistake is **overmixing the dough** once the flour is added. The more you mix, the more the gluten develops, leading to dense and tough cookie bars. Keep your mixing gentle and stop when the ingredients just come together.
Another frequent issue is **not properly measuring ingredients**. It’s best to use a kitchen scale for accuracy. For instance, flour should be spooned into your measuring cup and leveled off, not packed down. Packing flour can lead to drier cookie bars.
It’s also vital to **not cool the dough sufficiently** before cutting. Letting the bars cool completely helps them hold their shape when slicing, whereas warm dough can become gooey and fall apart. Lastly, remember that ovens can vary; keep an eye on your bars as they bake, especially the first time you make them.
Being mindful of these common mistakes will ensure that your cookie bars turn out perfectly every time, yielding a delightful treat that’s always a favorite!
Storage, Freezing & Reheating Tips
When it comes to storage, a proper method will keep your Spring Cookies: Mini Egg Cookie Bars fresh for longer. Store the cooled bars in an airtight container at room temperature for up to 4-5 days, keeping them soft and chewy. You can also refrigerate them to extend their freshness, but note that chilling may slightly alter the texture.
If you wish to store them for longer, freezing is an excellent option. Wrap individual bars tightly in plastic wrap and then place them in a freezer-safe bag or container. They can last up to three months in the freezer. When you’re ready to enjoy them again, simply take them out and let them thaw at room temperature or warm them in the microwave for about 15-20 seconds for a delightful, fresh-out-of-the-oven taste.
Be mindful of food safety practices too. When storing or reheating, always ensure your hands and equipment are clean to prevent any cross-contamination. Enjoy your treats knowing that they’ve been stored safely!
Frequently Asked Questions
Can I use different types of chocolate candies in this recipe?
Absolutely! You can substitute mini eggs with any chocolate candies you prefer, such as M&M’s, chocolate chips, or even seasonal candies like peppermint bark during the holidays. This flexibility allows for tailored flavors that suit your taste or the occasion.
How can I make these cookie bars healthier?
You can make several adjustments to lighten the recipe—use whole wheat flour for added fiber, substitute coconut sugar for granulated sugar, or even incorporate oats for texture. These modifications offer additional nutrition without sacrificing flavor.
Can I prepare the dough in advance and bake it later?
Yes, the dough can be made ahead of time! You can refrigerate it for up to 24 hours. Just ensure it’s stored in an airtight container to prevent it from drying out. When you’re ready to bake, simply allow it to sit at room temperature for about 30 minutes before spreading it in the baking pan.
What can I do if my cookie bars come out too dry?
Dry cookie bars can be a result of overbaking. If you ever find yourself faced with this unfortunate turn of events, try adding a drizzle of chocolate ganache or a scoop of ice cream on top to bring moisture back into the dessert. For future batches, consider checking for doneness a few minutes early.
Can these cookie bars be served warm?
Yes! Serving these cookie bars warm enhances the chocolate’s flavor and creates a melt-in-your-mouth experience. Just be cautious while cutting, as they can be a bit crumbly when hot. Pairing them with a scoop of ice cream makes for an indulgent dessert!
Conclusion:
In conclusion, Spring Cookies: Mini Egg Cookie Bars are an easy and delightful treat that captures the essence of springtime celebrations. From their soft and chewy texture to the colorful crunch of mini eggs, these bars are truly a hit with everyone. With just a few common ingredients and simple steps, you can create a memorable dessert that’s perfect for any occasion. Feel free to personalize the recipe with the variations provided, and don’t hesitate to share your creations with friends and family. I encourage you to give this recipe a try; you’ll be amazed at how quickly it becomes a staple in your spring baking lineup! Enjoy every bite, and may your kitchen be filled with joy and sweet aromas!