Prep time: 15 minutes
Cook time: 0 minutes
Total time: 15 minutes
Servings: 6-8
Are you looking for a fun and easy way to elevate your gatherings this spring? A charcuterie board bursting with fresh fruits is not just beautiful; it’s also a delightful experience for the taste buds. This guide will show you how to create a stunning Spring Charcuterie Board with Fresh Fruit in just five simple steps. Perfect for casual get-togethers, picnics, or family celebrations, you’ll surely impress your guests while offering a variety of tastes and textures they’ll love.
What Is Spring Charcuterie Board Ideas with Fresh Fruit in 5 Steps?
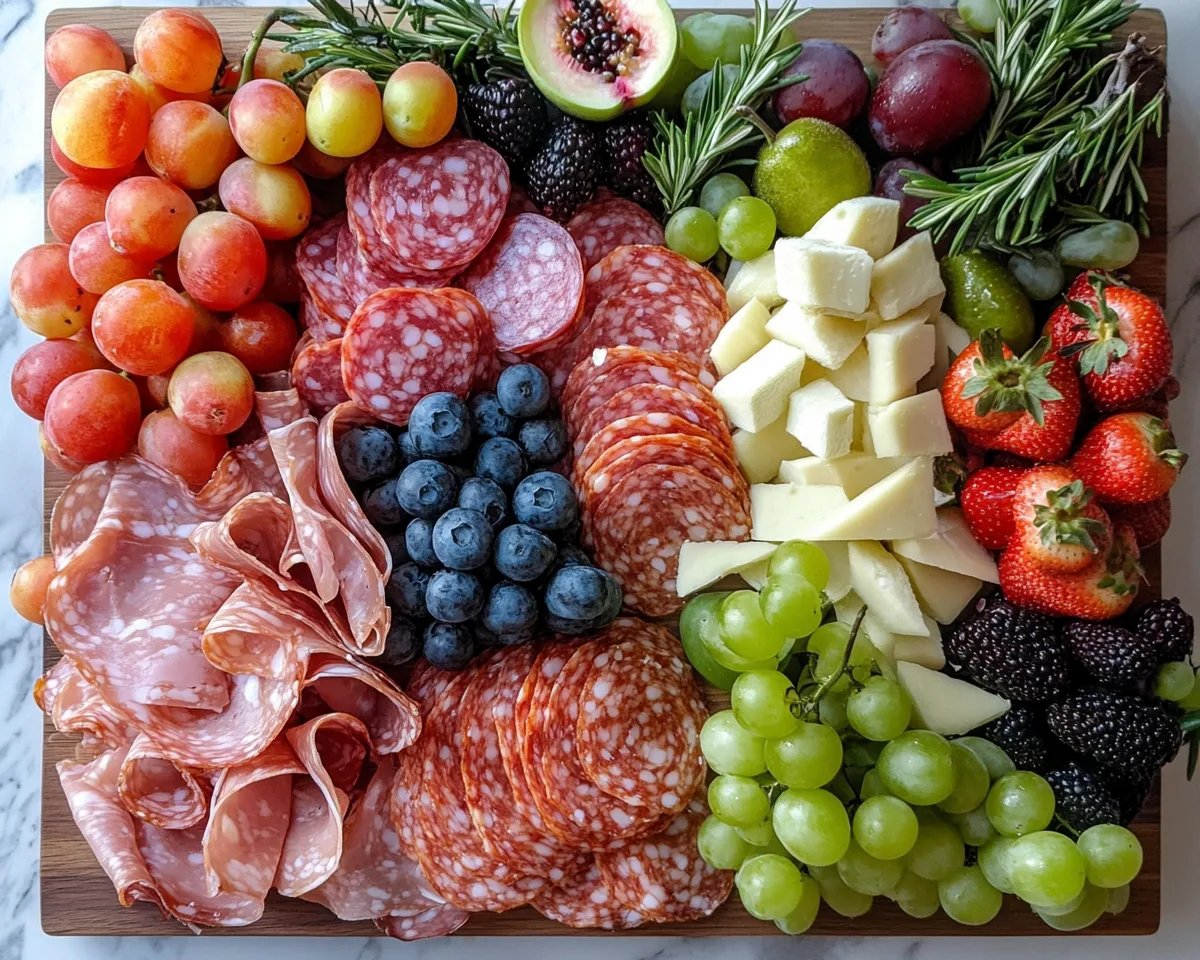
A Spring Charcuterie Board is a vibrant display of meats, cheeses, and fresh fruits that come together to create a visually pleasing and appetizing spread. The focus of this board is on seasonal fresh fruits, which not only add color but also incorporate a refreshing and juicy element. It’s an excellent option for anyone wanting to entertain without spending long hours in the kitchen.
Why You’ll Love This
This spring charcuterie board encompasses the freshness of spring, highlighting the season’s best produce. You’ll enjoy:
- Seasonal Flavors: Berries, melons, and citrus fruits represent spring beautifully.
- Visual Appeal: The vibrant colors make it a show-stopping centerpiece.
- Shareable Variety: A little something for everyone, accommodating various tastes.
- No Cooking Required: Save time and effort with delicious no-cook options.
Ingredients You’ll Need
To create the perfect Spring Charcuterie Board, gather the following ingredients:
- Fresh Strawberries: Sweet and juicy, strawberries provide a nice crunch and bold color.
- Blueberries: Their small size and sweet flavor make them a crowd favorite.
- Cantaloupe: This delicious melon is refreshing and pairs well with cheeses.
- Honeydew: Adds a subtle sweetness and a lovely green hue.
- Assorted Cheeses: A variety of textures is key—consider Brie, Cheddar, and Goat cheese.
- Assorted Meats: Sliced salami, prosciutto, or turkey add protein to the board.
- Crackers or Bread: Provide a base to enjoy with cheese and meats.
- Nuts: Almonds or walnuts add a nice crunch and health benefits.
- Honey or Jam: A sweet accompaniment that enhances the flavor profile.
How to Make
Creating your Spring Charcuterie Board can be a fun and creative process. Follow these simple steps to make yours:
- Start by selecting a large wooden cutting board or a beautiful serving platter. The board will serve as your canvas, so pick one that’s spacious enough to accommodate all your ingredients without overcrowding.
- Lay down your cheeses first, as they will take up the most space. Cut cheese into various shapes or cubes to add visual interest and make it easier for guests to serve themselves. Consider positioning slices of Brie alongside sharper Cheddar to create a contrast in both flavor and texture.
- Next, add the meats. Fold or roll slices of salami or prosciutto and place them near the cheeses. This arrangement encourages guests to combine different flavors on their plates. Keep in mind the color contrast for a visually stimulating presentation.
- Now it’s time to fill in with fresh fruits. Start with larger pieces, like slices of cantaloupe and honeydew, and then fill the gaps with strawberries and blueberries. The colors will create a cheerful, spring-like palette.
- Finish your board by adding crackers, nuts, and small bowls of honey or jam. Ensure there are several serving utensils for each component to facilitate ease of sharing. With the diverse arrangement of flavors and presentations, your charcuterie board will not only be appealing but also rewarding.
Variations & Substitutions
Vegan Charcuterie Board: For a vegan-friendly option, substitute dairy products with plant-based cheeses and stick with vegan deli slices or hummus. Include a beautiful selection of seasonal vegetables like cucumber or bell peppers, and sweeten the board with dates or figs.
Low-Carb Charcuterie Board: Swap out the crackers for slices of cheese or meats to keep it low-carb. Add a selection of grape tomatoes, olives, and nuts to maintain that delightful variety without the added carbohydrates.
Kids’ Charcuterie Board: Make it more playful for children by incorporating fun shapes, such as cookie-cutter sandwich slices, cheese cubes, and colorful fruits. Consider adding dips like yogurt or peanut butter for a unique twist.
International Flavors: Choose a theme based on cuisines from around the world. Use different cheeses like feta, manchego, and gouda along with matching meats and fruits. Add dried fruits and nuts from that region for authenticity.
Common Mistakes to Avoid
Creating a charcuterie board can be simple but there are pitfalls to avoid. Make sure to:
Don’t Overlook Texture: Variety is key. Including several textures—crispy crackers, creamy cheeses, and juicy fruits—will engage your guests more than an arrangement with one note.
Avoid Overcrowding: While you want to make a delicious spread, be careful not to overcrowd your board. Leave enough space for guests to navigate easily and make selections without knocking over anything.
Choosing Boring Ingredients: Fresh, vibrant ingredients are essential in making your charcuterie board appealing. Avoid choosing dull, dried-out options; instead, opt for fresh, seasonal varieties that will delight.
Skipping the Presentation: The presentation is half the allure of a charcuterie board. Arrange ingredients artfully, utilizing shapes and colors that resonate with a sunny spring day.
Storage, Freezing & Reheating Tips
Leftover ingredients from your Spring Charcuterie Board can be stored properly to maintain freshness. Place any remaining fruits in airtight containers in the refrigerator, where they can last for up to three days. Keep cheeses wrapped tightly to avoid drying out.
Meats should also be stored in airtight containers or zip-lock bags, and will typically retain their freshness for about a week. Although generally not recommended, cheese can be frozen for longer storage, though it might affect the texture.
If reheating is necessary for recently used cheeses, do so gently to avoid melting them too much; a cheese plate is meant to be enjoyed cold.
Frequently Asked Questions
Can I prep my charcuterie board ahead of time?
Absolutely! You can assemble the non-perishable components, such as cheeses, meats, and nuts, a few hours in advance. However, fruits are best added last to maintain freshness.
What types of cheeses should I include?
A mix of creamy, soft, and hard cheeses is ideal. Popular choices include Brie, aged Cheddar, Gouda, and a tangy blue cheese. This variety will please different palates.
How can I make my board more budget-friendly?
Look for sales on cheeses or meats at your local grocery store. You can also substitute fresh fruits with seasonal options or purchase in bulk to save on costs.
Is a charcuterie board suitable for vegan diets?
Certainly! Vegan charcuterie boards can be created using plant-based cheeses, nuts, dips, and a delightful selection of fruits and vegetables.
How do I serve a charcuterie board?
Place your board at room temperature for at least 30 minutes before serving. Encourage guests to mix and match flavors, creating their combinations, which adds to the fun and community aspect of enjoying this dish together.
Conclusion: In just a few simple steps, you can elevate your gatherings with a vibrant Spring Charcuterie Board filled with fresh fruits and an enticing assortment of meats, cheeses, and accompaniments. Perfect for bringing friends and family together, this board simplifies entertaining while still offering a delightful experience for everyone. Embrace your creativity, mix different tastes and textures, and enjoy sharing this seasonal feast with your loved ones!