Prep time: 20 minutes
Cook time: 0 minutes
Total time: 20 minutes
Servings: 4 people
Spring is the perfect time to embrace vibrant flavors and fresh ingredients. As the weather warms up, it invites us to create beautiful, shareable spreads that are a feast for both the eyes and the palate. A spring charcuterie board is an excellent way to showcase seasonal produce alongside an assortment of meats and cheeses. This guide will walk you through creating a stunning charcuterie board using seven fresh ingredients that not only tantalize the taste buds but also give you a chance to mix and match flavors, creating unique bites.
What Is Spring Charcuterie Board Ideas with 7 Fresh Ingredients?
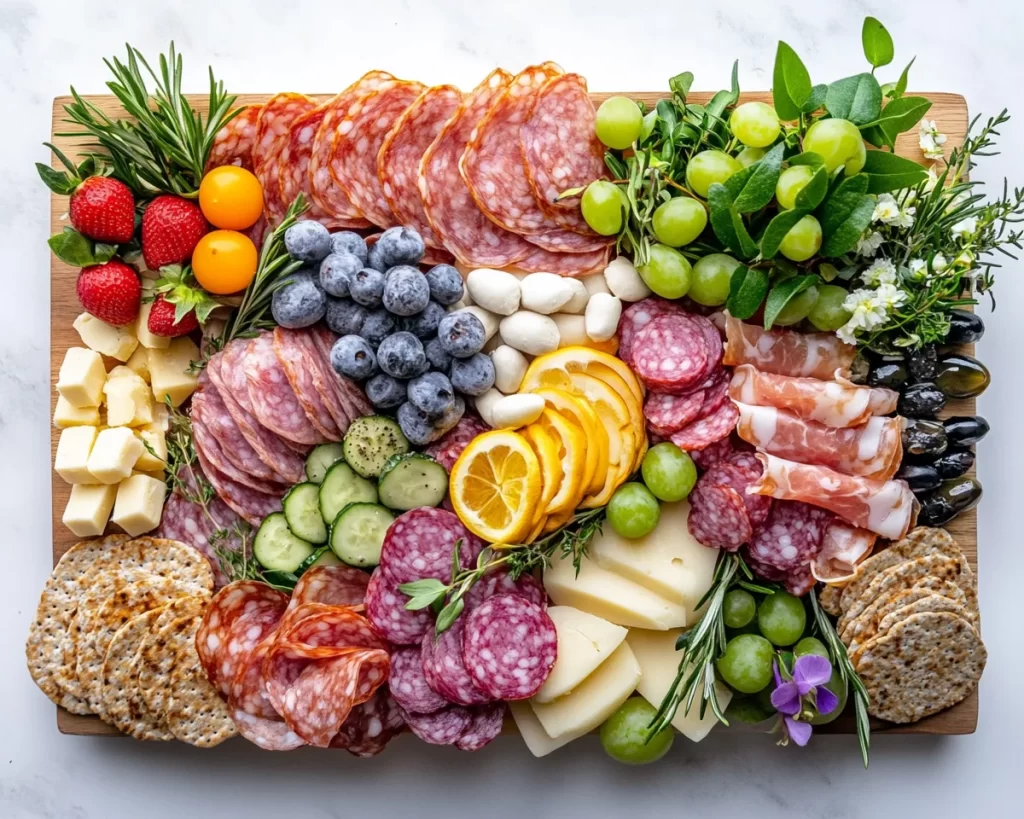
A spring charcuterie board is all about celebrating the fresh, crisp ingredients that are abundant in the spring months. Think of colorful fruits, aromatic herbs, creamy cheeses, and savory meats perfectly arranged to maximize enjoyment. A charcuterie board allows for creativity, as you can personalize it with your favorite flavors while ensuring it offers something delightful for everyone. The combination of textures—from crunchy to creamy—paired with bright, refreshing flavors makes for a memorable dining experience.
Why You’ll Love This
What sets this spring charcuterie board apart is its emphasis on fresh, seasonal ingredients that embody the spirit of spring. Not only is it visually appealing, but it also caters to various dietary preferences. Whether you’re planning a picnic, a brunch, or simply an enjoyable evening at home, this board is perfect for all occasions.
You’ll appreciate how easily it comes together and how adaptable it is. You can swap in your favorite seasonal ingredients, making it flexible for any gathering. Plus, it’s a great opportunity for busy parents or kitchen beginners to experiment with assembling a dish that looks gourmet without necessitating advanced cooking skills.
Ingredients You’ll Need
Here’s a convenient list of the seven fresh ingredients you’ll need, along with explanations about each:
- Fresh strawberries: Their sweet and juicy flavor adds a delightful contrast to the savory elements.
- Asparagus: A symbol of spring, it can be blanched briefly for crunch or served raw for a crisp bite.
- Herbed goat cheese: Creamy and tangy, this cheese pairs beautifully with fruits and crackers, providing a rich taste.
- Prosciutto: This thinly sliced Italian ham brings a savory, salty flavor that complements the sweetness of fruits.
- Mixed nuts: Providing a crunchy texture and an earthy flavor, nuts are a great source of healthy fats.
- Radishes: Their crispness and slight pepperiness add a refreshing zing to the board.
- Crackers or bread: A variety of textures gives guests options for building their bites, acting as the perfect vessel for toppings.

How to Make
Creating a spring charcuterie board is as easy as 1-2-3! Follow these steps for a visually stunning and delicious result:
- Select a large board or platter: Start with a clean, dry surface that’s large enough to fit all your ingredients. A wooden board or slate works wonderfully for presentation.
- Begin with the cheese: Place the herbed goat cheese in the center or slightly off-center of the board. This will act as the focal point, around which you will arrange the other items.
- Add the meats: Fold the prosciutto slices and place them on one side of the cheese. The folds create visual interest and make it easy for guests to grab a slice.
- Incorporate the fruits and vegetables: Strategically place the fresh strawberries and radishes around the board. The vibrant colors of these ingredients create a beautiful contrast with the creamy cheese and savory prosciutto.
- Fill in with asparagus: Arrange the asparagus spears in clusters to provide height and a fresh green element.
- Add nuts and crackers: Fill in any gaps with mixed nuts, either in a small bowl or directly on the board. Place the crackers or bread slices around the edges for easy access.
- Garnish: Finish with herbs or edible flowers to make the board even more inviting. A touch of olive oil drizzled over the cheese and nuts can elevate the flavors and presentation.
Variations & Substitutions
Vegetarian Charcuterie Board: If you want a meatless option, simply replace the prosciutto with marinated artichokes or grilled vegetables, adding a touch of Mediterranean flavor. You can add a variety of cheeses—like brie or a sharp cheddar—paired with olives for a salty contrast.
Low-Carb Charcuterie Board: For those following a low-carb diet, you can remove the crackers and bread completely and replace them with more cheeses and meats. Include sliced salami, mozzarella balls, and add dips like hummus or guacamole for additional richness.
Kid-Friendly Charcuterie Board: Create a fun board for kids by including cut-up fruits like melon and grapes, mini cheese cubes, and a selection of crackers. Adding fun shapes or colors can make it more appealing to children—think animal-shaped or colored crackers for added excitement.
Common Mistakes to Avoid
When assembling a charcuterie board, there are a few pitfalls to watch out for.
Overloading on one ingredient: Avoid placing too many meats or cheeses, which can detract from the overall balance. Variety is key, so ensure a mix of textures and flavors.
Ignoring color and presentation: A board should be visually appealing. Avoid dull arrangements; instead, have vibrant colors fill your board. Use fruits and vegetables strategically to add vibrancy.
Forgetting about dietary restrictions: Always consider your guests’ dietary needs. Including vegetarian or gluten-free options will ensure everyone has something to enjoy.
Storage, Freezing & Reheating Tips
A charcuterie board is best enjoyed fresh, but in case you have leftovers, here’s how to store them properly:
– **Cheese and meats:** Wrap leftover cheese and meats tightly in plastic wrap or place them in airtight containers. They can be stored in the fridge for up to three days.
– **Fresh produce:** Store fruits and vegetables separately to maintain their textures. Wrap delicate items like strawberries in paper towels before placing them in a container, keeping them fresh longer.
– **Nuts:** They should be kept in an airtight container away from humidity to avoid softening.
When reheating any items, ensure that you do this gently, as extreme heat can alter textures and flavors.
Frequently Asked Questions
Can I prepare a charcuterie board the night before? Yes, you can prepare a charcuterie board in advance. Just be sure to keep the ingredients covered in the fridge to maintain freshness. Certain elements, particularly fruits, are best added last to avoid browning.
Do I need to use all the suggested ingredients? No, feel free to customize the board to include your favorite ingredients or whatever is in season. The idea is to create a dish that’s enjoyable for you and your guests.
How long can I leave a charcuterie board out? Typically, a charcuterie board can be left out for about two hours at room temperature. After that, it’s best to refrigerate the remaining items to ensure food safety.
What can I use instead of a board? If you don’t have a board, a large plate, platter, or even a baking sheet can work beautifully. The goal is to create an aesthetically pleasing arrangement that everyone can enjoy.
Can I make a gluten-free charcuterie board? Absolutely! Just substitute regular crackers and breads with gluten-free options. There are plenty of delicious gluten-free crackers available that will complement your other ingredients nicely.
Conclusion: A spring charcuterie board can be an exciting and elegant way to present fresh ingredients while fostering a community atmosphere around food. Whether you’re hosting a gathering or just want to treat yourself, this vibrant spread is sure to delight. With these guidelines, your board will not only taste fantastic but also look like a work of art, taking your spring celebrations to the next level. Enjoy the process, mix and match, and don’t hesitate to get creative as you bring this delightful culinary experience to life!