Prep time: 20 minutes
Cook time: 0 minutes
Total time: 20 minutes
Servings: 4
If you’re looking for a delightful and indulgent way to celebrate love this Valentine’s Day, look no further than these No-Bake Valentine’s Chocolate Dessert Cups. Picture this: you’re in the kitchen, and the sweet aroma of chocolate fills the air. These dessert cups not only look amazing but are also incredibly easy to whip up, making them perfect for busy parents, beginners in the kitchen, or anyone who wants to impress their loved ones without spending hours in the kitchen.
These chocolate dessert cups are a labor of love that requires minimal ingredients and effort. With layers of creamy chocolate mousse and crispy cookie crumbles, you can easily customize them with your favorite toppings for an extra treat. Plus, they make for a stunning presentation and are sure to satisfy any sweet tooth craving. Read on to discover how you can create these delicious, no-bake desserts in no time.
What Are No-Bake Valentine’s Chocolate Dessert Cups?
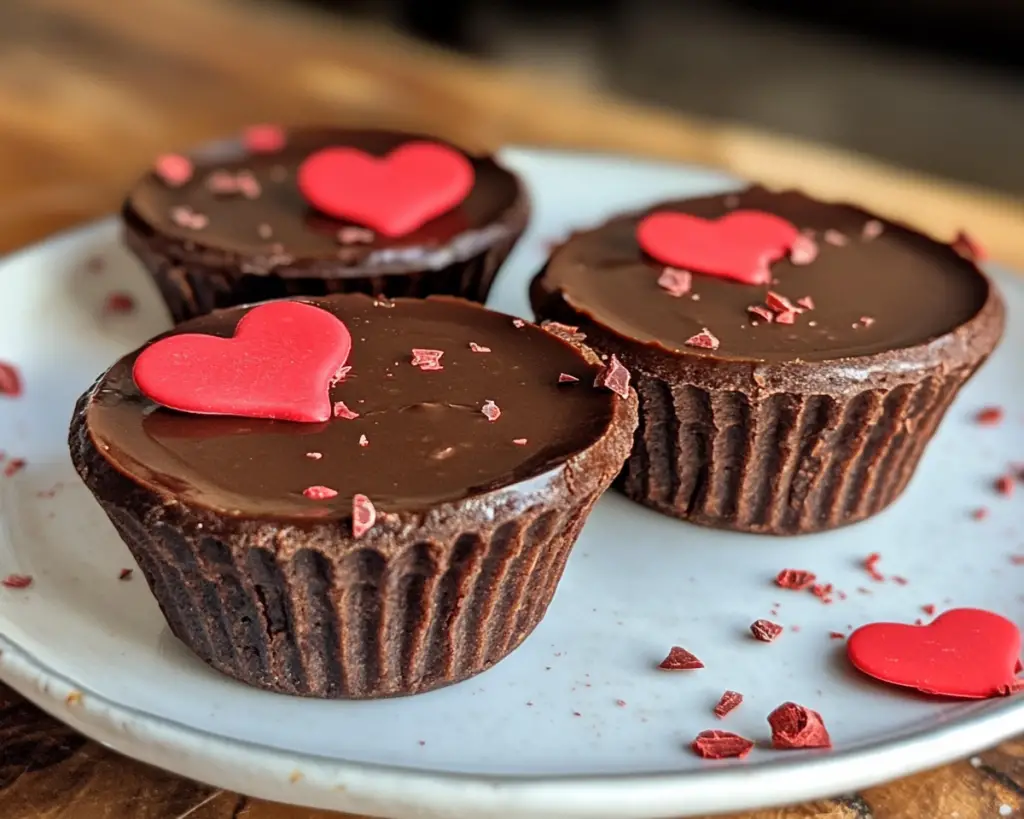
No-Bake Valentine’s Chocolate Dessert Cups are a luscious treat that combines rich chocolate flavors with a creamy texture, all served in charming individual cups. The beauty of these dessert cups lies in their simplicity and the ease of preparation without the need for baking. Originating from modern dessert-making trends, no-bake recipes have become favorites for their convenience and delightful outcome.
Each cup consists of a decadent chocolate mousse layered over a base of crushed cookies, creating a delightful contrast in texture. The sweetness of the chocolate mousse pairs beautifully with the crunch of the cookies, resulting in a dessert that is both satisfying and indulgent. They are a fantastic way to celebrate special occasions, and the absence of relying on the oven means anyone can achieve success in the kitchen, making it a favorite for bustling parents or anyone wanting to impress their significant other.
Why You’ll Love This No-Bake Valentine’s Chocolate Dessert Cups
These No-Bake Valentine’s Chocolate Dessert Cups offer many fantastic benefits. Firstly, the taste is simply divine. The combination of creamy chocolate mousse and crunchy cookies creates an explosion of flavors that will tantalize your taste buds. Secondly, the recipe is incredibly easy to follow, making it accessible for both seasoned bakers and those venturing into the kitchen for the first time.
Additionally, this recipe is both cost-effective and efficient. No need to worry about heating up your home with an oven on a warm day, as these dessert cups come together without any baking. They can also be prepared in advance, making them a breeze for meal prep or last-minute preparations for a romantic dinner. The versatility of this dessert means you can easily customize it to suit your preferences or dietary needs. Whether you’re catering to a specific health requirement or just looking to switch things up, there’s a variation for everyone.
Ingredients You’ll Need
- Chocolate Mousse Mix: This is the star of the dessert. You can use a pre-packaged mix or make your own from scratch using heavy cream and cocoa powder.
- Cream Cheese: This adds richness and tanginess to your mousse, making the flavor even more enticing.
- Powdered Sugar: Used to sweeten the mousse and enhance its creaminess. You can substitute with a sugar alternative if desired.
- Crumble Cookies (like Oreos or Graham Crackers): These act as the base layer for the dessert cups, providing a delightful crunch.
- Whipped Cream: For topping, it adds creaminess and a light, airy texture that complements the mousse.
- Fresh Berries (optional): Strawberries or raspberries are excellent additions for a pop of color and freshness.
- Chocolate Shavings or Sprinkles: For decoration, these add visual appeal and a touch of chocolatey goodness.
Gather all of these ingredients, and you’re set to create a beautiful dessert that will wow everyone at the table.
How to Make No-Bake Valentine’s Chocolate Dessert Cups
Follow these simple steps to create your No-Bake Valentine’s Chocolate Dessert Cups:
- Prepare the Mousse: In a mixing bowl, combine your chocolate mousse mix with cream cheese and powdered sugar. Whip using an electric mixer until the mixture is smooth and creamy. If making from scratch, beat heavy cream until soft peaks form, then fold in cocoa powder and sugar until well combined. Set aside.
- Crush the Cookies: Take your choice of cookies and place them in a resealable plastic bag. Using a rolling pin or your hands, crush the cookies into small pieces, ensuring they’re fine enough to form a base layer but still have some texture. Pour the crushed cookies into a separate bowl for assembly.
- Assemble the Cups: In each dessert cup, start by adding a layer of the crushed cookies, about 1-2 tablespoons deep, packing them down slightly. Follow this with a layer of the chocolate mousse, using a spoon or piping bag to make it look neat and appealing.
- Add More Layers: Repeat the process with another layer of cookie crumbs and another mousse layer. Aim for 2-3 layers, depending on the size of your cups. Ensure the final layer is mousse, as it creates a beautiful finish.
- Chill the Dessert Cups: Cover the assembled dessert cups with plastic wrap and place them in the refrigerator for at least 30 minutes to an hour. This chilling time allows the mousse to set and flavors to meld, resulting in a delightful treat.
- Decorate and Serve: After chilling, top each cup with a generous dollop of whipped cream. Add fresh berries on top and sprinkle with chocolate shavings or sprinkles for a decorative touch. Serve immediately to impress your loved ones.
With these straightforward instructions, you’ll create an impressive dessert in no time, perfect for sharing with someone special.
3 Variations & Substitutions
Variation 1: Mint Chocolate Delight
If you’re a fan of mint, this variation is for you! Simply add a few drops of peppermint extract to the chocolate mousse mix to infuse that refreshing mint flavor. Garnish the dessert cups with crushed mint chocolate candies or a sprig of fresh mint on top. This adds a fresh twist to the classic chocolate flavor, making each spoonful a delightful surprise.
Variation 2: Vegan Chocolate Mousse Cups
For those following a vegan diet, creating a no-bake dessert that everyone can enjoy is simple. Replace the cream cheese with a dairy-free cream cheese alternative or silken tofu, and use a vegan chocolate mousse mix made with non-dairy ingredients. For cookies, choose vegan varieties, such as chocolate or vanilla sandwich cookies, ensuring your dessert remains delicious and plant-based.
Variation 3: Peanut Butter Chocolate Cups
In this variation, you can elevate your dessert to new heights by adding a layer of creamy peanut butter between the mousse layers. Spread a thin layer of peanut butter on top of the cookie crust before adding the mousse. This combination of chocolate and peanut butter is irresistible, making it perfect for nut butter lovers.
Common Mistakes to Avoid
When making No-Bake Valentine’s Chocolate Dessert Cups, there are a few common mistakes you should be aware of to ensure your dessert turns out perfect.
Overwhipping the Cream: If you opt to make your mousse from scratch, be careful not to overwhip your cream. Overwhipping can result in a grainy texture, ruining the smoothness of your mousse. Whip until soft peaks form and then stop to maintain the desired texture.
Not Chilling Enough: Skipping the chill time may result in a runny dessert. Allowing your mousse to chill not only helps it set but also enhances the flavors, leading to a more delicious outcome. Be patient and give your dessert enough time in the refrigerator.
Incorrect Layering: Ensure your layers are balanced. If one layer spills over the others or is too thick, it could disrupt the overall appearance and taste. Pay attention to portion sizes and keep your layers uniform for a cleaner presentation.
By being mindful of these potential pitfalls, you’ll create beautifully layered dessert cups every time.
Storage, Freezing & Reheating Tips
When it comes to storing your No-Bake Valentine’s Chocolate Dessert Cups, they can be kept in the refrigerator for up to 3-5 days. Just remember to cover them tightly with plastic wrap or keep them in an airtight container to prevent them from absorbing any odors from your fridge.
If you prepare dessert cups ahead of time for an event and wonder whether they can be frozen, the answer is yes, but with caution. While the mousse can be frozen, the texture of the whipped cream and toppings may change upon thawing. To freeze, assemble the cups without whipped cream and toppings, then wrap tightly in plastic wrap and place them in a freezer-safe container. When you’re ready to enjoy, let them thaw in the refrigerator overnight, then add your whipped cream and toppings before serving.
It’s essential to practice safe food handling and avoid leaving our desserts out at room temperature for too long; they should not sit out for more than 2 hours, especially in warm environments. Always check for freshness before consuming stored leftovers, and discard if you notice anything unusual.
Frequently Asked Questions
Can I use milk chocolate instead of dark chocolate for the mousse?
Absolutely! You can use milk chocolate according to your taste preference. Milk chocolate will make the mousse sweeter and creamier, while dark chocolate will provide a richer flavor. Experiment with the type of chocolate you love best!
Can I make this dessert cup gluten-free?
Yes, you can easily make gluten-free No-Bake Valentine’s Chocolate Dessert Cups. Simply use gluten-free cookies instead of regular ones for the crust. Many brands offer excellent gluten-free options for sandwich cookies that work perfectly in this recipe.
How can I make this recipe lower in sugar?
If you’re looking to reduce sugar, use unsweetened cocoa powder for the mousse and sweeten it to taste with a sugar substitute like stevia or erythritol. Additionally, you can cut back on powdered sugar in the mousse.
What else can I add as toppings?
The possibilities are endless! You can get creative with toppings. Consider crushed nuts, coconut flakes, or even a drizzle of caramel sauce. Fresh fruit like banana slices or other berries can make wonderful additions to enhance the dessert’s appearance and flavor.
Can I serve this dessert at room temperature?
While these chocolate dessert cups can technically be served at room temperature, they taste best when chilled. The cool temperature maintains a smooth texture and allows flavors to pop. It’s recommended to keep them refrigerated until just before serving for the best experience.
Conclusion:
In summary, these No-Bake Valentine’s Chocolate Dessert Cups are a perfect way to impress your loved ones with minimal effort. The combination of rich chocolate flavor and creamy textures creates a dessert that’s not only visually stunning but also incredibly satisfying. Whether you’re celebrating Valentine’s Day or simply indulging in a sweet treat, you will surely enjoy this recipe. So go ahead, try this recipe today, customize it to your heart’s content, and don’t forget to share your delicious creation with others!


