Prep time: 20 minutes
Cook time: 30 minutes
Total time: 50 minutes
Servings: 6
Indulging in a rich, creamy dessert can often lead us back to cherished memories in the kitchen with our loved ones. One standout treat that embodies love and nostalgia is the Mother’s Day Vanilla Custard Dessert. This delightful dish evokes the sense of comfort that comes from a homemade treat, echoing whispers of childhood and family gatherings. The combination of silky custard infused with a soft, vanilla aroma makes it an irresistible choice for your next celebration or weekday indulgence.
The beauty of this recipe lies not only in its taste but also in its simplicity. You don’t need to be a baking expert to whip up this delightful dessert; all you need is a few quality ingredients and some patience. Throughout this article, we will delve into the secrets of making this beautiful custard, from perfecting the texture to ensuring every bite is bursting with flavor. You’ll learn tips, variations, and all the ins and outs to make this dish a star at any table.
What Is Mother’s Day Vanilla Custard Dessert?
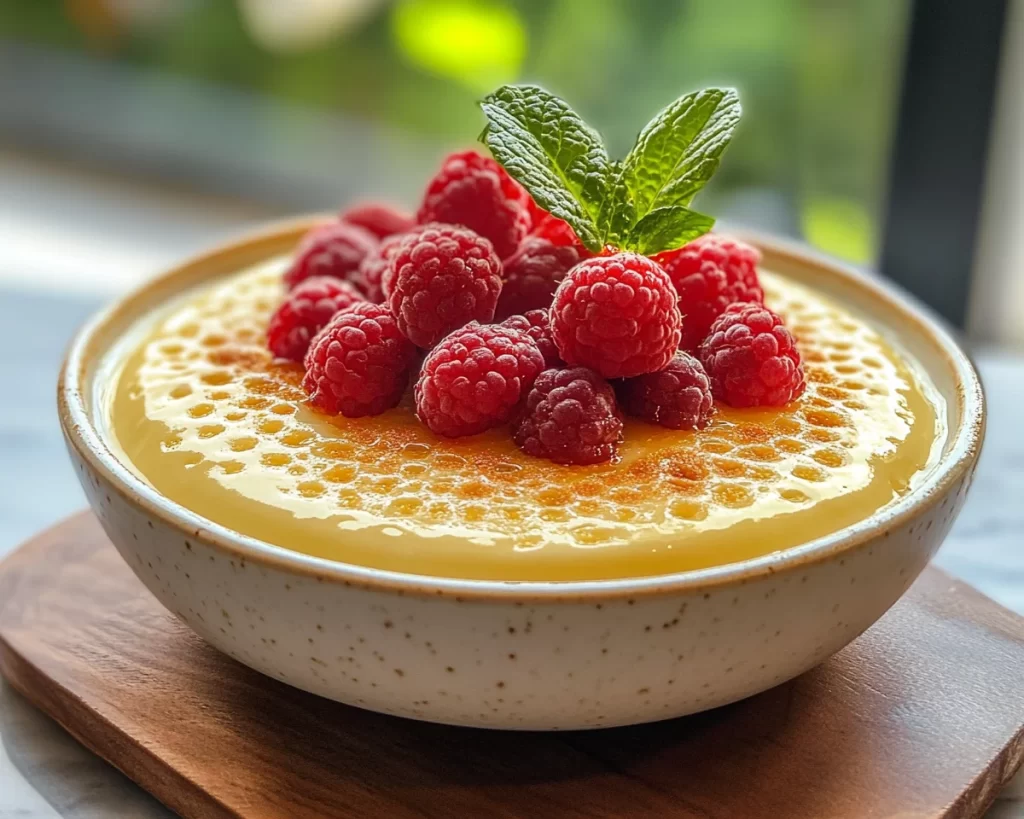
Mother’s Day Vanilla Custard Dessert is a classic dish that centers around a rich, creamy custard flavored with vanilla. Traditionally made with simple ingredients like milk, sugar, eggs, and vanilla extract, this dessert has origins that go back centuries. Renowned for its smooth texture and subtle sweetness, custard can be enjoyed on its own or used as a base for other dessert creations.
The flavor profile of this dish is divine. The custard serves as a blank canvas, absorbing the warm notes of vanilla while maintaining a silky mouthfeel that melts in your mouth. You can serve this dessert warm, cold, or topped with fresh fruit, whipped cream, or even a drizzle of chocolate sauce. The flexibility of this dish makes it a timeless favorite, particularly for special occasions like Mother’s Day, where it can bring families together in celebration.
Ultimately, it’s the nostalgia of this dessert that captivates hearts. It’s reminiscent of cozy family dinners where moms and grandmas would carefully prepare desserts that packed a punch of flavor with minimal fuss. This recipe not only allows you to recreate those precious moments but also gives you the chance to make new ones.
Why You’ll Love This
There are countless reasons why you will fall in love with this Mother’s Day Vanilla Custard Dessert. First and foremost is its exquisite taste. The delightful creaminess paired with the warm notes of vanilla creates a dessert that is truly unforgettable. The texture of the custard is incredibly smooth, providing a pleasant sensation with every spoonful.
Moreover, this recipe is easier than you might anticipate! With just a handful of ingredients and a few simple steps, you can create a dessert that impresses both visually and gastronomically. You won’t find yourself spending hours slaving over the stove; instead, you’ll enjoy the process from start to finish.
Cost is another appealing factor. Unlike many extravagant desserts that require specialty ingredients, the items in this recipe are inexpensive and easily accessible. This means you can create a restaurant-quality dish on a budget, making it perfect for families and anyone looking to entertain without breaking the bank.
Lastly, the versatility of this custard dessert stands out. It can be dressed up or down according to your preference or occasion. Whether you want to keep it classic or add seasonal fruit, this dessert can adapt to suit any palate or dietary need.
Ingredients You’ll Need
To make the Mother’s Day Vanilla Custard Dessert, gather the following ingredients:
- Milk: The base of the custard, providing creaminess. You can substitute with almond milk or coconut milk for a dairy-free version.
- Granulated Sugar: Sweetens the custard. You could use honey or maple syrup for a natural alternative, but adjust the quantity as needed.
- Eggs: Enhance the richness and provide the custard with its signature texture. For an egg-free version, consider using silken tofu, blended until smooth.
- Vanilla Extract: Imparts that classic vanilla flavor essential for this dessert. Use high-quality pure vanilla extract for the best results.
- Salt: A pinch enhances the overall flavors of the custard.
- Butter: Optional, for a richer flavor. If you’re aiming for a healthier option, you can leave this out entirely.
These ingredients come together to create an irresistible dessert that your loved ones will crave. As you gather them, consider exploring local markets or specialty stores to find the freshest options.
How to Make
Follow these simple steps to create your heavenly Mother’s Day Vanilla Custard Dessert:
- Prepare your ingredients: Start by gathering all your ingredients. This ensures that everything is measured out and ready to go. Preheat your oven to 350°F (175°C) since the custard will be baked in a water bath. This gentle heat will help maintain its creamy texture.
- Heat the milk: Pour the milk into a saucepan and heat it over medium heat. Stir occasionally to prevent it from sticking to the bottom. Heat until it is steaming but not boiling. This should take about 5-7 minutes. The warmth of the milk will help extract the vanilla flavor, so it’s crucial to allow it to reach this stage.
- Whisk the eggs and sugar: In a medium mixing bowl, whisk together the eggs and granulated sugar until they are well combined and slightly frothy. This process should take about 2-3 minutes. The whisking introduces air, which will ultimately add to the lightness of the custard.
- Combine the mixtures: Slowly add the hot milk to the egg mixture while continuously whisking to temper the eggs. This step is essential as it prevents the eggs from curdling. Make sure to add the milk gradually so that the transition in temperature is gentle.
- Add flavorings: Stir in the vanilla extract and a pinch of salt to the mixture. If you’re opting for butter, melt it and whisk it into the mixture. This adds an element of richness that elevates the custard.
- Prepare the baking dish: Pour the custard mixture into a baking dish and place it in a larger baking pan. Fill the outer pan with hot water until it reaches halfway up the sides of the custard dish. This water bath will help sustain a gentle, even cooking temperature for the custard, ensuring a creamy texture.
- Bake the custard: Carefully place the assembled dishes in the preheated oven. Bake for about 30-35 minutes, or until the center of the custard is set but slightly jiggly. A slight wobble indicates that it’s perfect; remember that it will continue to set as it cools.
- Cool and serve: Remove the custard from the oven and allow it to cool completely at room temperature before transferring it to the refrigerator. Chill for at least 2 hours or overnight for the best results. Once set, serve it in individual bowls or ramekins, garnished with fresh berries, whipped cream, or a drizzle of sauce.
These steps may seem straightforward, but the magic lies in the details. Pay attention to the cooking times and temperatures to ensure your custard is perfect!
Variations & Substitutions
Cocoa Custard Variation: If you want something different, try adding cocoa powder to create a decadent chocolate custard. Simply whisk in about 1/4 cup of unsweetened cocoa powder with the sugar when mixing with the eggs. This variation provides a rich flavor and is perfect for chocolate lovers.
Fruit Custard Variation: For a refreshing twist, fold in some fresh fruits like strawberries, peaches, or blueberries after the custard has cooled. This not only adds a burst of flavor but also a beautiful color contrast, making it visually appealing. It is an excellent choice for those looking for a more vibrant dessert option.
Spiced Custard Variation: You can spice things up by incorporating spices like cinnamon, nutmeg, or even cardamom into your custard. Just add a pinch of your chosen spice during the whisking stage to bring warmth and depth to the flavor. This variation works well in the colder months, as the comforting spices provide a cozy touch.
Plant-Based Custard Variation: For a vegan version of this dish, substitute eggs with silken tofu blended until smooth. Use almond or coconut milk instead of dairy milk, and don’t forget to use dairy-free butter if you prefer a richer flavor. This adaptation retains the creamy texture while being suitable for those with dietary restrictions.
Each of these variations offers a unique take on the classic recipe. Feel free to experiment and share your own variations!
Common Mistakes to Avoid
One common mistake when making custard is overheating the mixture, which can lead to curdling. It’s crucial to pay attention during the heating process, especially when combining the hot milk with the eggs. **Always whisk vigorously while pouring the milk slowly to avoid this mishap.**
Another mistake is not allowing the custard to cool completely before serving. Serving it too early might result in a runny, unappetizing texture. **Let it chill overnight if possible; the flavor and texture truly improve after sitting for a while.**
Additionally, baking the custard in an improperly prepared water bath can lead to uneven cooking. Be sure to fill the outer pan with hot water, watching the levels carefully to maintain the right temperature throughout the baking process. **Use a large enough pan to ensure consistent heat distribution**.
Lastly, some people might skip the salt, thinking it isn’t necessary. However, **a pinch of salt enhances the overall flavor of the custard**, making it taste more balanced and delicious.
These simple precautions can make a world of difference in achieving the perfect custard.
Storage, Freezing & Reheating Tips
After making your delicious Mother’s Day Vanilla Custard Dessert, it’s essential to store it properly. Once completely cooled, transfer the custard to an airtight container or cover it tightly with plastic wrap, ensuring that it doesn’t touch the surface of the custard.
You can keep the custard in the refrigerator for up to 3-4 days. Due to its perishable ingredients, make sure to check for any signs of spoilage before serving. If you want to extend its shelf life, consider **freezing** the custard. However, keep in mind that the texture might change once thawed, becoming slightly grainy.
To freeze, pour the custard into a freezer-safe container and leave some space at the top, allowing for expansion. When ready to enjoy, thaw in the refrigerator overnight, and then gently whisk it to restore some of its original consistency before serving.
Food safety is important when it comes to custards. Always check for signs of spoilage, such as off smells or unusual textures, especially if it’s been a few days in the fridge.
Frequently Asked Questions
Can I make Mother’s Day Vanilla Custard Dessert in advance?
Absolutely! This dessert is perfect for making ahead of time. In fact, the flavors develop beautifully when chilled overnight, making it an ideal choice for busy weekends or events. Just be sure to store it properly in an airtight container.
What is the best way to serve the custard?
You can serve the custard chilled, garnished with fresh fruits, whipped cream, or crumbled cookies. It can also be enjoyed as a lovely sauce over cakes or tarts, adding an elegant touch to your dessert presentation.
Can I substitute the eggs in this recipe?
Yes! If you need to make it egg-free, you can substitute the eggs with silken tofu blended until smooth. This will provide a similar texture and keeps the custard creamy.
What’s the best way to know if my custard is done baking?
When baking your custard, look for a slight jiggle in the center when you gently shake the pan. The edges should be firm, and the center should be just set but not overly firm. It will continue to set as it cools.
How long will the custard last in the fridge?
Homemade custard can be stored in the refrigerator for up to 3-4 days. Always check for any signs of spoilage before consuming, particularly if it has been stored for a few days.
Conclusion:
This Mother’s Day Vanilla Custard Dessert is not just a recipe; it’s a magical experience filled with warmth, nostalgia, and flavor. Whether you’re sharing it with family during special occasions or enjoying a quiet moment to yourself, each spoonful invites you to embrace the little joys in life. Don’t hesitate to experiment with the variations or customize this recipe to fit your personal taste! I encourage you to try making this delightful dessert, and I assure you, it will quickly become a cherished favorite in your home. Share your experiences and make memories that last a lifetime!


