Prep time: 20 minutes
Cook time: 15 minutes
Total time: 35 minutes
Servings: 4
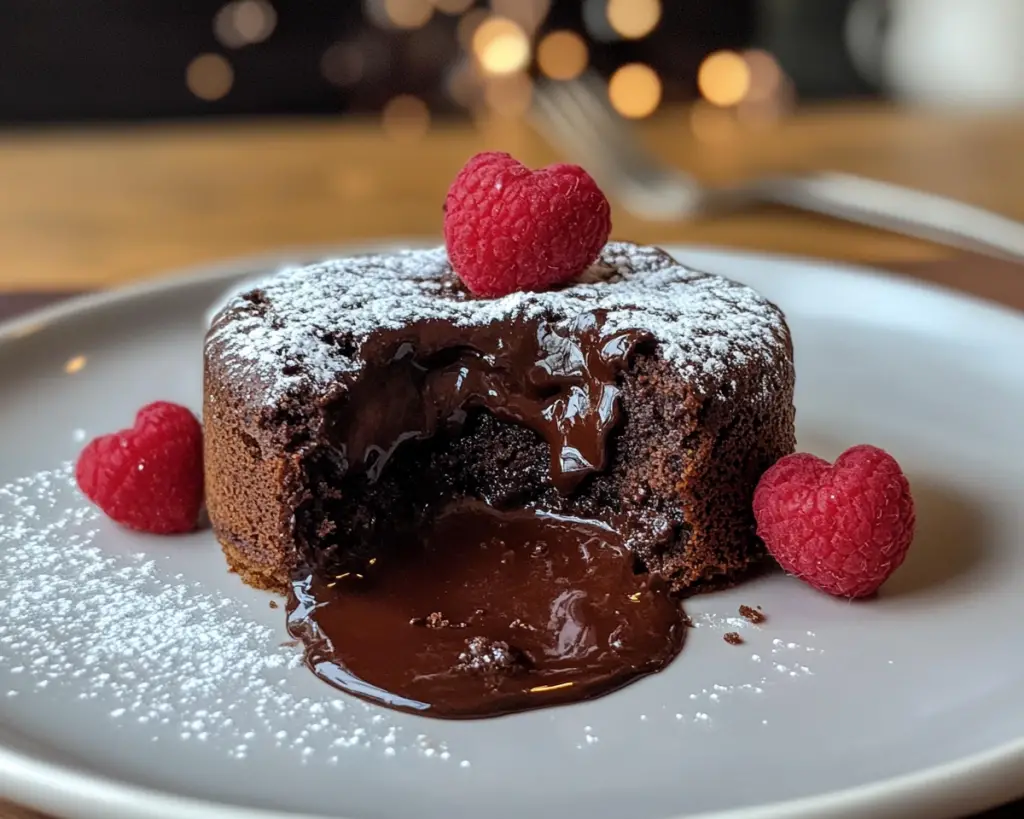
Indulging in a rich, decadent dessert can be one of the most satisfying experiences. Imagine cutting into a chocolate cake, only to find a warm, oozing center that flows with molten chocolate. This blissful moment makes the perfect ending to any meal, but it’s especially delightful on special occasions like Valentine’s Day. This Molten Chocolate Lava Cake recipe not only satisfies your cravings but also creates a memorable experience for you and your loved ones.
This recipe is special not just for its rich flavor and gooey texture, but also for its simplicity and the elegance it brings to any table. It’s a dessert that looks impressive but is deceptively easy to prepare, even for beginners. As you read on, you’ll discover essential tips for perfecting this dessert, variations to suit different tastes, and insights into making it a memorable experience for your loved ones.
What Is Molten Chocolate Lava Cake Perfect for Valentine’s Day?
The Molten Chocolate Lava Cake, sometimes referred to as “chocolate fondant,” is believed to have originated in the 1980s, becoming an instant classic in many high-end restaurants. This dessert features a soft outer cake layer with a sumptuous, flowing molten chocolate center. When you place your fork into it, the liquid chocolate erupts, offering an indulgent experience that delights the senses.
The texture of a perfectly baked lava cake is a mesmerizing blend of rich chocolate, airy cake, and a molten core. The use of high-quality chocolate is crucial, as it directly influences the flavor profile. A properly executed lava cake has a delicate crispness on the outside, while the inside remains decadently warm and gooey. With its luxurious nature, this dessert has become a staple not just for romantic dinners, but for any occasion where you want to impress.
The intense flavor of chocolate, combined with the thrill of discovery when you cut into the cake, makes this dessert an unforgettable addition to your culinary repertoire. Whether served with vanilla ice cream or a dollop of whipped cream, the experience of a Molten Chocolate Lava Cake is one that will linger in your memory long after the last bite has been savored.
Why You’ll Love This
There are several reasons you will fall in love with this Molten Chocolate Lava Cake recipe. First and foremost is the incredible taste. The harmony of rich chocolate flavor and the contrasting textures make each bite a joyous occasion. It is the ultimate comfort food, enveloping you in warmth and satisfaction, ideal for sharing with someone special.
The ease of preparation is another appealing aspect. Even if you consider yourself a novice in the kitchen, this recipe offers a straightforward method that requires no advanced techniques. Just melt, mix, and bake—it’s as simple as that! You won’t need specialized tools beyond basic kitchen essentials.
Moreover, the affordability of the ingredients means you can whip this dessert up without breaking the bank. High-quality chocolate might be a splurge, but the overall costs remain manageable. This makes it possible to treat yourself and your loved ones without overwhelming your budget.
There is also tremendous versatility in how you can serve and customize your lava cake. For instance, you can adjust the flavors by adding liqueurs or flavors like espresso or orange zest, making it possible to cater to various tastes. Plus, it’s an ideal dessert for various dietary preferences, as you can easily make gluten-free or egg-free variations.
Of course, common misconceptions about this dessert center on its difficulty. Many believe that achieving that perfect molten center is challenging, but with this recipe, you’ll learn how to avoid pitfalls and achieve dessert perfection.
Ingredients You’ll Need
To create the perfect Molten Chocolate Lava Cake, ensure you have the following ingredients on hand:
- High-Quality Dark Chocolate: The star of this dessert, it provides a deep, rich chocolate flavor. Choose chocolate with at least 70% cocoa for optimal taste.
- Unsalted Butter: Adds richness and moisture. It’s essential to use unsalted to control the overall salt level.
- Granulated Sugar: Sweetens the dessert and helps in achieving the ideal texture.
- All-Purpose Flour: Gives structure to the cake without overwhelming it. For a gluten-free version, substitute with a gluten-free flour blend.
- Eggs: They help in binding the ingredients together and contribute to the cake’s rise. If you need an eggless option, you can use flaxseed meal or applesauce as a substitute.
- Vanilla Extract: Enhances the flavor profile and adds depth to the chocolate taste.
- Pinch of Salt: Balances the sweetness and amplifies the chocolate flavor.
- Cocoa Powder: Used to dust the ramekins to prevent sticking and add an extra layer of chocolate flavor.
Each ingredient plays a crucial role. The quality of the chocolate can make or break the dish, so always opt for something you love to eat. Alongside, make sure to monitor the fresh quality of your eggs and butter.
How to Make
Follow these detailed steps to create a mouthwatering Molten Chocolate Lava Cake:
- Preheat your oven: Start by preheating your oven to 425°F (220°C). This high temperature is essential for achieving that perfect molten center. While the oven heats, prepare your ramekins.
- Grease the ramekins: Take four ramekins and grease them generously with butter. Then dust them lightly with cocoa powder. This will not only prevent sticking but also contribute to the overall chocolate flavor.
- Melt the chocolate and butter: In a microwave-safe bowl, combine the high-quality dark chocolate and unsalted butter. Microwave in 20-second intervals, stirring in between until completely melted and smooth. Ensure not to overheat; you want a silky consistency.
- Mix the batter: In a separate bowl, whisk together the eggs and granulated sugar until they become thick and pale. Gradually incorporate the melted chocolate mixture while whisking continuously. You want to maintain a smooth texture with minimal air bubbles.
- Add dry ingredients: Gently fold in the all-purpose flour, vanilla extract, and a pinch of salt. It’s vital to mix just until combined; no need to over-mix. The batter should be slightly glossy and thick.
- Divide the batter: Carefully pour the molten cake batter evenly into the prepared ramekins, filling them about 3/4 full. This allows sufficient space for the cakes to rise and keep the molten center intact.
- Bake: Place the filled ramekins in the preheated oven and bake for 12-14 minutes. Keep an eye on them. You want the edges to be firm while the center remains soft. A toothpick inserted in the edges should come out clean while the center will look slightly undercooked.
- Let them rest: Once baked, remove them from the oven and let them sit for 1-2 minutes. This step is crucial as it allows the cakes to set slightly, making them easier to remove.
- Serve: To serve, use a knife to gently loosen the edges of the cake. Invert the ramekin onto a plate and let it sit for a few seconds before lifting it off. Serve immediately with a scoop of vanilla ice cream or a dollop of whipped cream.
Taking the time to follow each step meticulously will reward you with beautifully risen cakes featuring a warm, molten interior. The magic happens as you slice through the cake, revealing the gooey chocolate surprise within.
Variations & Substitutions
Gluten-Free Variation: To create a gluten-free version of your Molten Chocolate Lava Cake, simply substitute the all-purpose flour with a gluten-free flour blend. Be sure to check the specific blend’s instructions for one-to-one substitutions. The result will be equally delicious, maintaining that rich molten center everyone loves.
Flavor Infusions: For those wanting to experiment with flavors, a dash of espresso powder can intensify the chocolate taste. Additionally, adding orange zest or a splash of almond extract not only elevates the profile but offers a unique twist.
Eggless Lava Cake: If you are avoiding eggs, blend 1 tablespoon of ground flaxseed with 2.5 tablespoons of water as a substitute for each egg. Allow it to sit until it becomes gel-like. This keeps the structure of the cake intact while still allowing it to rise beautifully.
Nutty Chocolate Lava Cake: For a more indulgent experience, consider folding in chopped walnuts or hazelnuts into the batter. The nuts add a delightful crunch and a new level of richness that pairs beautifully with chocolate.
Common Mistakes to Avoid
Creating the perfect Molten Chocolate Lava Cake can be straightforward, but it’s easy to encounter pitfalls. One common mistake is overbaking the cakes. If they are left in the oven for even a minute too long, the molten center may completely set, turning your dream dessert into a standard chocolate cake. Keep a close eye on the timing and aim for that delicate balance.
Another mistake is neglecting to prepare the ramekins properly. This means greasing them well and dusting with cocoa powder to prevent sticking. If the batter clings to the side of the ramekin, it might not release as desired, leading to a disappointing presentation.
Finally, making sure your ingredients are at room temperature can significantly affect the blending process. Cold eggs can cause the melted chocolate to seize, altering your cake’s texture. Be patient and allow your eggs, butter, and even your chocolate to warm appropriately before beginning.
Storage, Freezing & Reheating Tips
Storing your Molten Chocolate Lava Cake should be done cautiously to maintain its delectable quality. If you have leftovers, store them in an airtight container in the refrigerator for up to two days. When you’re ready to enjoy them again, preheat your oven to 350°F (175°C) and place the ramekins directly into the oven for 8-10 minutes to heat back up.
If you wish to make the cakes in advance, you can prepare the batter and pour it into the ramekins. Instead of baking, cover them tightly with plastic wrap and refrigerate for up to 24 hours. When you’re ready, simply bake straight from the fridge, but be aware that you might need to add a couple of extra minutes to the baking time.
Freezing is also an option, although it can alter the texture slightly. You can freeze the unbaked ramekins, but it is advisable to wrap them securely in foil. When ready to enjoy, bake from frozen at 425°F (220°C) for about 16-18 minutes.
Frequently Asked Questions
Can I use milk chocolate instead of dark chocolate?
Using milk chocolate will result in a sweeter cake with a different texture and flavor profile. For a strong chocolate taste, dark chocolate is recommended as it offers a more robust flavor and pairs beautifully with its molten center.
Can I make these cakes ahead of time?
Yes, you can prepare the batter in advance. Just fill the ramekins and cover them tightly with plastic wrap. They can be refrigerated for up to 24 hours, making it convenient to bake them fresh when you’re ready to serve.
Why did my cakes overflow during baking?
Overflowing often occurs due to overfilling the ramekins. Make sure you fill them only to about 3/4 full to allow enough space for the cakes to rise. Additionally, check the baking time to ensure that they do not expand too much.
Can I add toppings or sauces to the lava cake?
Absolutely! Vanilla ice cream, fresh berries, or a drizzle of raspberry sauce can enhance the experience. You can also top the cakes with a sprinkle of powdered sugar for a lovely finish.
What’s the best way to know when the cakes are done?
The edges should be firm while the center remains soft and slightly jiggly. A toothpick inserted into the edges should come out clean, but if tested in the center, it should have a little batter clinging to it. This ensures the molten center remains intact.
Conclusion:
This Molten Chocolate Lava Cake recipe stands out not only for its rich flavor and impressive presentation but also for its simplicity in preparation. You can dazzle your loved ones with an elegant dessert that feels special without spending hours in the kitchen. I encourage you to personalize it to your taste, whether through adding unique ingredients or serving it with complementary sides. Don’t hesitate—try making this delightful dessert for your next special occasion or just for yourself. Your dessert table deserves it, and the warm, oozing chocolate is waiting for you!


