Prep time: 15 minutes
Cook time: 10 minutes
Total time: 25 minutes
Servings: 24 cookies
Milk cookies hold a special place in many hearts, often evoking childhood memories of cozy kitchens and warm ovens. Imagine taking a bite of a soft, melt-in-your-mouth cookie that instantly transports you back to simpler times. This recipe for Soft Milk Cookies embodies that nostalgia, marrying simplicity with flavor in a way that makes it perfect for both busy parents and novice bakers. As you follow along, you’ll discover not only the process but also tips, variations, and common pitfalls to watch out for.
What Is Milk Cookies: Soft Milk Cookies (Melt in Your Mouth)?
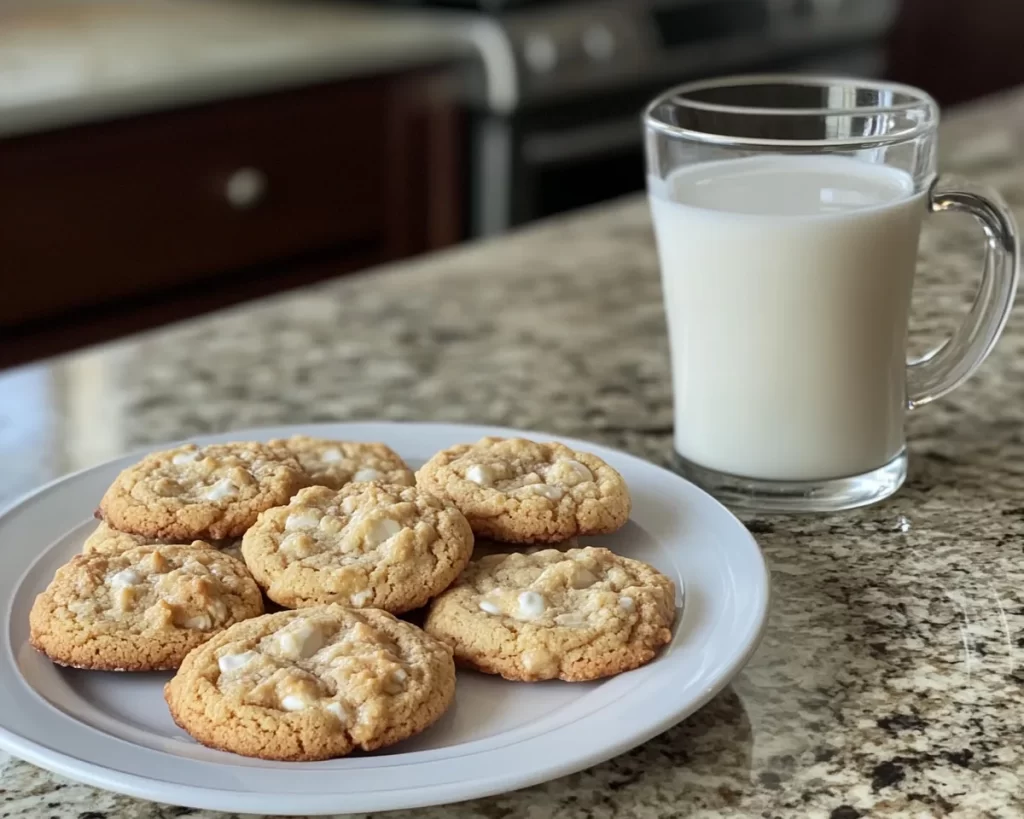
Milk cookies, particularly this version, are known for their **soft**, airy texture that makes them perfect for dunking in your favorite warm drink. Originating from various corners of the world, these cookies are traditionally simple yet profoundly satisfying. The primary ingredient that sets them apart is **milk**, which contributes to their uniquely soft texture, giving them the melt-in-your-mouth quality that many crave.
The cookies are generally lightly sweetened and often feature hints of vanilla, making them versatile enough for various occasions—morning snacks, lunchbox treats, or even a pair to your evening tea. You can enjoy them as they are or elevate them with different toppings or mix-ins, such as chocolate chips or nuts. This flexibility in flavor proves that basic ingredients can yield delicious results!
Why You’ll Love This
You’ll find that this recipe is a wholesome amalgamation of taste, ease of preparation, and cost-effectiveness. Using straightforward ingredients, these cookies come together quickly, making them ideal for those moments when you have unexpected guests or need a last-minute dessert. Moreover, their **mild sweetness** and buttery essence make them appealing to both children and adults, ensuring you can’t eat just one!
It’s essential to note that many people mistakenly believe that cookie-making is complicated. However, this recipe proves that anyone can turn out a delightful batch, minimizing stress in the kitchen, and maximizing enjoyment for the entire family. When compared to other fancy dessert options that require specialized techniques, milk cookies stand out as a straightforward alternative that doesn’t compromise flavor or presentation.
Ingredients You’ll Need
- 2 ½ cups all-purpose flour
- 1 cup unsalted butter, softened
- 1 cup granulated sugar
- 2 large eggs
- 1 cup whole milk
- 1 tablespoon pure vanilla extract
- 1 teaspoon baking powder
- ½ teaspoon baking soda
- ½ teaspoon salt
Each of these ingredients plays a significant role in achieving the ideal texture and flavor. The **all-purpose flour** serves as the base, creating structure while allowing the cookie to remain soft. **Unsalted butter** contributes to the rich flavor and moisture, while **granulated sugar** adds sweetness. The **eggs** help with binding and added richness, while **whole milk** provides that distinctive softness that defines milk cookies.
For those looking for substitutes, consider using **almond milk** or **oat milk** instead of whole milk for a dairy-free option. If you want to lower sugar, alternatives such as coconut sugar can work well, though they may slightly alter the flavor. Remember, however, that any substitutions should be mindful of how they might change the cookie’s final texture.
How to Make
Follow these step-by-step instructions to create your batch of soft milk cookies:
- Preheat your oven to 350°F (175°C). Arrange two parchment-lined baking sheets on your counter. Preheating your oven is crucial for achieving the perfect texture.
- In a large mixing bowl, cream together the softened butter and granulated sugar using an electric mixer. Mix on medium speed until the mixture becomes light and fluffy, which should take about 4–5 minutes. This process allows air to incorporate into the butter, which contributes to the cookie’s lightness.
- Add the eggs one at a time, mixing well after each addition. This step helps the eggs incorporate properly and contributes to a smooth batter. Then, mix in the pure vanilla extract.
- In another bowl, combine the dry ingredients: flour, baking powder, baking soda, and salt. Whisk until combined. This ensures even distribution of the leavening agents, which will contribute to the cookie’s rise.
- Gradually add the dry ingredients to the wet mixture, alternating with whole milk. Start and end with the dry ingredients to help create a smooth batter. Mix until just combined; be careful not to over-mix, as this can lead to tougher cookies.
- Using a cookie scoop or tablespoon, drop the cookie dough onto the prepared baking sheets, spacing them about 2 inches apart to allow for spread. You may flatten them slightly if you prefer a more uniform shape.
- Bake in the preheated oven for 8–10 minutes, or until the edges are lightly golden but the centers remain soft. Keep an eye on them, as baking times may vary depending on your oven.
- Once baked, allow the cookies to cool on the baking sheets for about 5 minutes before transferring them to a wire rack to cool completely. This resting period helps them set without becoming too hard.
You will know you’ve nailed the texture when the cookies have a golden edge and a slightly soft center. Enjoy the sweet, buttery aroma wafting through your kitchen as they bake!
Variations & Substitutions
Chocolate Chip Milk Cookies
For a fun twist, you can easily add 1 cup of semi-sweet chocolate chips to the dough before baking. The gooeyness of melted chocolate paired with the milky softness of the cookie takes the flavor to another level. This variation is perfect for those who believe that cookies should always have that delightful chocolate experience.
Nutty Milk Cookies
If you’re a fan of nuts, consider adding ½ cup of chopped walnuts or pecans to the batter. The subtle crunch and nutty flavor enhance the cookies’ texture while also making them a tad more filling. This variation caters well to those who enjoy a little bite in their cookies.
Spiced Milk Cookies
For a hint of warmth, add 1 teaspoon of ground cinnamon or nutmeg to the dry ingredient mix. This variation is especially beneficial during colder months or holiday seasons when you crave a warming, spiced aroma in your house. The spices blend beautifully with the buttery milk flavors.
Dairy-Free Milk Cookies
Instead of whole milk, use almond or coconut milk and replace the unsalted butter with coconut oil or a plant-based butter alternative. This makes the cookies accessible to those who are lactose intolerant while not sacrificing the delicious taste.
Common Mistakes to Avoid
Even with a straightforward recipe like this, there are pitfalls you may encounter. One common mistake is over-mixing the dough. When you over-mix, you’re incorporating more air and activating the gluten, which can lead to tough cookies instead of the desired softness. Always mix just until combined.
Another error is using cold ingredients. It is crucial that your butter is **softened** and your eggs are at room temperature. Cold ingredients can slow down the emulsification process, resulting in a less cohesive batter.
Also, don’t skip the resting time after baking. If you immediately transfer cookies to a wire rack, they might break apart because they haven’t set properly. Allowing them to cool on the baking sheet before transfer is an essential step for achieving the perfect texture.
Storage, Freezing & Reheating Tips
To store your cookies, place them in an airtight container at room temperature, where they can last for up to 5 days. If you want to keep them longer, consider freezing them. You can freeze the cookies either baked or unbaked. For frozen baked cookies, place them in an airtight freezer bag and store for up to three months.
If you’re freezing raw dough, scoop out the cookies onto a baking sheet and freeze them until firm, then transfer them to a freezer-bag or container. When you’re ready for a batch, just bake from frozen, adding a minute or two to the baking time.
For reheating, microwave a cookie for about 10 seconds for a delightful softness. You can also pop them in the oven at 350°F (175°C) for 5 minutes to regain that fresh-baked quality.
Frequently Asked Questions
What makes milk cookies different from regular cookies?
Milk cookies are defined by their unique texture and flavor due to the inclusion of milk as a primary ingredient. This results in a softer cookie that has a melt-in-your-mouth quality. Additionally, they often have a more delicate sweetness compared to firmer cookies like chocolate chip cookies.
Can I make these cookies ahead of time?
Absolutely! You can prepare the dough in advance and refrigerate it for up to 24 hours before baking. This not only allows for easier meal prep but also deepens the flavor as the ingredients meld. Just be sure to let the dough sit at room temperature for about 15 minutes before scooping and baking.
Are milk cookies suitable for children?
Yes! Milk cookies are a fantastic treat for children. They contain familiar ingredients that most kids love, and their soft texture makes them easy to chew. Always consider any allergies when sharing your cookies with others.
What can I serve with milk cookies?
These cookies pair wonderfully with milk, coffee, or tea. The subtle flavors of vanilla and butter enhance the experience and make them perfect for afternoon snack time. You might also consider serving them with ice cream for a delicious dessert combo.
Can I add more flavors to the milk cookies?
Certainly! Milk cookies are versatile, and you can infuse them with various flavors. Adding citrus zest, or using flavored extracts like almond or maple, can create unique variations. Experimenting with additional mix-ins like dried fruit or oats can also alter the texture and flavor profile.
Conclusion:
With their unique softness and nostalgia-inducing flavors, these Soft Milk Cookies are a recipe you’ll find yourself returning to again and again. They are perfect for sharing with friends and family, or simply enjoying with a quiet cup of tea after a long day. Don’t hesitate to experiment with flavors and modifications; these cookies are as customizable as they are delightful. So whip up a batch, fall in love with the *melt-in-your-mouth* magic, and share these tasty morsels with everyone you know!