Prep time: 30 minutes
Cook time: 0 minutes
Total time: 4 hours (including chilling)
Servings: 12
Indulging in a luscious dessert can truly turn an ordinary day into something extraordinary. This Irresistible No-Bake Oreo Cheesecake Slice is a delightful treat that’s perfect for any occasion, whether you’re celebrating a birthday, hosting a dinner party, or simply wanting to savor a little slice of heaven. The smooth creaminess of the cheesecake combined with the rich flavors of Oreos creates a divine harmony that melts in your mouth. But what sets this recipe apart is its no-bake nature—perfect for novice bakers or anyone short on time. Expect a sumptuous, creamy texture alongside a delightful crunch of chocolate cookie crumbs as you dive into each slice.
In this article, you will learn how to make this exquisite dessert with ease. I will guide you through every step, share important tips for success, and present variations to customize the cheesecake to your liking. Whether you’re in a hurry or taking your sweet time, you’ll appreciate how simple yet impressive this recipe is. Let’s embark on this delightful culinary journey together!
What Is Irresistible No-Bake Oreo Cheesecake Slice?
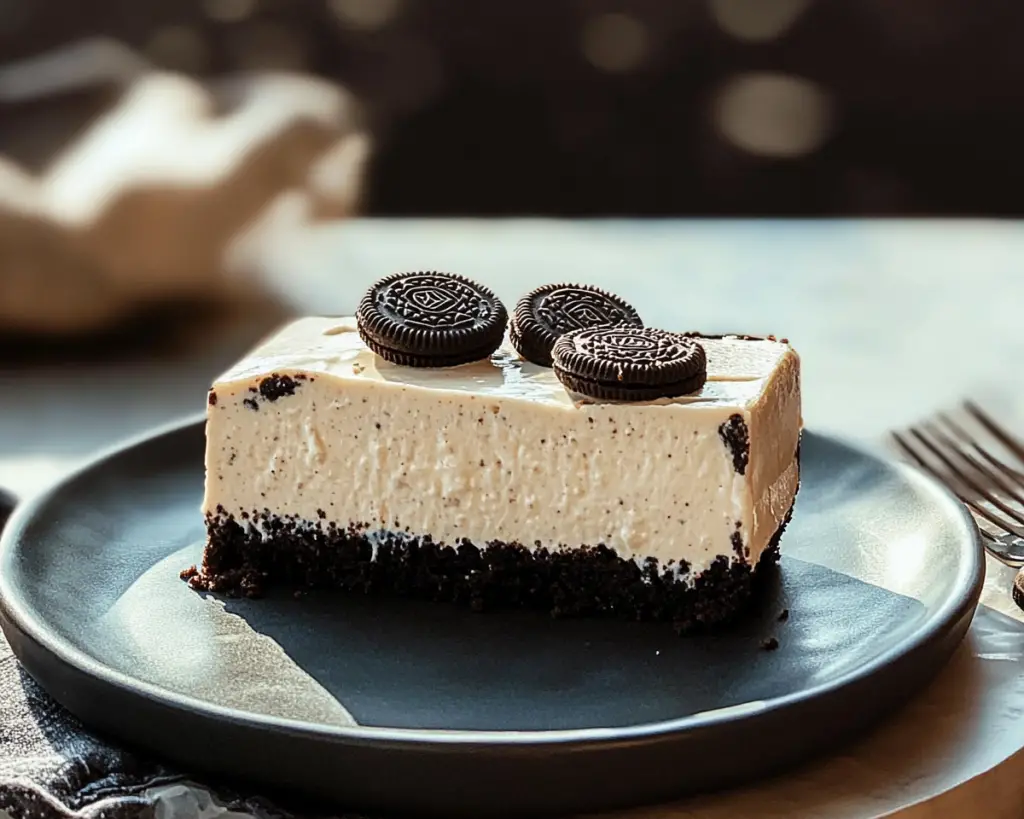
Irresistible No-Bake Oreo Cheesecake Slice is a creamy, decadent dessert that offers the ultimate combination of flavors and textures. The origin of cheesecake goes back centuries, but this no-bake method is a modern twist that appeals to dessert lovers everywhere. The cheesecake itself has a smooth and velvety texture, thanks to the combination of cream cheese and whipped cream. This dessert is not only rich in flavor but also incredibly easy to make, requiring no oven time whatsoever.
At the heart of this cheesecake is the iconic Oreo cookie. The chocolatey base creates a delightful contrast with the creamy filling, while the cookie pieces folded throughout provide a pleasant crunch. This combination allows everyone to enjoy a slice that feels indulgent without the hassle of baking. One taste, and you will see why this dessert has become a favorite among families and friends.
Why You’ll Love This
You will fall in love with this No-Bake Oreo Cheesecake Slice for various reasons. First and foremost, the flavor is simply irresistible. The sweetness from the cream cheese balanced with the earthy tones of the Oreos makes for a heavenly combination. Additionally, it’s incredibly easy to prepare, requiring only a few simple ingredients and minimal cooking techniques, making it perfect for busy parents or beginners in the kitchen.
Another reason to love it? The cost-effectiveness of this dessert. With ingredients that are typically found at your local grocery store, you can create a luxurious dessert without breaking the bank. Plus, it’s highly versatile! Feel free to customize the cheesecake with various toppings or flavors, from chocolate drizzle to fresh fruit. Many misconceptions exist about cheesecakes being labor-intensive, but this recipe proves that you can achieve dessert perfection with little effort.
Ingredients You’ll Need
- Oreos: 24 Oreo cookies, crushed into fine crumbs. This will serve as the base and key flavor.
- Butter: 1/2 cup unsalted butter, melted. This helps bind the crust together.
- Cream cheese: 16 oz cream cheese, softened. Provides the main creamy texture for the cheesecake.
- Sugar: 1 cup granulated sugar. Sweetens the filling harmoniously.
- Heavy whipping cream: 2 cups. This adds a fluffy and light texture to the cheesecake.
- Vanilla extract: 1 teaspoon. Enhances the overall flavor profile.
Each ingredient plays a vital role in contributing to the overall texture and flavor of the cheesecake. For instance, you can substitute Oreos with any chocolate sandwich cookies if desired, while coconut oil can replace butter for a slightly different flavor profile. Be mindful of using room temperature cream cheese and heavy cream for optimal blending—great texture is essential!
How to Make
1. **Prepare the crust:** Start by crushing the Oreo cookies in a ziplock bag or using a food processor until you achieve fine crumbs. In a mixing bowl, combine the crushed Oreos with melted butter and mix well. Press this mixture firmly into the bottom of a 9×13-inch baking dish to form a uniform crust. Make sure it’s packed tightly to ensure it holds its shape once set.
2. **Make the cheesecake filling:** In a large mixing bowl, use an electric mixer to beat the softened cream cheese and granulated sugar together until smooth and creamy. This should take about 2-3 minutes. Scrape the sides of the bowl to ensure all ingredients are combined thoroughly. The mixture should be free of lumps, indicating that the cream cheese is adequately softened.
3. **Add vanilla extract:** Incorporate the vanilla extract into the cream cheese mixture. This adds depth to the flavor. Beat again briefly to blend well—this should take no more than 30 seconds.
4. **Whip the heavy cream:** In another mixing bowl, pour the heavy whipping cream and use the electric mixer to whip it until medium peaks form. This takes approximately 4-5 minutes. The goal is for the cream to become fluffy, which gives the cheesecake its light texture once combined.
5. **Combine the mixtures:** Gently fold the whipped cream into the cream cheese mixture using a spatula. Be careful not to deflate the whipped cream; this is essential for achieving that rich, creamy texture. Add in half of the crushed Oreos and fold them into the mix.
6. **Fill the crust:** Pour the cheesecake filling over the prepared crust, smoothing the top with a spatula for an even finish. For an attractive presentation, sprinkle the remaining crushed Oreos on top.
7. **Chill:** Cover the baking dish with plastic wrap and place it in the refrigerator. Allow the cheesecake to chill for at least 4 hours, though overnight chilling is recommended for the best results. The longer it sets, the firmer the texture will become.
8. **Serve:** Once set, slice the cheesecake into squares and serve. Consider drizzling chocolate syrup or topping with fresh berries for added flair.
Variations & Substitutions
Chocolate Mint Oreo Variation: If you love the combination of chocolate and mint, consider using Mint Oreos instead. This variation adds a refreshing twist to the dessert, making it ideal for the holiday season or mint lovers. Simply replace the regular Oreos with Mint Oreos, and if you like, add a few drops of mint extract to the cream cheese mixture for an extra punch of flavor!
Peanut Butter Cup Variation: For those who crave a nutty creaminess, why not add peanut butter? Mix 1/2 cup of creamy peanut butter into the cheesecake filling for a delightful flavor experience. This variation is perfect for peanut butter lovers and can take the indulgence to another level. Don’t forget to layer chopped Reese’s Pieces or peanut butter cups into the filling for added texture.
Fruit Topping Variation: Adding toppings is always a hit! Consider using fresh fruits like strawberries, blueberries, or raspberries for a fruity twist. Not only does this add a pleasing visual appeal, but it also enhances the flavors, creating a wonderful balance between the sweet, creamy cheesecake and the natural tartness of the berries. Simply place the chosen fruit on top before serving.
Common Mistakes to Avoid
One common mistake is not allowing the cream cheese to soften adequately. Using cold cream cheese can result in a lumpy filling and a less than desirable texture. Always take your cream cheese out of the refrigerator ahead of time to let it reach room temperature.
Another critical error is rushing the whipped cream process. Be patient while whipping; if you stop too soon, the cheesecake can end up too dense. On the flip side, over-whipping can lead to grainy cream, which negatively impacts the texture. Aim for medium peaks—this is essential for achieving that light and fluffy cheesecake consistency.
Lastly, making adjustments to chill time should be avoided. Chilling the cheesecake is crucial for it to set properly. Rushing this step will prevent the cheesecake from firming up adequately, leading to a runny or messy slice when served.
Storage, Freezing & Reheating Tips
Proper storage of your No-Bake Oreo Cheesecake Slice is essential for maintaining its delicious flavor and texture. Keep any leftovers covered tightly with plastic wrap or foil and store in the refrigerator. It can last for about 5-7 days.
If you want to prepare ahead of time or have leftovers you wish to freeze, it’s possible. Wrap each slice individually in plastic wrap, followed by aluminum foil to protect against freezer burn. Store in an airtight freezer-safe container if you plan to freeze for longer periods. Your cheesecake can be frozen for up to 2 months.
To thaw, simply move the cheesecake to the fridge the night before you plan to serve it. Avoid reheating it, as this is a no-bake dessert, and the texture will be compromised. Thawing slowly will help to maintain the integrity and taste.
Frequently Asked Questions
Can I use reduced-fat cream cheese?
Yes, you can! Using reduced-fat cream cheese will lower the calorie content a bit, but it might alter the texture and creaminess slightly. Make sure to whip it well to achieve the desired smooth consistency.
How long should I let the cheesecake chill?
It is recommended to chill the cheesecake for at least 4 hours, but ideally, letting it sit in the fridge overnight will yield the best results. This allows the flavors to meld properly and ensures a firmer texture.
Can I make this cheesecake gluten-free?
Absolutely! Swap regular Oreos for gluten-free chocolate sandwich cookies to create a gluten-free version of this delicious cheesecake. Always double-check the ingredient labels to ensure all components are gluten-free.
What can I do if I don’t like Oreos?
If Oreos aren’t your thing, you can use any chocolate cookie or even graham crackers as a substitute for the crust. They will provide a different flavor yet still complement the creamy cheesecake filling beautifully.
Can I add toppings to the cheesecake?
Yes! In fact, adding toppings can make this cheesecake even more special. Consider using whipped cream, chocolate syrup, or fresh fruit like berries for a delightful contrast of flavors.
Conclusion:
This Irresistible No-Bake Oreo Cheesecake Slice is not just a dessert; it’s an experience filled with rich flavors and delightful textures. Whether serving at a gathering or enjoying a quiet night at home, this dessert is sure to impress. Don’t hesitate to customize it to your liking or try the various variations to suit different occasions. Give yourself the chance to enjoy the blissful combination of creamy cheesecake and crunchy cookies. Dive into this simple recipe today, and you’ll be rewarded with countless compliments. Happy baking!


