Prep time: 30 minutes
Cook time: 30 minutes
Total time: 1 hour
Servings: 12
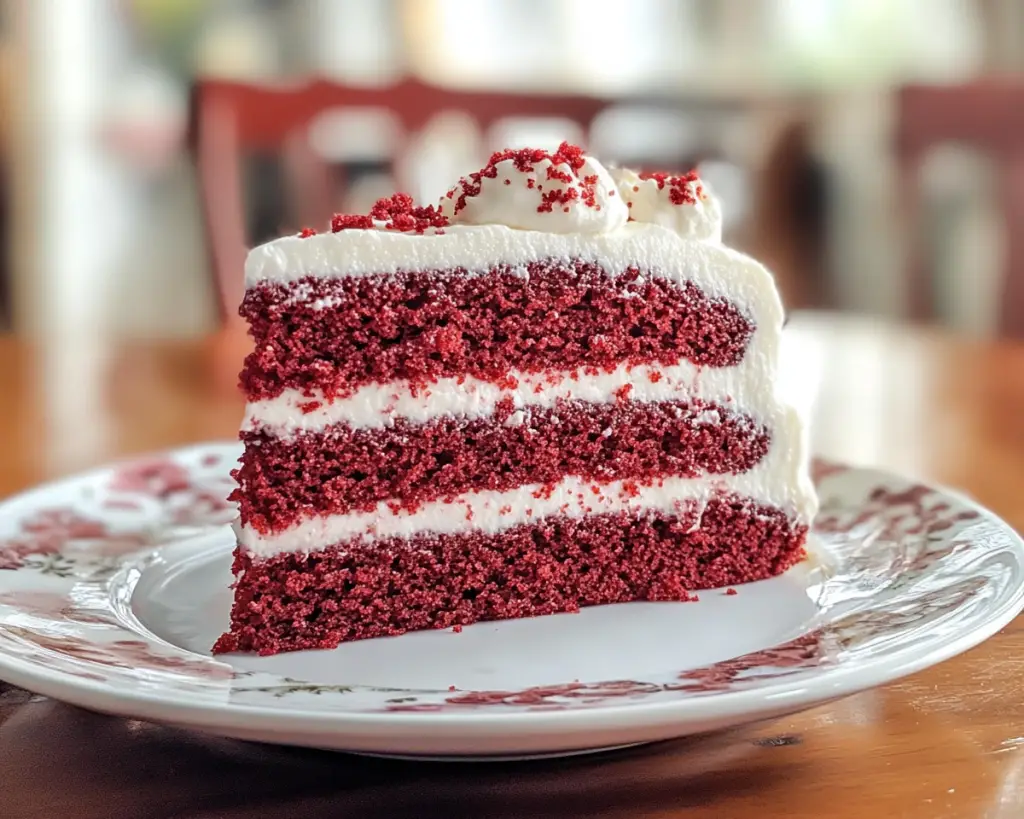
Red velvet cake is a luscious dessert that tantalizes the senses and embodies a festive spirit. This cake, with its stunning deep red color, is often paired with a rich cream cheese frosting that perfectly complements its unique flavor. Originating in the Southern United States, red velvet is known for its moist texture and subtly chocolatey taste. There’s something nostalgic about baking a red velvet cake; it evokes memories of special occasions and family gatherings, where the warm aroma fills the kitchen and brings everyone together.
In this article, you’ll discover how to bake the best red velvet cake, complete with tips for achieving the perfect crumb and vibrant color. You’ll learn about essential ingredients and techniques, variations to suit different diets, and advice to help avoid common pitfalls. Whether you’re a seasoned baker or a novice, this recipe aims to guide you through the delightful process of creating this alluring dessert.
What Is How Can You Bake The Best Red Velvet Cake?
Red velvet cake is an iconic dessert characterized by its bright red hue blended with a hint of cocoa powder and a velvety texture. The combination of buttermilk, vinegar, and baking soda creates a slight acidity that not only enhances flavor but also gives the cake its signature tenderness. Traditionally, this cake is layered with a rich cream cheese frosting, which provides a delightful contrast to its subtly sweet, chocolatey flavor.
The origins of red velvet cake can be traced back to the early 20th century, with the cake emerging as a popular choice for holiday celebrations and weddings. The deep red color is a visual delight, drawing the eyes in a way that few other cakes do. Notably, its unique combination of tanginess and sweetness makes it a beloved dessert across various demographics and celebrations, making it a must-try for any home baker.
Why You’ll Love This
This red velvet cake recipe is not only delicious, but it’s also straightforward, which can be a boon for busy parents or inexperienced bakers looking to impress their family and friends. You’ll love its dynamic flavor profile, enhanced by the slight tang from buttermilk and the richness of the cream cheese frosting. Moreover, this recipe can be made with readily available ingredients that won’t break the bank, making it budget-friendly as well.
One common misconception about red velvet cake is that it’s simply a vanilla cake with food coloring. In reality, the cake possesses distinct flavors, texture, and moisture that set it apart. When made correctly, it offers a refined taste experience that goes beyond just its stunning appearance. By following the steps laid out in this recipe, you’ll avoid typical pitfalls encountered by beginners, leading to a delightful success that will have everyone reaching for a second slice.
Ingredients You’ll Need
- All-purpose flour: Provides structure to the cake. For a gluten-free option, consider using gluten-free all-purpose flour.
- Cocoa powder: A key ingredient that contributes to the cake’s flavor. Using unsweetened cocoa powder is essential for balance.
- Granulated sugar: Sweetens the cake and helps with the moisture. Brown sugar can be used for a richer flavor.
- Baking soda: This leavening agent makes the cake rise, creating a light texture. Be sure it’s fresh for best results.
- Salt: Enhances the sweetness of the cake. A pinch is enough to elevate the overall flavor.
- Vegetable oil: Keeps the cake moist and tender. You can use melted butter for a different flavor profile.
- Buttermilk: Adds a tangy flavor and rich moisture. If unavailable, make a substitute with milk and vinegar.
- Eggs: Bind the ingredients and add richness. Room temperature eggs work best.
- Red food coloring: Essential for giving the cake its iconic color. Gel food coloring is recommended for better results.
- Vinegar: Reacts with the baking soda to enhance leavening and provide tanginess.
Each ingredient plays a critical role in how the cake turns out, so understanding their contributions can help you make informed substitutions or adjustments.
How to Make
- Preheat your oven to 350°F (175°C) and prepare your cake pans. Grease and flour two round 9-inch cake pans, or line them with parchment paper for easy removal.
- In a large mixing bowl, combine the all-purpose flour, cocoa powder, baking soda, and salt. Whisk these dry ingredients together until well blended, ensuring there are no lumps.
- In a separate bowl, combine the granulated sugar and vegetable oil. Mix until combined, then add the eggs one at a time, beating well after each addition. This process incorporates air into the mixture, which helps with leavening.
- Next, stir in the buttermilk, vinegar, and liquid red food coloring. Mix until everything is fully incorporated and uniform in color. The mixture should have a rich, vibrant hue that is bright and inviting.
- Gradually fold the dry flour mixture into the wet ingredients. Be careful not to overmix; a few small lumps are acceptable. Once combined, the batter should be smooth yet somewhat thick.
- Evenly distribute the batter between the prepared cake pans. Gently tap the pans on the counter to remove air bubbles and ensure an even surface.
- Bake for 25-30 minutes. Start checking for doneness around the 25-minute mark. A toothpick inserted in the center should come out clean or with a few crumbs attached, indicating the cake is done.
- Once baked, allow the cakes to cool in the pans for 10-15 minutes. Then, carefully remove them from the pans and let them cool completely on a wire rack.
- While the cakes cool, prepare the cream cheese frosting. In a mixing bowl, combine softened cream cheese and butter, then beat until creamy and smooth. Gradually add in powder sugar and vanilla extract, mixing until well combined.
- Once the cakes are fully cooled, spread a generous amount of frosting on the top of one layer, place the second layer on top, and frost the top and sides of the cake. Decorate as desired.
- Slice, serve, and enjoy the incredibly moist and flavorful slice of red velvet cake!
Each step contributes to creating the perfect texture and flavor profile for your cake. Remember to keep an eye on your baking times, as ovens can vary.
Variations & Substitutions
Gluten-Free Red Velvet Cake
For those with gluten sensitivities, you can make this cake with gluten-free all-purpose flour. Just ensure it contains xanthan gum to help with the structure. The flavor may remain consistent, but the texture might be slightly different. Always check the packaging for guidance on proper substitutions; it can help you achieve the best results.
Vegan Red Velvet Cake
If you prefer a plant-based option, substitute eggs with flaxseed meal mixed with water, use almond or soy milk in place of buttermilk, and replace butter with coconut oil or a vegan alternative. The flavor will remain deliciously sweet and chocolatey, with the same stunning red color that makes this cake so appealing.
Red Velvet Cupcakes
Transform the cake into cupcakes for a fun party treat. Bake the batter in a lined muffin tin for about 18-20 minutes. They will be perfectly portioned and easier to serve. Top them with cream cheese frosting and adorn with sprinkles for a charming presentation.
Chocolate Red Velvet Cake
For chocolate lovers, you can enhance the cocoa powder in the recipe by increasing it slightly to double the amount. This will give you a more intense chocolate flavor while maintaining the classic traits of red velvet. Just be sure to balance the other flavors to keep the cake moist.
Common Mistakes to Avoid
One of the most critical mistakes when making red velvet cake is using too much food coloring, which can lead to an artificial taste. Instead, focus on achieving the right shade through careful measurement. Also, avoid using expired baking soda; this can result in a dense cake rather than a light and airy one.
Another common pitfall is underestimating the importance of ingredient temperatures. Using cold eggs or buttermilk can hinder the creaming process, leading to a denser cake. Always allow ingredients to reach room temperature before mixing. Lastly, avoid overmixing the batter, as this can result in a tough cake. Mix just until combined for the best texture.
Storage, Freezing & Reheating Tips
For optimal freshness, store your red velvet cake in an airtight container at room temperature for up to three days. If you prefer longer storage, refrigerate it where it can last up to a week. Always remember to wrap it well to prevent it from drying out.
If you want to freeze your cake, ensure it has cooled completely. Wrap individual slices or the whole cake in plastic wrap, followed by aluminum foil, to prevent freezer burn. Unfrosted layers can remain frozen for up to three months. Allow it to thaw in the fridge overnight before serving. For reheating, consider using a microwave if you’ve frozen individual slices; heat in short bursts to preserve moisture.
Frequently Asked Questions
Can I use gel food coloring instead of liquid food coloring?
Absolutely! Gel food coloring will provide a richer color without affecting the batter’s dry and wet balance. It’s often preferred by bakers for achieving a vibrant hue without compromising texture.
What happens if my red velvet cake turns out too dense?
If your cake is dense, it could be due to either overmixing the batter or using expired leavening agents like baking soda. Always check freshness and mix just until combined for lighter texture.
How can I tell when my cake is done baking?
A toothpick inserted into the center of the cake should come out clean or with a few moist crumbs attached. Additionally, the edges should slightly pull away from the sides of the pans.
Is it necessary to use buttermilk in the recipe?
While buttermilk is highly recommended for its unique flavor and moisture, you can substitute it with a mixture of milk and vinegar or lemon juice if needed.
Can I make this cake in advance?
Yes! You can bake the cake layers a day ahead and store them wrapped in plastic wrap at room temperature. Frosting can also be made in advance and stored in the refrigerator.
Conclusion:
This red velvet cake recipe stands out as a delightful option for any occasion. Its rich texture and unique flavor, combined with the luscious cream cheese frosting, make it a true crowd-pleaser. As you try out this recipe, feel free to explore variations and customize it to your heart’s desire. Embrace the process, and don’t hesitate to share your delightful creation with friends and family. Happy baking!