Let’s Get Real
Let me just start by saying that there are few things in the culinary world that can conjure up the kind of nostalgia I feel about vanilla custard. It’s like the classic movie of desserts; everyone has seen it, but not everyone has enjoyed it at its finest. Just the word “custard” takes me back to my childhood, sitting at my grandma’s kitchen table, her apron-covered belly sticking out like a well-fed cat, ready to serve the creamiest, dreamiest bowl of vanilla custard known to mankind. Somehow, as I grew up, vanilla custard became synonymous with my culinary education initiation—it was part of the “let’s see if you really know how to cook” test from the universe.
Ah, but I’m no stranger to failed custard attempts. I once tried to whip this up in my tiny apartment during a relaxation phase –big mistake. I didn’t know that cooking custard required patience, nor did I know that I should have been whisking away like a hyperactive toddler. End result? A burnt mess that looked like someone had tried to cook the dreams of dessert lovers everywhere. Since that day, I had sworn off making custard, only to find myself unable to resist its charm. The creamy texture, the subtle sweetness, and that OMG moment when you take your first spoonful—it’s like a hug for your taste buds. So buckle up, because we’re diving into my favorite homemade vanilla custard recipe, and I promise not to steer you into the land of kitchen disasters this time around.
Ingredients, Unfiltered
What’s Really in Homemade Vanilla Custard
Alright, let’s get down to the nitty-gritty. Here’s what we’re working with:
Milk: The backbone of this custard. I’m a whole milk gal – because if you’re going to indulge, you might as well do it right. If you’re feeling rebellious, go ahead and use almond or oat milk. Just know that the texture and flavor might be a little off, and we might not be friends for a week.
Cream: Oh yes, the magical elixir that turns dessert dreams into creamy realities. Heavy cream brings an unbeatable richness that will have you questioning every low-fat decision you’ve ever made. If you think I’m going to suggest half-and-half to be “health-conscious,” you clearly don’t know me.
Eggs: Four of them. Yes, whole eggs. I am unapologetically eggy in my custard game. If you attempt to skimp on eggs to avoid calories, just stop right there and reconsider your life choices. Eggs are what makes this sweet concoction rich and velvety.
Vanilla: Here’s where the magic happens! Use *real* vanilla extract, not that synthetic stuff that tastes like pancake syrup’s weird cousin. If you really want to go all out, scrape the seeds out of a vanilla bean. Yes, it’s the diva move of dessert-making, but the flavor? Absolutely worth it. Don’t wear white unless you’re a master at flavor balance – shot counts of splattered vanilla beans are real.
Sugar: It’s a sugar-party, folks! I’m a fan of whole sugar for flavor depth, but if you’re living that white sugar life, then do you. I won’t judge… out loud, anyway.
Salt: You might think a pinch of salt is unnecessary here, but trust me. It’s like the supportive best friend that brings balance to the sweetness and makes you say, “Hmm, this is extra delicious!”
So there you have it—no weird ingredients here! Unless you count the inner turmoil of trying to impress everyone with your custard skills. Speaking of impressing, let’s get to the health matters—or lack thereof.
Let’s Talk Health (or Not)
Is This Even Healthy? Let’s Discuss
Okay, so time for some honest talk: is vanilla custard healthy? Maybe not. But who cares?! Are we really going to sit here, counting calories and cholesterol points while we’re tempted by the smooth, creamy brilliance of this revelation?
Listen, I get it. You may have health goals, and I salute you for that. But here’s the truth: the sheer magic of a well-made custard is in its richness, people. You can absolutely have a little indulgence every now and then without guilting yourself into a spiral of self-loathing. Sure, there’s butter, cream, and if there were a custard Olympics, it would win gold every time.
But if you’re looking to swap something ridiculous like “Greek yogurt” for the heavy cream, you do you, boo! Just know that you might end up with a custard that’s as enjoyable as chewing cardboard. So embrace this moment, throw caution to the wind, and get ready for a fiesta of creamy greatness!
Your Grocery List
Here’s What You’ll Need
– 2 cups whole milk
– 1 cup heavy cream
– 4 large eggs
– 2/3 cup sugar
– 1 tablespoon vanilla extract (or 1 vanilla bean, seeds only)
– A pinch of salt
This bad boy serves 4–6 people, depending on whether you choose to share or fully embrace the “this-is-mine” mentality.
The Actual Cooking Part
Okay, Let’s Make This
Alright, let’s do this thing! Grab your apron, preheat that oven to 325°F (or 160°C, for my metric-loving friends), and let’s make some custard magic happen. But first, a quick word of caution: Prepare yourself for a bit of whisking action. And if you have a hot date, maybe this is not the best recipe to impress them in a “look-how-cool-I-am” kind of way. Let’s begin!
1. In a medium saucepan over medium heat, combine the whole milk and heavy cream, stirring occasionally until it’s hot but not boiling. Let’s not create a frothy disaster here—please don’t wander off to scroll Insta or get distracted by that “just one more” episode of your favorite show.
2. While that’s happening, grab a bowl, and whisk the sugar, eggs, and salt together until it’s smooth and has that nice pale hue. You’re looking for a soft ribbon effect here, folks. If your arm gets tired, then just think of all the calories you’re burning. Win-win!
3. This is where the real deal begins. Gradually add the hot cream mixture to the egg mixture while whisking continuously. You want to do this slowly; add it too fast, and you could end up with scrambled eggs instead of silky custard. And we’re not trying to create a brunch dish gone awry here.
4. If you’re using vanilla beans, now’s the time to flex your “I’m fancy” muscles by scraping those seeds into the mixture. If you’re Team Extract, just toss in that tablespoon of vanilla like the rock star you are.
5. Pour the entire mixture through a fine-mesh strainer into a clean bowl or a measuring cup. This step is crucial for achieving a smooth texture. You don’t want any eggy bits ruining your creamy dreamscape. Layer it in a little at a time if you need to!
6. Now for the baking! Lightly grease a 9” pie dish or custard cups. If you want to get all trendy, you can use ramekins too. Place the dish or cups in a larger baking pan, then fill the pan with hot water until it reaches halfway up the sides of the custard dish. This is called a water bath, and it’s your insurance policy against custard tragedy.
7. Bake it all for about 30-45 minutes. The edges should be set while the center still has that lovely jiggle (is that even a word? Let’s pretend it is). Don’t panic if it looks messy—this is supposed to look a little like a luxurious hot tub!
8. Allow the custard to cool at room temperature for a bit, then toss it in the fridge for at least 4 hours. Overnight is even better if you can resist the temptation! You’re giving it time to set up, and believe me, patience is a virtue here.
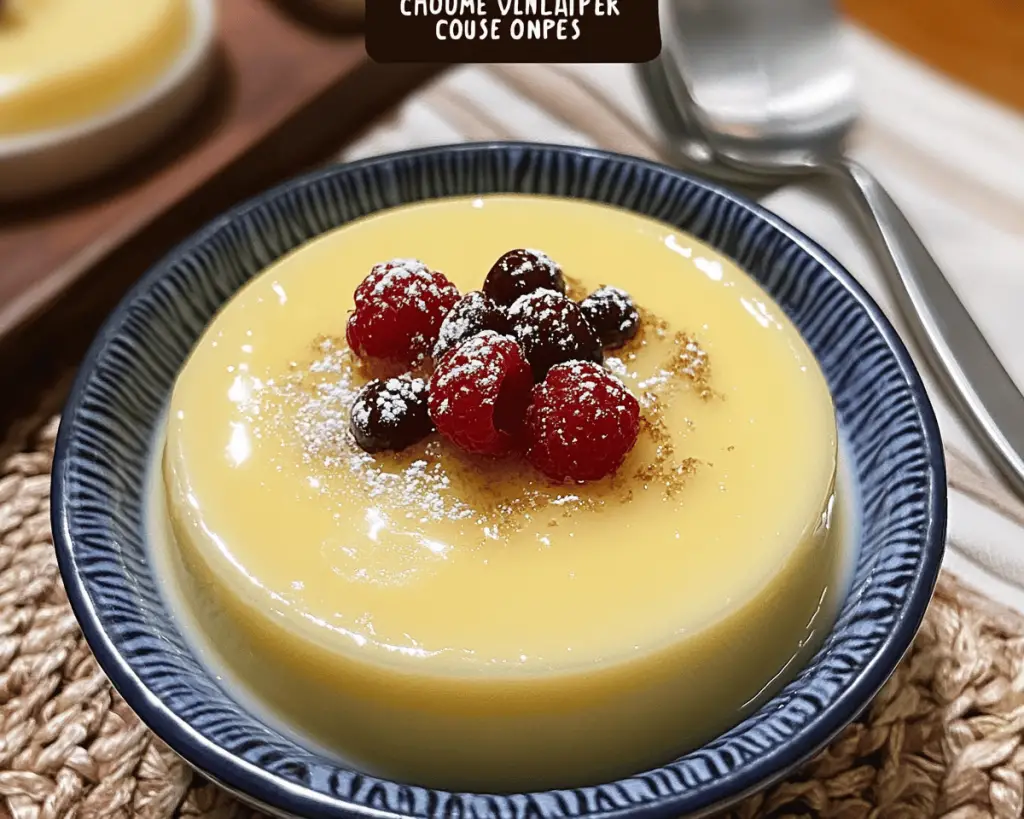
9. Ready to serve? Dust some nutmeg or shredded coconut on top, because why not? Grab a spoon and dig into that glorious custard goodness. But remember, be the custard-sharing champion only if you want to, because I totally respect the “I’m gonna eat this all alone” lifestyle.
Side Notes & Sassy Hacks
Bonus Tips You Didn’t Ask For
Now that you’ve mastered the basics, let’s add some pizzazz! Here are some things I’ve learned along the way –often through my own cooking misadventures:
– Don’t have enough eggs? Be careful! Generally, you can swap in extra yolks, but if you’re only using whites, your custard could turn out a bit light. You’ve been warned!
– Need to make it gluten-free or vegan? You can simply swap the milk for almond milk or coconut milk and try using a substitute like silken tofu for the eggs. The texture may vary, and it might not be “true” custard, but hey—adventure is what life is about!
– Want a flavor upgrade? Try infusing your milk/cream with a bit of orange zest or matcha powder before combining. Just be aware that these variations might give you a **totally** different vibe than classic vanilla custard.
– If you’re serving it to guests and want to feel fancy without too much work, you can garnish with fresh berries, chocolate shavings, or even a drizzled caramel sauce.
– What happens if you forget the entire process like I did once? First, remember that **nobody is perfect**, and second, let out that kitchen frustration! Grab an apple pie from the freezer, heat it up, and laugh about your custard failures because it’s all about enjoying food, right?
Final Words of (Culinary) Wisdom
If you’ve made it this far, I applaud you! Go ahead, throw caution to the wind, and savor every last spoonful of your homemade vanilla custard. It’s not just about satisfying your sweet tooth; it’s an experience!
Now go forth, my fellow dessert philosopher, and create, share, and relish the custard magic. If you try my recipe, please tag me! Or simply send me a mental high-five because those are just as meaningful in our food-obsessed world. Happy custarding!