Prep time: 15 minutes
Cook time: 5 minutes
Total time: 20 minutes
Servings: 20 servings
Homemade gummies are not just a delightful treat for kids; they also cater to adults looking for healthier candy options. Picture this: you’re bustling through your busy afternoon and are suddenly hit by a craving for something chewy and sweet. Instead of reaching for store-bought candy filled with preservatives and artificial ingredients, wouldn’t it be great to have a stash of homemade gummies at your fingertips? This recipe offers you the chance to create tasty, colorful gummies that are not only fun to make but also healthy, satisfying your sweet tooth without the guilt.
This recipe allows you to tap into your creativity by customizing flavors and shapes. By using natural fruit juices and sweeteners, you can create a treat that is not only delicious but also packed with nutrients. You’ll learn how to make these delightful jellies using simple ingredients while discovering tips to make the process easier and variations to suit your flavor preferences.
What Is Homemade Gummies: A Fun and Healthy Treat!?
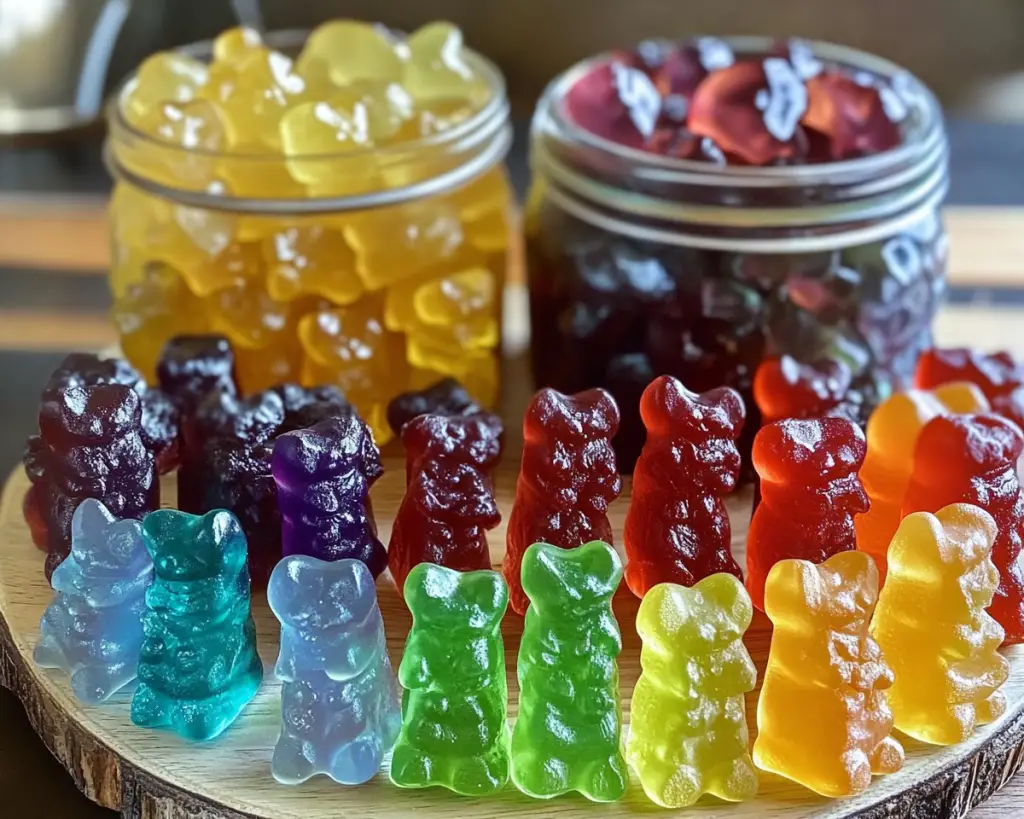
Homemade gummies are chewy, sweet candies made primarily from gelatin, sugar, and fruit juice. The origin of gummy candies dates back to the early 1920s in Germany, where they were first created in the form of gummy bears. Since then, they have become a beloved treat across the globe, evolving in flavors and forms. The texture of these gummies is wonderfully soft and bouncy, providing that satisfying chewy experience that so many love about store-bought options but without the additives.
You can control the flavor and sweetness of your gummies, creating a sweet experience that reflects your preferences or those of your family. Imagine biting into a gummy filled with the vibrant taste of fresh strawberries or zesty lemons—when you make your own, the flavor possibilities are endless. This DIY approach not only assures you of better ingredients but also allows you to experiment and create personalized flavors that cater to everyone’s tastes.
Why You’ll Love This
There are countless reasons to love homemade gummies. First and foremost, they provide a fantastic opportunity to indulge in a sweet treat while being conscious of health. Traditional gummy candies typically contain high amounts of sugar and artificial flavors, but this recipe allows you to utilize natural ingredients. Not to mention, it’s an economical choice—a batch of homemade gummies often costs less than a store-bought option.
Another significant benefit of homemade gummies is their simplicity. Even if you are a beginner in the kitchen, this recipe requires minimal ingredients and simple instructions, making the entire process accessible and fun. Plus, these gummies are highly versatile. You can adjust the sweetness to suit your taste or even cater to specific dietary needs. Whether you’re making a fruity version for kids or incorporating herbs for an adult palate, the possibilities are extensive.
Additionally, making gummies can be a fun activity with children or a creative solo endeavor, allowing you to explore flavors and shapes that appeal to you. Lastly, many people mistakenly believe that homemade candies will take too long or will be too complicated. In reality, the process is quick and straightforward, leading to a product that will bring joy to you and those you share them with.
Ingredients You’ll Need
- Gelatin: This is the key ingredient that gives gummies their unique texture. You can use unflavored gelatin, but for easier substitution, look for vegan alternatives like agar-agar.
- Fruit Juice: Freshly squeezed juice or store-bought juice without added sugars works best. Popular choices include orange, apple, and berry juices.
- Sweetener: Natural sweeteners like honey, maple syrup, or agave nectar add sweetness without the use of refined sugars. Adjust the amount according to your taste preferences.
- Citric Acid: Optional, but highly recommended for a tangy flavor. This enhances the taste and mimics the flavor profile of store-bought gummies.
- Food Coloring: If you wish to boost the visual appeal, you can use natural food coloring or leave it out for a more rustic look. However, opt for organic or all-natural dyes to keep it healthy.
Each ingredient plays a vital role in the creation of your gummies. The gelatin not only gives structural integrity but also allows for that bounce-back texture that makes gummies fun to chew. Fruit juice is your source of flavor and natural sugars, providing some nutritional value, while sweeteners can enhance the level of sweetness and richness to your gummies. By using high-quality ingredients, you can create a delightful treat that everyone will enjoy.
How to Make
- Begin by gathering all your ingredients. Measure out 1 cup of your chosen fruit juice and pour it into a medium saucepan. Add 2 tablespoons of gelatin and allow it to bloom for about 5 minutes. This step is essential as it allows the gelatin to hydrate properly for the perfect texture.
- Once the gelatin has bloomed, you can begin heating the mixture over low to medium heat. Stir gently until the gelatin has fully dissolved. Be cautious not to boil the mixture, as overheating could damage the gelatin’s gelling properties.
- Next, add in your selected sweetener—around 2-3 tablespoons should suffice, but you can adjust this based on your taste. If you’re using citric acid for additional tanginess, add about 1 teaspoon at this stage. Stir until the mixture is completely smooth and free of lumps.
- Now, it’s time to transfer the mixture into your gummy molds! Use a dropper or small measuring cup for easy pouring, and fill the molds to your desired height. Consider using silicone molds, as they make demolding easier once the gummies are set.
- Place the filled molds in the refrigerator for at least 2-3 hours or until fully set. The longer you leave them, the firmer the texture will be. Once fully chilled, gently pop the gummies out of the molds. Store them in an airtight container and enjoy them over the next week!
This process is straightforward, yet provides a sense of accomplishment when you see your finished gummies transform from liquid to delightful chewy treats. Be attentive during the heating process to maintain a gentle temperature. If you prefer a firmer gummy, simply increase the amount of gelatin used.
Variations & Substitutions
Fruit-Infused Variations: One delightful twist to your homemade gummies is incorporating cubes of fresh fruit into the mixture before pouring it into molds. This not only adds a pop of flavor with real fruit pieces but also appeals visually, making the treats more tempting. Fruits like strawberries, kiwis, or blueberries can elevate the texture and taste.
Herbal Infusions: If you’re interested in something more sophisticated, consider adding herbs or tea to your gummies. For example, steeping chamomile or mint leaves in your fruit juice before adding it to the gelatin can provide a unique flavor profile. These gummies can be refreshing and even soothing, making them a great option for a calming afternoon snack.
Vegan Gummies: For a completely plant-based version, replace the gelatin with agar-agar, a seaweed extract that works well as a gelling agent. Agar-agar behaves a bit differently than gelatin, requiring a slightly different preparation method, so be mindful of the measurements. Vegan gummies typically yield a firmer texture, perfect for those who prefer a little more chew.
Low-Sugar Options: If you’re concerned about sugar intake, you can opt for alternatives using stevia or erythritol. Both sweeteners provide sweetness without the high calorie count, making them suitable for those on a low-sugar diet. Remember to taste your mixture before setting it, as these sugar substitutes can vary in sweetness.
Common Mistakes to Avoid
Making homemade gummies can be a fun process, but there are some common pitfalls to watch out for. One frequent mistake is overheating the mixture, which can lead to a failure in the gelling process. Always use low to medium heat and avoid boiling. If your mixture doesn’t set properly, it may be due to the gelatin not being dissolved completely, so be sure to stir well until all is clear.
Another mistake is using sweeteners that can impart off-flavors. For instance, if you choose an artificial sweetener, it may affect the final taste. Instead, opt for natural sweeteners that are often more forgiving. Also, keep in mind that adding too much liquid can dilute the flavor and make the gummies softer than desired. Investing in silicone molds can also help prevent the sticking that can occur with traditional plastic molds, ensuring your gummies maintain their shape.
Storage, Freezing & Reheating Tips
Homemade gummies are best stored in an airtight container at room temperature. This helps them maintain their chewy texture and keeps them fresh for up to a week. If you live in a warm climate, consider refrigerating them to prolong their shelf life.
Freezing is also an option if you want to prepare a larger batch. Arrange the gummies in a single layer on a baking sheet and place them in the freezer until solid. Once frozen, transfer them to a freezer-safe bag. They’ll stay fresh for several months, ready for whenever the craving strikes. While freezing will not harm the gummies, they may become slightly firmer upon thawing.
When reheating isn’t necessary in the way you might think for these candies, proper care during storage can keep them delicious for a long stretch. Just remember that returning to room temperature will restore their ideal chewiness.
Frequently Asked Questions
Can I use store-bought fruit juice for my gummies? Absolutely! Store-bought fruit juice without added sugars works perfectly for this recipe. However, be mindful of fruit juices that contain preservatives, as they may affect the texture of your gummies.
How can I make my gummies firmer? If you prefer firmer gummies, simply increase the amount of gelatin you use. You might start with 3 tablespoons instead of 2 for a more satisfying chew.
Are homemade gummies suitable for children? Yes, homemade gummies can be a healthier option for children as they contain natural ingredients without artificial additives. Just ensure that sweeteners are appropriate for children’s diets.
Can I mold my gummies into different shapes? Absolutely! Silicone molds are available in a vast array of designs, from classic bear shapes to fun characters. Just ensure they are properly greased to prevent sticking.
What if my gummies didn’t set properly? If your gummies didn’t set, it’s likely due to under-measurement of gelatin or overheating during the process. Try adjusting these factors next time or allowing them to chill longer in the refrigerator for better results.
Conclusion:
Homemade gummies are a delightful, fun, and healthy treat that everyone in your family will enjoy. Not only do you have the power to customize flavors and textures to your liking, but you also get to steer clear of unhealthy additives commonly found in store-bought versions. The ease and simplicity of this recipe make it accessible for everyone, whether you’re a beginner in the kitchen or a busy parent looking for convenient snacks. I encourage you to try this recipe, experiment with variations, and share your creations with friends and family. Happy gummy making!