**Prep time**: 15 minutes
**Cook time**: 25 minutes
**Total time**: 40 minutes
**Servings**: 12 bars
If you’re looking for a delightful dessert that’s bursting with flavor but won’t keep you in the kitchen for hours, these Easy Lemon Cream Cheese Bars with Crescent Roll Crust are perfect for you. Imagine biting into a luscious lemony cream cheese filling perched atop a golden, flaky crust—it’s the kind of treat that makes your taste buds sing and your heart smile.
These bars not only emphasize bright citrus goodness but also take advantage of the convenience and versatility of store-bought crescent roll dough. For busy parents, students, or anyone who loves to save time without sacrificing taste, this recipe is a true gem.
In this article, you’ll learn how to whip up these delicious lemon cream cheese bars in just 40 minutes, with tips for perfecting the recipe, alternatives to fit dietary needs, and answers to common questions. Let’s dive into this delightful dessert!
What Are Easy Lemon Cream Cheese Bars with Crescent Roll Crust?
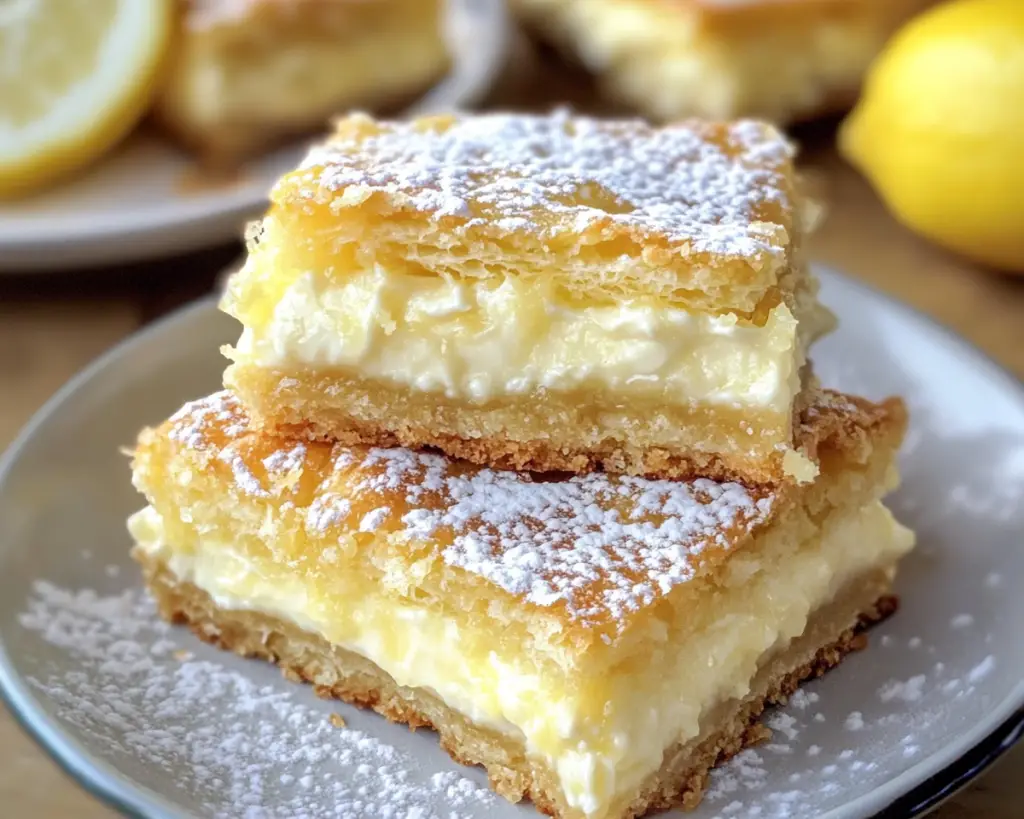
Easy Lemon Cream Cheese Bars with Crescent Roll Crust are a heavenly dessert that combines the tangy brightness of fresh lemons with the rich, creamy texture of cream cheese, all nestled within a soft, buttery crescent roll crust. These bars are not only visually appealing, often dusted with powdered sugar, but they also boast a delightful contrast of flavors and textures.
Originating from a blend of classic cheesecake flavors and quick-to-make dough, this dessert is a beloved favorite across various gatherings—from summer picnics to holiday parties. The creamy filling is made using basic ingredients like cream cheese, sugar, and fresh lemon juice, which creates an irresistible filling that is both tart and sweet. The crescent roll crust adds a flaky and tender touch, making these bars easy to cut and serve.
The aroma of lemon wafting through your kitchen as these bars bake is enough to brighten anyone’s day. The delightful taste and the ease of preparation make these bars not just a dessert but a comforting food memory that you’ll cherish.
Why You’ll Love These Easy Lemon Cream Cheese Bars
There are so many reasons to fall in love with these Easy Lemon Cream Cheese Bars! Here are just a few:
– **Quick & Easy**: This recipe comes together in a matter of minutes, with a simple bake time, providing a delicious dessert without taking too much time away from your day.
– **Bright Flavor**: The combination of tangy lemon and creamy cheese creates a mouthwatering contrast that is refreshing and satisfying, making it perfect for any occasion.
– **Versatile**: These bars can be served as a sweet treat at a birthday party, an afternoon snack, or even as a light dessert after dinner. They are perfect for summer gatherings as the lemon adds a cooling factor.
– **Budget-Friendly**: Utilizing crescent roll dough and basic pantry staples keeps the cost down while still delivering on flavor. You can impress your guests without breaking the bank!
– **Make-Ahead Friendly**: Once prepared, these bars can be stored and will actually improve in flavor the next day, making them perfect for meal prep or last-minute gatherings.
However, one common misconception is that baking with cream cheese requires expert-level skills. In reality, this recipe is incredibly beginner-friendly, allowing even novice bakers to shine.
Ingredients You’ll Need
Here’s a list of the ingredients crucial for making these Easy Lemon Cream Cheese Bars with Crescent Roll Crust, along with explanations for each:
– **Crescent Roll Dough (2 cans)**: The base of your crust, offering a flaky, buttery taste. While you can use store-bought, homemade dough can work if you’re feeling adventurous.
– **Cream Cheese (16 oz, softened)**: The primary filling, providing richness and creaminess. Ensure it’s at room temperature to prevent lumps in your filling. You can substitute with Neufchâtel cheese for a lighter version.
– **Granulated Sugar (1 cup)**: This sweetener balances the tartness of the lemon juice and zest, creating a well-rounded flavor.
– **Lemon Juice (1/4 cup, fresh)**: Freshly squeezed is preferred over bottled; it offers a bright, vibrant flavor that elevates the bars.
– **Lemon Zest (1 tablespoon)**: Adds depth to the lemon flavor, enhancing the overall zestiness of the bars.
– **Vanilla Extract (1 teaspoon)**: Rounds out the flavors with its warm sweetness.
– **Eggs (2 large)**: Acts as a binding agent for the filling, providing structure and stability for your bars.
– **Powdered Sugar (for dusting)**: Optional, but it adds a sweet finish and elevates the presentation.
These ingredients come together to create a treat that’s full of fantastic textures and tastes!
How to Make Easy Lemon Cream Cheese Bars
Follow these simple steps to create your delicious Easy Lemon Cream Cheese Bars:
1. **Preheat Your Oven**: Begin by preheating your oven to 350°F (175°C). This ensures your bars bake evenly and develop a beautiful golden color.
2. **Prepare the Crescent Roll Crust**: Open the cans of crescent roll dough (see tip below for helping with this process). Unroll the dough and arrange it in a greased 9×13-inch baking dish. Make sure to pinch any seams together to create a solid crust. You can also use a rolling pin to gently roll the dough into a more uniform layer.
*Tip: Ensure your dish is well-greased; this will help prevent sticking and make it easier to remove the bars once baked.*
3. **Bake the Crust**: Place the crust in the oven and bake for about 10 minutes or until it’s lightly golden and set. Don’t bake it too long, as you want this to remain soft since it will be topped with the lemon cream filling.
4. **Make the Filling**: While the crust is baking, in a mixing bowl, combine the softened cream cheese and granulated sugar. Using an electric mixer, blend until smooth and creamy. Add the eggs, lemon juice, lemon zest, and vanilla extract to the mixture. Beat until everything is well combined and you have a soft, smooth filling.
*Tip: Make sure there are no lumps in the cream cheese mixture as this will keep the texture silky.*
5. **Pour the Filling**: Once the crust has baked and is slightly cooled, carefully pour the lemon cream filling over the crust, spreading it evenly with a spatula.
6. **Bake Again**: Return the dish to the oven, baking for an additional 15 to 20 minutes. The filling will puff up and slightly jiggle when done, indicating it’s set.
*Tip: Keep an eye on it; the edges should be golden, and a toothpick inserted in the center should come out relatively clean.*
7. **Cooling Time**: Once baked, remove the bars from the oven and allow them to cool completely at room temperature before transferring them to the refrigerator. Chill them for at least 4 hours or until firm. Chilling ensures easier cutting into perfect squares and enhances the flavors.
8. **Serve**: Just before serving, dust the chilled bars with powdered sugar for a decorative and sweet touch. Cut them into squares and enjoy!
You now have a delightful dessert that’s bursting with flavor and guaranteed to impress family and friends!
5 Variations & Substitutions
Feel free to customize your Easy Lemon Cream Cheese Bars with these variations and substitutions:
1. **Berry Lemon Cream Cheese Bars**: Add a layer of your favorite berries, like blueberries or raspberries, on top of the cream cheese filling before baking. The tartness of the berries complements the lemon, creating a delightful twist. You may want to reduce the sugar slightly to balance the added sweetness from the fruit.
2. **Ginger Lemon Bars**: For a spiced-up version, add 1/2 teaspoon of ground ginger or finely chopped crystallized ginger to the filling. The heat from the ginger adds depth and layers of flavor.
3. **Lemon Lavender Bars**: Incorporate 1 teaspoon of culinary lavender into the cream cheese filling. The floral notes of lavender pair beautifully with lemon, creating a unique, gourmet flavor profile. Be cautious with the amount; lavender can be overpowering if used excessively.
4. **Key Lime Variation**: Substitute half of the lemon juice with key lime juice for a tropical twist. The key limes introduce a sharper, more intense flavor that’s deliciously refreshing.
5. **Gluten-Free Option**: Use a gluten-free crescent roll dough alternative instead of traditional; you can find options in specialty health food stores. This makes it suitable for those with gluten intolerances while still keeping it delectable.
Common Mistakes to Avoid
While making these Easy Lemon Cream Cheese Bars, keep these common pitfalls in mind to ensure your bars turn out perfectly:
– **Overmixing the Filling**: Mixing the cream cheese filling too much can incorporate excess air, leading to cracks on the surface post-baking. Mix until ingredients are just incorporated for a smooth result.
– **Using Cold Cream Cheese**: It’s crucial to use softened cream cheese at room temperature to avoid lumps in your filling. Take it out of the fridge ahead of time to allow it to soften naturally.
– **Not Pinching the Seams**: Forgetting to pinch together the seams of the crescent dough may lead to leaks as the filling bakes. Ensure those seams are sealed to keep all that lovely cream filling intact.
– **Overbaking the Bars**: Remove your dessert when it’s slightly jiggly but set; overbaking can lead to a dry filling. Keep a close eye and use visual cues to know when to pull them from the oven.
– **Skipping the Chill Time**: After baking, don’t rush to cut the bars. Letting them chill for several hours enhances the flavors and helps the bars hold their shape when cut. Patience is key!
Storage, Freezing & Reheating Tips
These Easy Lemon Cream Cheese Bars are not only delicious but also practical when it comes to storage.
– **Storage**: Keep any leftover bars in an airtight container in the refrigerator; they can last up to 5 days. The flavors will meld together, making them even tastier after a day or two.
– **Freezing**: If you want to enjoy these bars later, they freeze beautifully. Wrap the bars tightly in plastic wrap and then in aluminum foil to prevent freezer burn. They can be frozen for up to three months.
– **Reheating**: Thaw in the refrigerator overnight when you’re ready to enjoy them again. They can be served cold right from the fridge, or you can allow them to come to room temperature for enhanced flavor and texture.
Always remember to keep an eye on food safety best practices, particularly when it pertains to dairy ingredients like cream cheese.
Frequently Asked Questions
1. **Can I use a different type of fruit juice?**
Absolutely! While lemon juice is traditional, experimenting with other fruit juices like lime or orange can provide delightful results. Just follow the same proportions to maintain balance.
2. **Can I make these bars vegan?**
Yes, you can! Substitute the cream cheese with a plant-based alternative, use aquafaba (the liquid from canned chickpeas) in place of eggs, and choose vegan crescent rolls to create a delicious vegan version.
3. **How do I know when the bars are done baking?**
The filling should be set but slightly jiggly in the center. A toothpick inserted in the filling should come out relatively clean. Keep an eye on the edges as they will puff up and turn a golden brown color.
4. **Can I use store-bought lemon juice instead of fresh?**
While you can use store-bought lemon juice, the flavor won’t be as bright or vibrant. Fresh juice and zest elevate the flavor significantly. If possible, opt for fresh lemons.
5. **What can I do with leftover filling?**
If you find yourself with extra filling, consider making mini tartlets or filling a graham cracker crust for a quick mini cheesecake. You can even use it as a topping for pancakes or waffles for a sweet breakfast!
In conclusion, these Easy Lemon Cream Cheese Bars with Crescent Roll Crust are a perfect balance of creamy, zesty, and sweet flavors that are sure to impress everyone at your next gathering or simply serve as a delightful treat for yourself. The ease of preparation and stunning results make them a must-try recipe in every home baker’s repertoire.
So, gather your ingredients, give this recipe a try, and let the delightful aroma of lemon fill your kitchen! Enjoy creating this simple yet decadent dessert, and don’t forget to share your creations with friends and family or share a few on social media to inspire others. Happy baking!


