Prep time: 15 minutes
Cook time: 10 minutes
Total time: 25 minutes
Servings: 16
There’s something utterly comforting about making candy at home, especially when it comes to fudge. If you’ve ever indulged in the velvety sweetness of Biscoff cookies, then you’re in for a real treat. Welcome to this delightful journey of creating Easy Homemade Biscoff Fudge! Imagine the rich, spiced flavor of the beloved Biscoff cookie combined with creamy, luscious fudge—it’s the best of both worlds. This recipe is not just about satisfying a sweet tooth; it’s about creating a rich experience filled with warmth, nostalgia, and a hint of adventure in your kitchen.
In this article, you’ll discover how simple it is to achieve an indulgent dessert that could easily become your next go-to treat. By the end, you’ll be armed with tips, variations, and even answers to common questions. So grab your apron, and let’s dive into the sweet world of Biscoff fudge!
What Is Easy Homemade Biscoff Fudge Recipe?
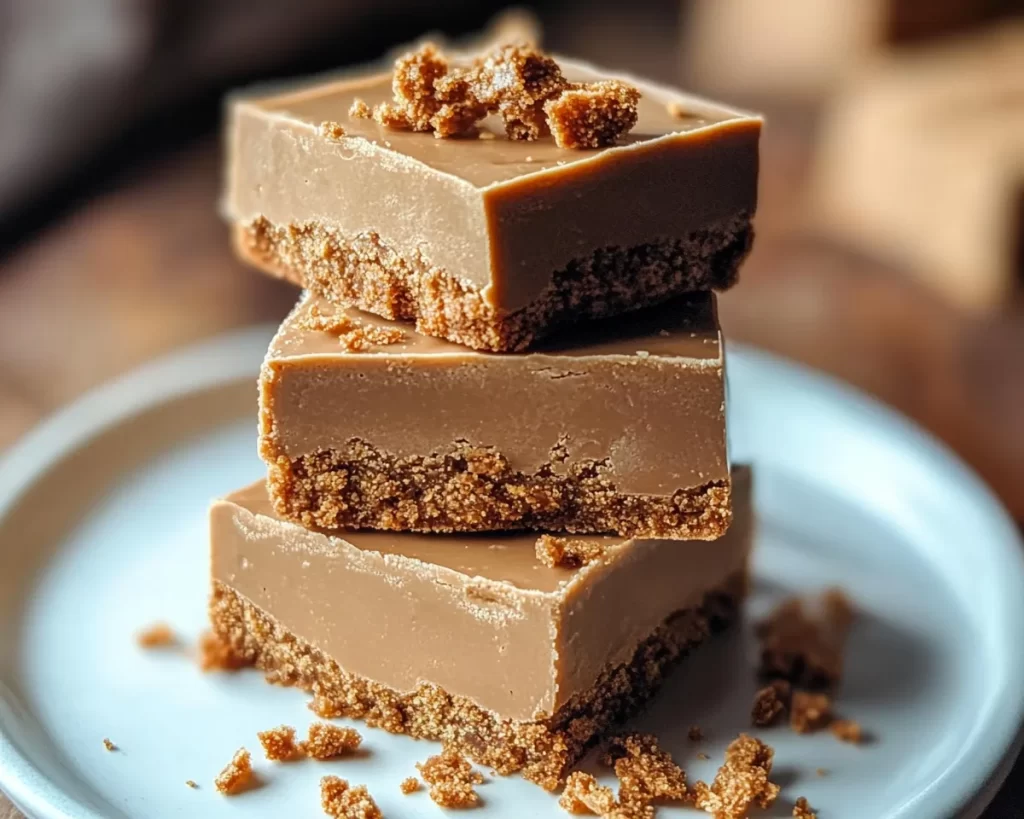
Easy Homemade Biscoff Fudge is a rich twist on traditional fudge that incorporates the captivating flavor of Biscoff cookies, known for their caramelized, spiced undertones. Originating from Belgium, Biscoff cookies have taken the world by storm, especially as a delightful pairing with coffee. This fudge amplifies that unique flavor, making it a creamy, dreamy treat.
The texture of this fudge is incredibly smooth and melt-in-your-mouth, thanks to the perfect blend of chocolate and frosting. The added Biscoff spread gives it a delightful creaminess while maintaining that signature crunch of the cookie. As you bite into a piece, you’ll experience a lovely combination of sweet and slightly spicy notes, a taste that lingers and beckons you for more. What’s more, this fudge doesn’t demand extensive skills or time—making it perfect for busy parents, beginners in the kitchen, or simply anyone wanting to whip up a quick treat.
Why You’ll Love This
You’re going to love this Easy Homemade Biscoff Fudge for several compelling reasons. First and foremost is the incredible flavor—it’s a delightful balance of chocolate and spiced cookie that creates an entirely unique dessert experience. Secondly, the ease of preparation is a game-changer; you can whip up a batch in just about 25 minutes, making it an ideal option for spontaneous cravings or last-minute gifts.
Another excellent factor is the cost. Making fudge at home is significantly cheaper than buying gourmet confections from a store. Plus, you know exactly what ingredients are going into your fudge, allowing you to make healthier choices without sacrificing taste.
Often, people think making fudge is complicated and can lead to a grainy texture if not done right; however, this recipe employs straightforward methods to ensure your fudge comes out smooth and delicious every time. For those familiar with traditional fudge, you may find that this recipe cuts down on the cooking time and complicated steps usually associated with candy-making.
Ingredients You’ll Need
- White chocolate chips: These are the base of your fudge, providing a creamy texture. You can substitute with milk chocolate or dark chocolate if you prefer a different flavor profile.
- Biscoff cookie spread: This key ingredient adds richness and that iconic Biscoff flavor. If you can’t find it, you can blend crushed Biscoff cookies with some cream for a substitute.
- Sweetened condensed milk: This ingredient helps bind everything together and adds sweetness. It’s essential for achieving the right consistency; evaporated milk will not work as a substitute.
- Butter: Adds richness and helps improve the texture of your fudge. Use unsalted butter for better control over the sweetness.
- Biscoff cookies: Chopped cookies provide texture and that delicious crunch. Feel free to adjust the amount based on your preference for cookie bites in your fudge.
How to Make
1. **Prepare Your Baking Dish**: Start by lining an 8-inch square baking pan with parchment paper, allowing some overhang for easy removal later. This step is crucial for keeping your fudge intact and avoiding any sticky mess.
2. **Melt the White Chocolate**: In a medium saucepan over low heat, combine the white chocolate chips and butter. Keep stirring continuously to prevent burning. The chocolate should be melted and smooth, taking about 5 minutes.
3. **Add the Sweetened Condensed Milk**: Once your chocolate and butter mixture is smooth, slowly stir in the sweetened condensed milk. This will create a rich and creamy mixture. Continue stirring until everything is well combined and smooth.
4. **Incorporate Biscoff Spread**: Remove the saucepan from the heat and fold in the Biscoff cookie spread. This will infuse that unique flavor into your fudge. Stir until it’s evenly combined and has a warm, inviting aroma.
5. **Fold in Chopped Biscoff Cookies**: Gently add the chopped Biscoff cookies to the mixture. This step adds texture and crunch, making every bite exciting. Ensure that the cookies are evenly distributed through the fudge mixture.
6. **Pour into the Pan**: Carefully transfer the fudge mixture into the prepared baking dish. Use a spatula to press it down and create an even top. You want to make sure that it’s compact, which will help when slicing later.
7. **Chill**: Place the fudge in the refrigerator for about 2 hours, or until it’s set. This step is essential, as chilling will firm up the fudge, making it easier to cut into squares.
8. **Cut and Serve**: Once set, lift the fudge from the pan using the parchment paper overhang. Cut it into squares or rectangles—whatever shape you prefer. Serve immediately or store in an airtight container.
Variations & Substitutions
Biscoff and Nut Fudge: For a delightful crunch, consider adding nuts such as chopped pecans or walnuts into the fudge mixture. This variation offers a textural contrast that enhances the overall experience, and it’s excellent for nut lovers. Just ensure the nuts are roasted and unsalted for the best flavor.
Vegan Biscoff Fudge: If you’re looking for a plant-based version, substitute the white chocolate chips with vegan chocolate chips and use coconut cream instead of sweetened condensed milk. This variation maintains all the delectable flavors while catering to a vegan diet.
Chocolate-Dipped Biscoff Fudge: For an extra layer of indulgence, after chilling and cutting the fudge, dip each piece in melted Biscoff or dark chocolate. This gives an indulgent finishing touch and elevates the overall flavor profile.
Spiced Fudge: For more warmth, adding spices such as cinnamon or nutmeg can enhance the fall flavors, making this fudge a perfect treat for the chilly months. Mix in about a teaspoon of your chosen spice after melting the chocolate for a cohesive taste.
Common Mistakes to Avoid
One common mistake is using chocolate that is too hot when adding other ingredients. This can cause the chocolate to seize up, leading to a grainy texture instead of the smooth finish you desire. Always allow the mixture to cool slightly before adding sensitive ingredients like sweetened condensed milk or Biscoff spread.
Another issue arises from not letting the fudge set properly in the refrigerator. If you don’t allow enough time for it to chill, the fudge will be too soft and crumbly when you try to cut it. Always ensure your fudge sets for at least 2 hours, but if time allows, leaving it longer can only improve its texture.
Lastly, don’t skimp on the parchment paper lining. A good lining not only helps with easy lifting but also prevents the fudge from sticking to the pan. If the fudge sticks, it can crumble apart, defeating the purpose of creating perfect squares.
Storage, Freezing & Reheating Tips
To ensure your Easy Homemade Biscoff Fudge stays fresh and delicious, store it in an airtight container at room temperature for up to a week. If you need to keep it longer, consider freezing it. Wrap individual pieces tightly in plastic wrap and place them in a freezer-safe bag. This helps to keep them from sticking together. Your fudge can last in the freezer for up to three months.
When you’re ready to enjoy, simply move the fudge to the refrigerator to thaw overnight. Avoid using a microwave to reheat any leftover fudge; this could cause it to become too soft and lose its desirable texture.
Always pay attention to food safety, especially when it comes to dairy products. If you notice any changes in smell or texture, it’s best to err on the side of caution and discard the fudge.
Frequently Asked Questions
Can I make Biscoff fudge without a microwave?
Absolutely! This recipe is great for stovetop cooking. Just melt the ingredients over low heat while continuously stirring, which allows for better control and reduces the risk of burning.
How do I know when my fudge is set?
The fudge will feel firm to the touch but will have a slight give when you press it. Check that it doesn’t leave a fingerprint, which indicates it’s ready to cut.
Can I use other types of chocolate for this fudge?
Yes! While white chocolate creates a creamy finish, you can certainly experiment with milk or dark chocolate. Just be mindful that this will change the flavor profile of your fudge.
Why is my fudge grainy?
A grainy texture is often caused by sugar crystallization. To avoid this, ensure that both the chocolate and condensed milk mixture is carefully combined over low heat, preventing it from cooking too quickly.
Is this fudge suitable for freezing?
Yes, it freezes beautifully! Just ensure you wrap it well in plastic wrap and store it in an airtight container or a freezer-safe bag to maintain its quality.
Conclusion:
This Easy Homemade Biscoff Fudge truly embodies the spirit of indulgence and comfort in dessert-making. With its unique flavors, quick preparation time, and delightful texture, it’s a recipe you’ll want to keep on hand for holidays, special occasions, or even a simple sweet treat after dinner. So don’t hesitate—try stepping into the kitchen and creating this luscious fudge, customizing it to your delight, and sharing it with loved ones. You may just find it becomes a cherished tradition for years to come!