Let’s get real. I don’t know about you, but I’m a sucker for baked goods. Seriously, if it can be combined with butter and sugar, sign me up! But, you know, some days I need something a little less guilt-inducing than the usual cake, especially when the weather is as dreary as it has been lately. It’s like Mother Nature looked at a sunbeam and decided to block it out with a thick blanket of clouds. And honestly, I don’t even know why I live in a place with such unpredictable weather. It’s completely normal to crave something warm and comforting when it’s gray outside, right?
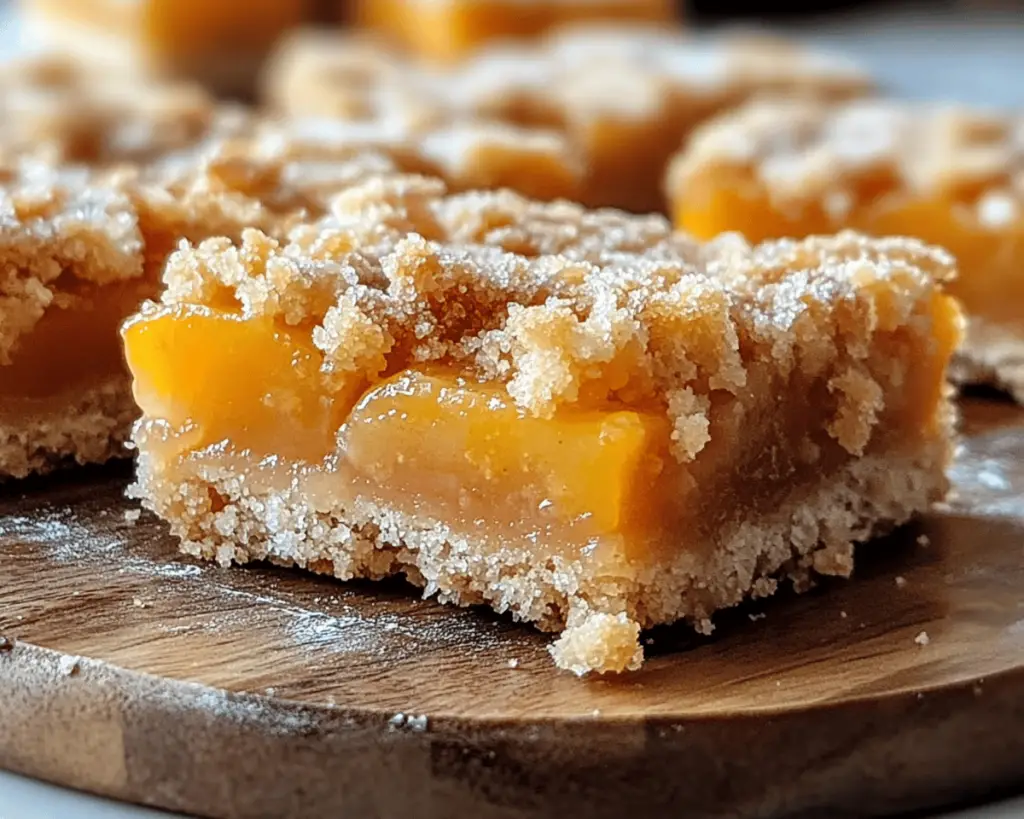
Enter: Easy Apricot Crisp Bars. Remember those days of liking fruit? (Ha! Whoever liked fruit as a kid anyway, right?) And yet, here I am, adulting like a boss and getting surprisingly excited about fruit, especially when it’s baked into something as delightful as these bars. Let’s face it; the soggy, canned apricot halves of my childhood aren’t anything like the juicy, sun-kissed apricots we get these days. If I knew then what I know now, I would have begged my mom to whip up these bars instead of trying to make peace with those sad little fruit cups.
So, grab your apron, and let’s dive into these Easy Apricot Crisp Bars, shall we? You won’t regret it—unless, of course, you forget the butter, in which case, run far, far away!
—
### Ingredients, Unfiltered
#### What’s Really in Easy Apricot Crisp Bars
Let’s break down the ingredients and see what we’re working with.
– **Apricots:** The star of the show! Fresh, ripe apricots work best here, and you can even use dried apricots if you live in a place where fresh ones are as rare as unicorns. Just soak them in warm water for about 15 minutes to plump ‘em up, and voilà! Instant real fruit love.
– **Butter:** Ah, butter. The magic elixir of life. I usually opt for unsalted butter, because I like to control my sodium, but if you only have salted on hand, go wild! Just dial back the added salt later, or don’t. Live a little.
– **Brown Sugar:** This will give your bars that delicious, caramel-like flavor. Honestly, if I could bathe in brown sugar, I probably would. Like, why is it so much better than white sugar? Let’s start a movement.
– **Oats:** A must-have for that chewy, crumby texture. I usually grab old-fashioned rolled oats, because they hold up nicely during baking. I’m not saying I’ve tried to use instant oats and ended up with a mushy mess before, but… I definitely don’t recommend it.
– **Flour:** Don’t skimp on this one! All-purpose works like a charm here, but you can swap it out for gluten-free flour if that’s your jam. Just know that some gluten-free mixes can absorb more liquid, so you might need a touch more butter or some water depending on how things look.
– **Cinnamon:** Because let’s face it, cinnamon makes every dessert that much cozier. It’s like sitting by a fire with a warm blanket, sipping apple cider, and contemplating life’s most profound questions. (Okay, maybe not that deep, but you get the idea.)
– **Salt:** Just a pinch! It enhances all the flavors like magic. Don’t skip it; your taste buds will revolt.
—
### Let’s Talk Health (or Not)
#### Is This Even Healthy? Let’s Discuss
Alright, let’s just rip the band-aid off—these bars aren’t going to win any health awards anytime soon. Sure, we have *some* fruit in there, and oats are basically health food, right? But let’s call a spade a spade: they’re mostly sugar and butter.
Look, I’m not on this health crusade that involves denying myself all things delicious. You want a little butter and sugar in your life. It makes us human. So let’s embrace that! These bars are a delightful treat, and I’ll sleep just fine at night knowing I indulged a little. If they were straight-up healthy, would they be as tasty? Nope, and I’m not interested in that life.
So go ahead—pair these bars with your afternoon cup of coffee or tea and relish in the joy of eating something that’s equal parts comforting and delicious.
—
### Your Grocery List
#### Here’s What You’ll Need
– 2 cups fresh apricots, diced (or 1 ½ cups dried apricots, soaked)
– ½ cup unsalted butter, melted
– ½ cup brown sugar
– 1 cup old-fashioned rolled oats
– 1 cup all-purpose flour (or gluten-free flour)
– 1 tsp ground cinnamon
– ¼ tsp salt
*Yields: About 16 bars—perfect for sharing!*
—
### Okay, Let’s Make This
#### The Actual Cooking Part
Now comes the fun part—let’s get baking! We’re going to make this so simple, you won’t even break a sweat. Okay, maybe a tiny sweat ’cause, you know—oven on and all. But I promise this will be a low-maintenance cooking adventure!
1. **Preheat Your Oven:** Fire that guy up to 350°F (175°C). This is where the magic begins. It’s almost like a dance party for food, and you should definitely be a part of it.
2. **Prep the Pan:** Grab an 8×8-inch or 9×9-inch baking pan and line it with parchment paper for easy removal later. Trust me, you don’t want to be wrestling with your dessert because you forgot this crucial step. It’s like trying to get your cat into a carrier—nothing short of a cat thriller movie!
3. **Mix Your Filling:** In a bowl, toss your diced apricots (or soaked dried apricots) with a tablespoon of brown sugar and let it sit for a minute. This will help draw out some natural juices, giving your bars that lovely fruity flavor.
4. **Make the Crumble:** In another bowl, combine the melted butter, brown sugar, oats, flour, cinnamon, and salt. Mix it all together until it resembles a crumbly dough. Honestly, if you reach the point where you’re shoving your hands in there to really mix it up, you’re doing it right. You might feel like you’re ruining your manicure, but you’re not! Multi-tasking is the name of the game, and the dough is worth it!
5. **Layer it Up:** This is where the fun begins! Press half of the crumble mixture into the bottom of your prepared baking pan. Now it’s time for the apricot filling. Spoon it over the top, making sure it’s evenly distributed—don’t worry if some of it goes rogue; live your best life with those apricots.
6. **Top It Off:** Sprinkle the remaining crumble over the apricots. Don’t skimp on this part—it’s like the final touch that makes everything as beautiful as a sunset at the beach (okay, maybe that’s a stretch, but you get it).
7. **Bake Away:** Pop that beauty in the oven and bake for about 30-35 minutes or until it’s golden brown and you can smell it from the other room. I mean, let’s be real—baking is basically just waiting for your house to smell like a bakery, and when it does, you know it’s all worth it.
8. **Cool it Down:** Once baked, allow the bars to cool in the pan for at least 20 minutes. If you can resist, let them cool completely before slicing—but who am I kidding? I usually slice into them while they’re still warm enough to burn my mouth. Worth it!
—
### Bonus Tips You Didn’t Ask For
Alright, my lovely baking enthusiasts, here are some bonus tips to elevate your Apricot Crisp Bars game:
1. **Customize Like a Boss:** Don’t have apricots? Try peaches or pears—just make sure they’re ripe and juicy. You could even mix and match different fruits; after all, variety is the spice of life!
2. **Consider the Toppings:** A scoop of vanilla ice cream or a dollop of whipped cream will take these bars to a whole new level of amazing. Seriously, it’s like a summer party in your mouth.
3. **Freezer Friendly:** These bars freeze beautifully! Cut them into squares, wrap them tightly, and toss them in the freezer. When you need a last-minute treat or a snack, just pop one out and hit the microwave for a few seconds. Instant happy moments!
4. **The Snoop and Swap Policy:** If you’re running low on brown sugar, mix some white sugar with a bit of molasses for a makeshift brown sugar effect. We’re all about ingenuity around here—hello, kitchen MacGyver!
5. **Less is More:** Think you might add nuts? Think again! I’m a firm believer that true fruit desserts should showcase the fruit, not compete with it. No one needs a walnut trying to upstage apricots in this dessert.
—
### Final Words of (Culinary) Wisdom
So there you have it—your guide to whipping up the most unbelievable, easy-to-make Apricot Crisp Bars. Honestly, these are such a crowd-pleaser, and they fill your home with the warm, fruity aroma that says “Welcome, I am your snack savior.”
Whenever you want to feel fancy without any fuss, these bars are the answer. And if you try them, please tag me in your pictures or send me a mental high-five from across the globe. Life is far too short not to relish in the small things, like a delicious dessert, a good cup of coffee, and knowing you’ve crushed another baking session like a rock star! Happy baking, friends!