Prep time: 10 minutes
Cook time: 15 minutes
Total time: 25 minutes
Servings: 12
Easter is a time of joy, celebration, and delicious treats! What could be better than indulging in delectable, colorful chocolate covered strawberries? These **Easter Chocolate Covered Strawberries: Tie Dye Pastel Chocolate Strawberries in 25 Minutes** are not only visually stunning but also incredibly simple to make. Whether you’re hosting a gathering or looking for a fun activity to do with the kids, this treat is sure to impress. Imagine juicy, ripe strawberries dipped in a variety of pastel colors, creating a festive masterpiece that screams springtime!
Creating these delightful strawberries will give your kitchen that vibrant Easter feel with a delightful taste that everyone will adore. Not only do they look amazing on any dessert table, but they also combine the deliciousness of fresh strawberries with the sweetness of chocolate. Making these will guarantee you that perfect balance of flavors that will have your guests reaching for another!
What Is Easter Chocolate Covered Strawberries: Tie Dye Pastel Chocolate Strawberries in 25 Minutes?
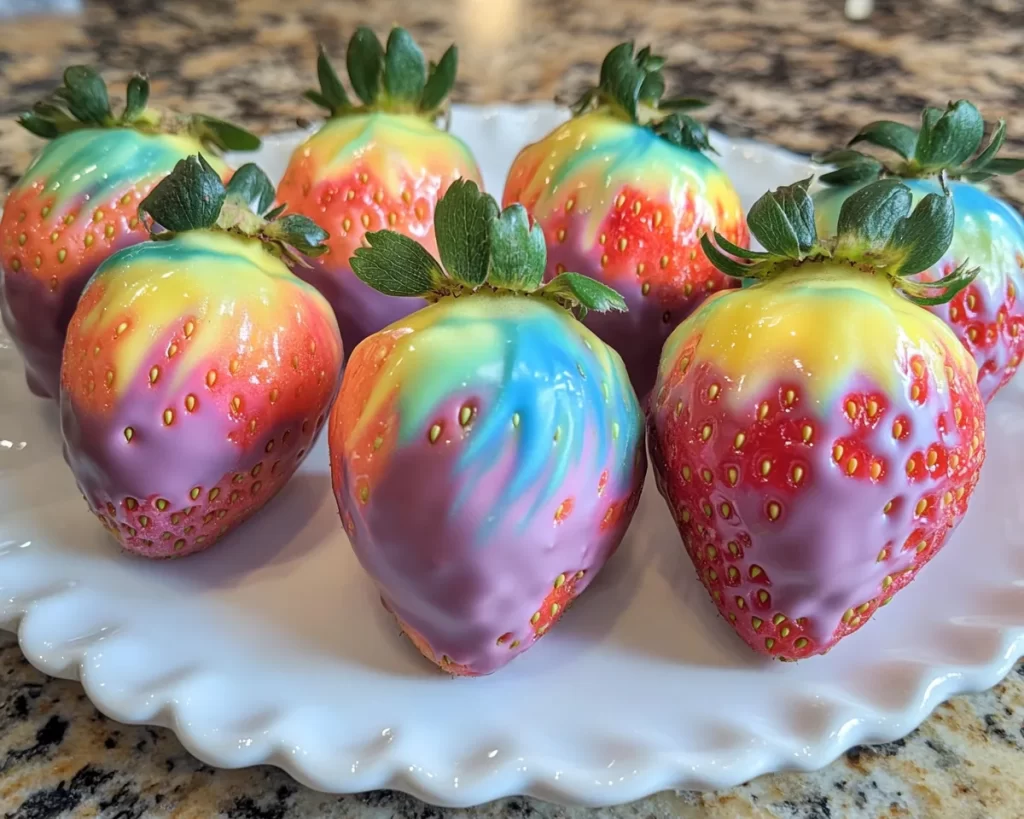
These Easter Chocolate Covered Strawberries are a delightful treat made by dipping fresh strawberries into rich chocolate and then swirling different pastel colors for a beautiful tie-dye effect. The chocolate coating adds a rich, creamy texture that complements the sweet and tangy flavor of the strawberries. Perfect for Easter brunch, formal parties, or casual family gatherings, these strawberries are versatile and eye-catching.
Making tie dye chocolate strawberries is a breeze! The use of melting chocolate allows for creativity and fun in the kitchen. You can customize the colors and toppings to suit your personal style or theme. Kids love getting involved in the process of decorating these festive treats, making it a cherished family activity.
Why You’ll Love This
These chocolate covered strawberries are a guaranteed hit for numerous reasons:
- Quick Preparation: The entire process from prep to finish takes just 25 minutes.
- Fun Activity: Great for kids and adults, allowing for creativity.
- Customizable: Different color combinations and toppings mean you can make them unique.
- Healthier Dessert: Strawberries provide nutritional benefits, making this a guilt-free pleasure.
- Pleasant Presentation: Their vibrant colors make them excellent eye candy for any occasion.
Ingredients You’ll Need
To make your own Easter Chocolate Covered Strawberries, gather the following ingredients:
- 1 pound fresh strawberries: Choose ripe and firm strawberries as they hold up better when dipped in chocolate. Look for berries that are bright red and free of blemishes. The freshness will greatly enhance the flavor.
- 12 ounces white chocolate chips: These will serve as the base for your pastel colors. White chocolate complements the strawberries perfectly with its sweet, creamy texture.
- Pastel food coloring: Use food coloring gels for vibrant colors. This is what creates the fun tie-dye effect. You can use any combination to get the desired shades.
- Paraffin or coconut oil (optional): To achieve a smooth and glossy finish for your chocolate, adding a small amount can make a difference. However, it’s not a must-have if you don’t have it on hand.
- Sprinkles (optional): For added fun and texture, colorful sprinkles or edible glitter can be used to decorate your strawberries.

How to Make
Now, let’s dive into the step-by-step instructions for creating these delightful chocolate covered strawberries:
- Prepare the strawberries: Rinse your fresh strawberries under cold water and gently pat them dry with a paper towel. It’s essential that they are completely dry; otherwise, the chocolate won’t adhere properly. Place the berries on a baking tray lined with parchment paper to get ready for dipping.
- Melt the white chocolate: In a microwave-safe bowl, melt the white chocolate chips. Heat in 30-second intervals, stirring in between until the chocolate is completely smooth and melted. If desired, add a small teaspoon of coconut oil or paraffin to give the chocolate a glossy finish.
- Add color to the chocolate: Divide the melted chocolate into several smaller bowls based on how many colors you want to create. Add a few drops of pastel food coloring to each bowl, mixing until you achieve your desired shades. Fold the color gently into the chocolate to keep it fluffy and airy.
- Dip the strawberries: Take each strawberry by the stem and dip it into the melted chocolate. Allow the excess to drip off. For the tie-dye effect, you can use a spoon to drizzle different colors over the chocolate-covered strawberries as you move them to the parchment paper.
- Adding toppings: If you’re using sprinkles, add them immediately after dipping, while the chocolate is still wet. This ensures that the sprinkles adhere well.
- Let them set: Allow the chocolate to set completely at room temperature. You can speed up the process by placing the tray into the refrigerator for about 15 minutes.
Variations & Substitutions
Chocolate Variations: Swap out white chocolate for dark chocolate or milk chocolate for a different flavor profile. Dark chocolate offers a richer taste that perfectly balances the sweetness of strawberries.
Fruit Variations: Try using other fruits like bananas, pineapple chunks, or apple slices. Each will bring its unique taste to the chocolate-covered treat and can be equally festive.
Toppings: Get creative with toppings like crushed nuts, coconut flakes, or even mini chocolate chips. These can enhance both texture and flavor, giving an extra crunch to every bite.
Dip Variations: Instead of using just food coloring in white chocolate, consider making a flavored chocolate by adding a bit of peppermint or orange essence for an exciting twist. This adds another layer of complexity to your dessert.
Common Mistakes to Avoid
While making chocolate-covered strawberries is straightforward, there are a few pitfalls to watch out for:
Using wet strawberries: Ensure the strawberries are completely dry. Moisture will cause the chocolate to seize up and not stick properly. It may also lead to a less appealing finish.
Overheating chocolate: When melting chocolate, be cautious not to overheat it. Doing so can lead to a tough texture. Always melt at lower temperatures and in short bursts.
Skipping the fridge: Don’t skip the setting step! Chocolate needs time to set up properly. If you’re in a hurry, once dipped, at least give them a few minutes in the fridge to harden.
Using the wrong type of chocolate: Make sure you’re using quality chocolate designed for melting. Chocolate chips often contain stabilizers that may prevent a good melting experience; they can become thick and clumpy.
Storage, Freezing & Reheating Tips
To keep your chocolate covered strawberries at their best, you should consider proper storage techniques:
Storage: Store your strawberries in an airtight container in the refrigerator. They are best enjoyed within 1-2 days after making to maintain freshness and texture.
Freezing: If you need to freeze them, place the strawberries on a baking sheet to freeze individually before transferring them to an airtight container. Just be aware that thawing may change the texture slightly.
Reheating: If you happen to have leftover chocolate, it can be re-melted. However, it’s not advisable to re-melt chocolate-covered strawberries as it can ruin the coating and the fruit itself.
Frequently Asked Questions
Can I use any type of chocolate for dipping? Yes, you can use dark, milk, or white chocolate for dipping strawberries. Each type provides a different flavor. Just ensure that the chocolate is meant for melting for the best results.
How can I prevent chocolate from hardening too quickly? If chocolate starts to harden before you’re finished dipping strawberries, gently reheat it over low heat or in 20-second intervals in the microwave to bring it back to a pourable consistency.
Can I add flavors to the chocolate coating? Absolutely! You can enhance the chocolate flavor with extracts like vanilla or almond. Just ensure not to add too much liquid, as it can cause the chocolate to seize.
Are these strawberries healthy? Chocolate covered strawberries offer a healthier alternative to many desserts. Strawberries are packed with nutrients and antioxidants, and the small amount of chocolate enhances their flavor. Moderation is key, making them a festive yet guilt-free treat.
Can I make these ahead of time? Yes, you can make chocolate covered strawberries a day in advance. However, they are best enjoyed fresh, as the strawberries can release moisture over time, compromising their texture.
Conclusion: These Easter Chocolate Covered Strawberries are not only a delightful treat but also a fun activity for friends and family. With whimsical colors and tasty strawberries, they add a festive flair to any occasion! Enjoy making them, experimenting with flavors, and, most importantly, savoring the fruits of your labor.