Prep time: 30 minutes
Cook time: 15 minutes
Total time: 45 minutes
Servings: 12
Indulging in a rich dessert can be one of life’s greatest pleasures, especially when it involves chocolate and peanut butter. Imagine biting into a soft, chocolatey roll filled with creamy peanut butter goodness, topped off with a glossy chocolate ganache. This Decadent Peanut Butter Cup Chocolate Roll promises to deliver that experience and more! As you embark on creating this luscious dessert, you will find that it is not only delicious but also surprisingly straightforward to prepare.
This recipe shines because of its versatility; it can be served at birthday parties, holidays, or just as a sweet treat to brighten up a day. You’ll learn how to craft a beautiful roll that showcases an irresistible combination of flavors and textures. So, gather your ingredients, and let’s dive into this easy-to-follow recipe that is sure to impress family and friends alike.
What Is Decadent Peanut Butter Cup Chocolate Roll?
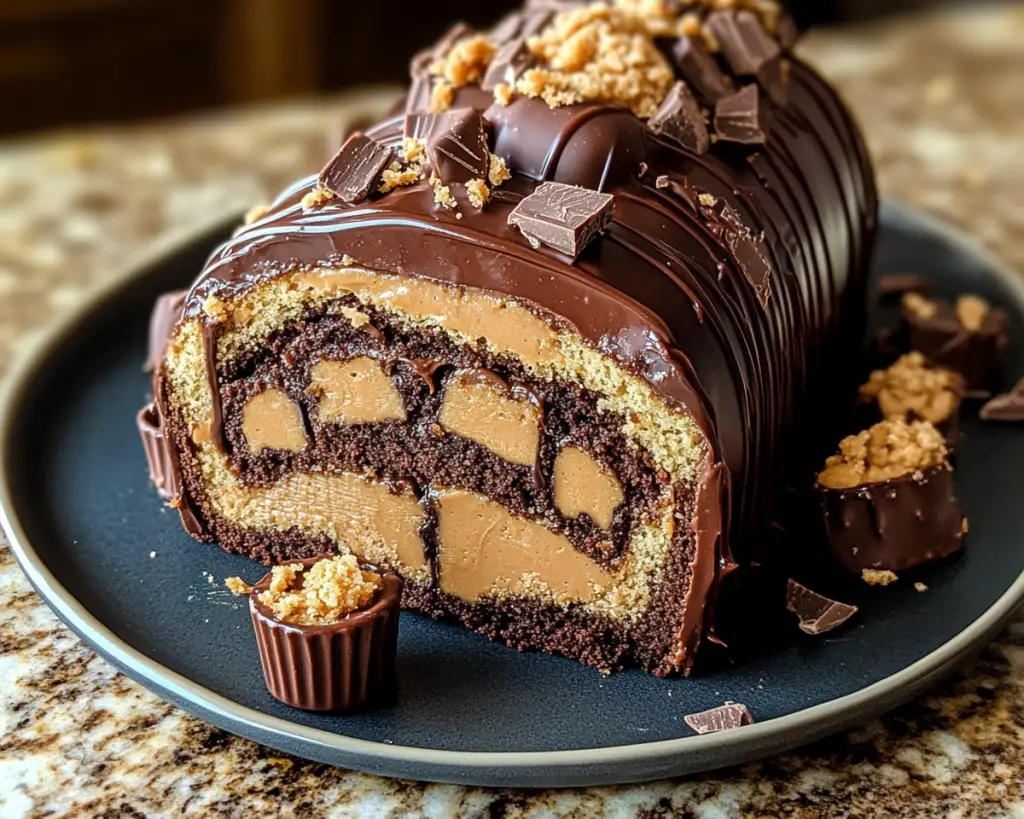
The Decadent Peanut Butter Cup Chocolate Roll is a show-stopping dessert that combines the creamy allure of peanut butter with the rich taste of chocolate. This delightful treat features a soft, sponge-like chocolate cake that rolls up effortlessly, creating a dessert that is not only pleasing to the eye but also a delight for the palate. Originating from classic Swiss rolls, this version incorporates the much-loved flavors of peanut butter cups, making it an all-time favorite for chocolate enthusiasts and peanut butter lovers alike.
The texture is nothing short of heavenly; the chocolate roll is moist and fluffy, offering a gentle resistance as you slice into it, revealing that tempting peanut butter filling. The final touch is a silky ganache that envelops the entire roll, providing a glossy finish that elevates its visual appeal. Each bite promises a harmonious blend of flavors—rich chocolate, creamy peanut butter, and just the right amount of sweetness that leaves you wanting more.
This dish is perfect for both novice bakers and seasoned cooks looking to impress at their next gathering. It allows you to explore your baking skills while enjoying a satisfying dessert that feels indulgent yet is surprisingly achievable at home.
Why You’ll Love This
There are numerous reasons to fall head over heels for this Decadent Peanut Butter Cup Chocolate Roll. First and foremost, its **taste** is undeniably addictive; the balance between the dark chocolate and creamy peanut butter creates a flavor explosion that tantalizes the taste buds. You will enjoy the melt-in-your-mouth texture that is soft and rich, making it an ideal dessert for any occasion.
Moreover, this recipe is incredibly **easy** to make. With just a few key ingredients, you can whip up this dessert in under an hour. You don’t need to be a professional baker to achieve stunning results; the step-by-step instructions are designed to guide you through the entire process with ease.
Cost-wise, this dessert is quite **friendly** to the budget, especially if you buy ingredients in bulk. Unlike many extravagant desserts, the ingredients required for the chocolate roll are relatively inexpensive, ensuring that you can treat yourself and your loved ones without breaking the bank.
It’s also a versatile dish; you can customize the recipe to suit various dietary needs and preferences. Whether you are vegan, gluten-free, or just looking to switch things up, there are several variations that can make this dessert fit your needs. Lastly, this Chocolate Roll makes an impressive centerpiece for gatherings. Once served, its beautiful presentation is sure to attract attention and start conversations.
Ingredients You’ll Need
- All-purpose flour: 1 cup — This forms the structure of the roll. It can be substituted with gluten-free flour blends for those with gluten sensitivities.
- Cocoa powder: 3/4 cup — A must for that rich chocolate flavor. It adds depth and intensity; use unsweetened cocoa for the best results.
- Sugar: 1 cup — Sweetness is essential for balancing flavors. You can use substitutes like coconut sugar for a healthier option.
- Baking powder: 1 teaspoon — This helps the roll to rise and become fluffy. Be sure to check the expiration date for effectiveness.
- Salt: 1/2 teaspoon — Enhances the flavors of the other ingredients; it’s often an overlooked component in baking but crucial for balance.
- Eggs: 4 large — Eggs bind the ingredients together and provide moisture. For a vegan alternative, consider using flax eggs.
- Vanilla extract: 1 teaspoon — Adds a lovely aromatic whisper to the roll; opt for pure vanilla extract for a richer flavor.
- Peanut butter: 1 cup — The star ingredient! Creamy peanut butter is ideal for a smooth filling; nut butter alternatives can be used for those with allergies.
- Heavy cream: 1 cup — Necessary for the ganache, it adds creaminess. If you’d like a lighter option, go for coconut cream.
- Chocolate chips: 1 cup — Use semi-sweet or dark chocolate for the ganache. Feel free to experiment with dairy-free options if desired.
Each ingredient plays a pivotal role in achieving the perfect balance of flavor and texture in this decadent dessert. You’ll be amazed at how their simple combinations yield such a stunning result.
How to Make
Creating your Decadent Peanut Butter Cup Chocolate Roll is simpler than you might think! Follow these easy steps for a guaranteed success.
- Preheat your oven: Start by preheating your oven to 350°F (175°C). This is an essential step that ensures your cake cooks evenly and rises properly.
- Prepare your baking sheet: Line a 15×10-inch jelly roll pan with parchment paper. Make sure to grease the paper lightly to prevent sticking. This allows the roll to slide out easily later.
- Mix the dry ingredients: In a large mixing bowl, sift together the all-purpose flour, cocoa powder, sugar, baking powder, and salt. Sifting aerates the mixture and eliminates lumps, ensuring a smoother cake.
- Beat the eggs: In a separate bowl, whisk the eggs until they are frothy and light. This process will incorporate air into the eggs, giving a fluffy texture to your chocolate roll.
- Add wet ingredients to dry: Pour the beaten eggs and vanilla extract into the dry ingredients, mixing until just combined. Avoid over-mixing, as this can affect the cake’s texture.
- Pour the batter into the pan: Carefully spread the batter evenly into the lined jelly roll pan with a spatula. Use a gentle hand to ensure it doesn’t deflate.
- Bake the cake: Place the pan in the preheated oven and bake for about 12-15 minutes or until the cake is set and springs back when gently touched. Keep an eye on it as baking times can vary.
- Cool the cake: Once done, remove the cake from the oven and allow it to cool in the pan for about 5 minutes. Next, sprinkle a light layer of cocoa powder over a clean dish towel, and flip the cake onto it.
- Roll the cake: While the cake is still warm, gently roll it up in the dish towel, starting from one end. This step is crucial for creating the roll shape. Allow it to cool completely in this position.
- Prepare the peanut butter filling: In a bowl, mix the peanut butter with powdered sugar until smooth and combined. This will form a rich filling that enhances the flavor.
- Unroll and fill: Once the cake has cooled completely, unroll it gently and spread the peanut butter filling over the surface. Be careful not to tear the cake.
- Re-roll the cake: Carefully re-roll the cake, ensuring the filling doesn’t ooze out. Place it seam-side down on a serving platter.
- Make the ganache: To create the ganache, heat the heavy cream in a saucepan until it just begins to simmer. Remove it from heat and pour it over the chocolate chips in a bowl, allowing it to sit for a few minutes. Stir until you achieve a smooth, glossy consistency.
- Frost the cake: Pour the ganache over the rolled cake, allowing it to drape over the sides. Use a spatula to smooth it out if necessary and make it look extra sumptuous.
- Chill and serve: Allow the ganache to set by placing the cake in the refrigerator for about 30 minutes. When ready to serve, slice and enjoy each decadent piece. You can garnish with additional peanut butter or chocolate shavings if desired.
With these detailed instructions, you will be able to create a gorgeous chocolate roll that is equal parts beautiful and delicious. The process may seem lengthy, but each step is straightforward and rewarding.
Variations & Substitutions
There are endless possibilities when it comes to customizing your Decadent Peanut Butter Cup Chocolate Roll.
Vegan Variation: If you’re following a vegan diet, you can easily make swaps to accommodate your needs. Replace the eggs with flax eggs (1 tablespoon of ground flaxseed mixed with 2.5 tablespoons of water, allowed to sit until gel-like), and use almond or oat milk in place of dairy. Opt for dairy-free chocolate for the ganache, and you will have a delightful vegan treat that everyone can enjoy.
Gluten-Free Variation: For those who need to avoid gluten, consider using a gluten-free all-purpose flour blend. The texture might slightly differ, but the flavor will remain rich and satisfying. You can also add a little xanthan gum to help mimic the elasticity of gluten. This way, the roll will still be fluffy while catering to gluten-sensitive individuals.
Chocolate Chip Variation: To take your chocolate roll to the next level, consider mixing in chocolate chips into the batter for added bursts of chocolate flavor. Semi-sweet, dark, or even white chocolate chips can provide different tastes and experiences with every bite.
Nutty Variation: Feel free to add chopped nuts to the peanut butter filling for an additional crunch and depth of flavor. Finely chopped peanuts or even almonds can enhance the texture and provide a delightful surprise as you sink your teeth into the roll.
Each of these variations offers something unique while still adhering to the spirit of the original recipe. When you feel empowered to experiment, your dessert experience becomes even more rewarding and personalized.
Common Mistakes to Avoid
Even though this recipe is straightforward, there are a few pitfalls you can encounter if you’re not careful.
One common mistake is overmixing the batter. When you overmix, you can develop excess gluten in the flour, resulting in a tough texture instead of the desired fluffy softness. Always mix until just combined; it’s okay if there are a few lumps.
Another critical issue can be not properly preparing your baking pan. Ensure you line and grease the pan adequately. If the cake sticks to the sides, you will find it impossible to roll without breaking, which can be quite frustrating.
Also, be cautious with the filling. Make sure your peanut butter mixture is well-combined; if it’s too thick, it can make rolling the cake difficult. If this happens, add a little cream or milk to soften it up for easier spreading.
Lastly, don’t skip letting the cake cool adequately before rolling it. Rolling a hot cake can lead to breakage, while a cooled cake allows for a more stable structure and easier handling. Following these tips can help you avoid common mistakes and ensure that your Decadent Peanut Butter Cup Chocolate Roll turns out perfectly.
Storage, Freezing & Reheating Tips
To store your Decadent Peanut Butter Cup Chocolate Roll, it’s best to keep it in an airtight container in the refrigerator. Properly stored, it can last for up to 5 days. Make sure to slice it only as needed to preserve freshness and moisture. The flavor will continue to develop after a day or two, making it even more delightful.
If you wish to prepare it in advance, consider freezing the roll. Wrap it tightly in plastic wrap and then in aluminum foil to prevent freezer burn. It can be stored in the freezer for up to two months. When ready to enjoy, simply take it out and let it thaw in the refrigerator overnight. Avoid microwave thawing, as this can alter the texture.
Reheating is not usually necessary for serving this roll, as it is best enjoyed chilled. But if you feel inclined to warm it slightly, do so gently in the microwave for about 10 seconds. Topping it with a dollop of fresh whipped cream or more melted chocolate before serving will enhance its appeal.
By following these storage, freezing, and reheating tips, you can ensure that your Decadent Peanut Butter Cup Chocolate Roll remains delectable and satisfying whenever you’re ready to indulge.
Frequently Asked Questions
Can I use natural peanut butter in this recipe?
Yes, you can use natural peanut butter; however, it may require some adjustments because it tends to be thinner. If you find it too runny, consider adding a bit of powdered sugar to thicken it. The texture of the filling will slightly differ, but the flavor will remain excellent.
Can I make this recipe in advance?
Absolutely! The Decadent Peanut Butter Cup Chocolate Roll can be made a day ahead of serving. In fact, allowing it to sit overnight in the fridge allows the flavors to blend beautifully, making it even more delicious!
Is the roll gluten-free?
The original recipe is not gluten-free, but you can easily adapt it by using a gluten-free all-purpose flour blend. This allows those with gluten sensitivities to enjoy the dessert without worry.
What can I use instead of cocoa powder?
If you are unable to use cocoa powder, carob powder is a great alternative. It has a similar flavor profile, though it’s slightly sweeter and less bitter. Keep in mind that adjustments may be needed with sugar levels due to the natural sweetness of carob.
How do I prevent my cake from cracking while rolling?
To minimize the chances of cracking, it’s important to ensure that your cake is not overbaked, as a drier cake is more prone to cracking. Additionally, rolling it while still warm helps maintain its flexibility. A careful, gentle hand during the rolling process will also help preserve the roll’s integrity.
Conclusion:
In conclusion, the Decadent Peanut Butter Cup Chocolate Roll stands as an exquisite dessert that combines simplicity with a luxurious flavor experience. It’s an approachable recipe that anyone can master, making it a wonderful addition to any home baker’s repertoire. Don’t hesitate to make it your own by exploring various variations and substitutions that cater to your taste and dietary needs. Join in the joy of baking and create memories that you can share with friends and family. So why wait? Gather your ingredients and dive into this chocolate-filled adventure—your taste buds will thank you!


