Prep time: 20 minutes
Cook time: 30 minutes
Total time: 50 minutes
Servings: 12-16
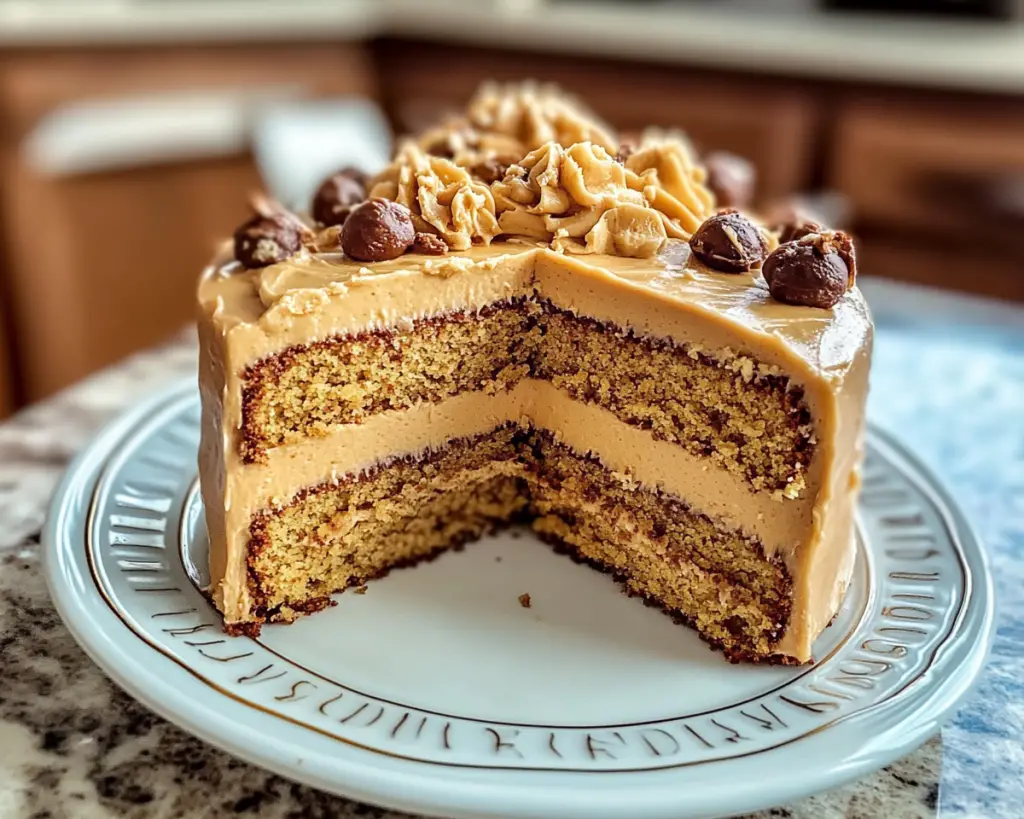
Decadent Peanut Butter Cake with Frosting is more than just a dessert; it’s an indulgent experience that calls to mind cherished family gatherings and comforting moments. Imagine biting into a moist cake rich with the flavor of creamy peanut butter, the kind that pairs perfectly with a rich chocolate frosting that delicately melts in your mouth. This recipe is special not only for its taste but also for its simplicity and versatility.
In this article, you’ll learn how to whip up this delightful cake with minimal effort, ensuring that even beginners can impress their family and friends. We’ll cover the key ingredients, step-by-step instructions, thoughtful variations, and helpful tips that will elevate your baking game. Trust me, once you try this recipe, it could become your new go-to for every celebrate occasion!
What Is Decadent Peanut Butter Cake with Frosting Recipe?
The Decadent Peanut Butter Cake is a rich, moist dessert that combines the nutty flavors of peanut butter with the sweetness of sugar, resulting in a cake that’s as delightful to the palate as it is to the eye. Traditionally, **peanut butter** has been a beloved ingredient in many households, often used in cookies and frostings. However, this cake takes the classic nutty flavor up a notch by offering a tender crumb and a texture that’s satisfying yet airy.
As an originating American favorite, peanut butter cake has gained popularity over the years due to its simple ingredients and delicious outcome. The cake is layered with creamy frosting that complements the peanut butter base beautifully. The frosting is often chocolate-based, creating a delightful contrast that enhances the cake’s overall texture and flavor. Each bite delivers a combination of sweet, salty, and nutty notes that is hard to resist.
The cake itself offers a wonderful foundation for experimenting with different kinds of frostings and toppings, making it an incredibly versatile choice for any gathering or celebration. Perfect for birthdays, potlucks, or just a cozy meal at home, this Decadent Peanut Butter Cake is sure to impress anyone lucky enough to have a slice!
Why You’ll Love This
There are countless reasons to fall in love with this Decadent Peanut Butter Cake. First and foremost, the flavor is overwhelmingly delectable, combining the familiar tastes of your favorite peanut butter treats but in a cake form. The crumb is light and moist, thanks to the careful balance of ingredients, ensuring that every bite remains enjoyable and satisfying. Additionally, it is simple to whip up; even novice bakers can find success with this recipe.
Cost-wise, most of the ingredients are pantry staples, meaning you won’t have to break the bank. Peanut butter, flour, sugar, eggs, and butter are all affordable and often on hand. In terms of health, while this cake is not diet food, using natural peanut butter can provide some protein and healthy fats, which can be a small comfort when indulging. Versatility is another highlight; feel free to substitute or mix in your favorite add-ins, such as chocolate chips or even berries, to customize the flavor to your liking.
One common misconception about peanut butter cakes is that they might be overly heavy or rich, making them hard to enjoy after a meal. However, when baked properly, this cake strikes a perfect balance, leaving you with a light texture that won’t weigh you down.
Ingredients You’ll Need
This Decadent Peanut Butter Cake requires only a handful of ingredients, each playing a vital role in the baking process. Gather the following for the cake and frosting:
- All-purpose flour (2 cups): Provides structure to the cake. For gluten-free options, you can use a 1:1 gluten-free flour blend.
- Sugar (1 ½ cups): Sweetens the cake, creating a balance between the salty peanut butter and sugary frosting. Adjust the amount to taste, but keep in mind that sugar is crucial for moisture.
- Baking powder (1 ½ teaspoons): A leavening agent that helps the cake rise, resulting in a light texture.
- Salt (½ teaspoon): Enhances the other flavors and balances sweetness.
- Butter (½ cup, softened): Adds richness and moisture to the cake. For dairy-free versions, you can replace it with coconut oil.
- Eggs (2 large): Help bind the cake together and contribute to its structure. Aquafaba can serve as a substitute for a vegan option.
- Milk (½ cup): Adds moisture; you can use non-dairy milk as a substitute.
- Peanut butter (1 cup): The star ingredient that gives the cake its wonderful taste. Choose creamy or crunchy, based on your preference.
- Powdered sugar (for frosting, 2 cups): Sweetens the frosting and gives it a light texture. More can be added for a thicker consistency.
- Unsweetened cocoa powder (½ cup): Introduces rich chocolate flavor to the frosting, perfectly balancing the peanut butter’s sweetness.
- Vanilla extract (1 teaspoon): For added depth of flavor in both the cake and frosting.
Knowing the role each ingredient plays helps you understand how substitutions can impact the final product. For instance, using brown sugar instead of white sugar can add a rich, molasses-like flavor to your cake. Similarly, using natural peanut butter—without added sugars or oils—will contribute to a more authentic peanut taste.
How to Make
Follow these step-by-step instructions to create your own Decadent Peanut Butter Cake and Frosting.
- Preheat your oven: Start by preheating your oven to 350°F (175°C). This is crucial as it allows the cake to rise properly. A well-heated oven will give you an even bake, so make sure to do this step first.
- Prepare your baking pan: Grease and flour two 9-inch round cake pans. This helps the cake release easily after baking, preventing any breaks or tears. You can also use parchment paper for an extra layer of security.
- Mix dry ingredients: In a mixing bowl, whisk together the all-purpose flour, baking powder, and salt. This helps to evenly distribute the leavening agent and ensures it activates correctly during baking.
- Cream butter and sugar: In a separate bowl, use an electric mixer to cream the softened butter with sugar until light and fluffy. This should take about 3-5 minutes. This step incorporates air into the mix, leading to a lighter cake.
- Add eggs and peanut butter: Beat in the eggs one at a time, making sure each one is fully incorporated before adding the next. Then, add the peanut butter and mix until well blended. The mixture should be smooth and creamy at this point.
- Combine wet and dry ingredients: Gradually add the flour mixture into the wet ingredients, alternating with the milk. Start and end with the flour mixture, mixing until just combined. Over-mixing can lead to a dense cake, so be gentle!
- Pour batter into pans: Divide the batter evenly between the prepared cake pans. Use a spatula to smooth the tops for an even bake. You might want to tap the pans against the counter gently to release any air bubbles.
- Bake your cake: Place the pans in the preheated oven and bake for 25-30 minutes or until a toothpick inserted into the center comes out clean. Keep an eye on the color; if it starts to darken too much, you may need to cover it loosely with aluminum foil.
- Cool the cakes: Once out of the oven, let the cakes cool in the pans for 10 minutes. Carefully remove them from the pans and let them cool completely on wire racks.
- Prepare the frosting: In a mixing bowl, combine the softened butter and peanut butter. Beat with an electric mixer until the mixture is smooth and creamy. Gradually add the powdered sugar and cocoa powder, alternating with milk, until you reach your desired consistency.
- Assemble your cake: Once the cakes are completely cooled, place one layer on a serving platter. Spread a generous amount of frosting on top, then place the second layer on top and frost the entire cake as desired. Feel free to get creative with decorating!
- Serve and enjoy: After assembling, let the cake sit for about 30 minutes to let the frosting set a bit, then slice and serve. Enjoy the delightful combination of peanut butter and chocolate with every bite!
Baker’s tip: When frosting, use a spatula or a butter knife to create swirly patterns on the surface of the cake for a professional look!
Variations & Substitutions
Chocolate Chip Peanut Butter Cake: If chocolate is your thing, mixing in a cup of chocolate chips into the batter adds a delightful surprise in every bite. You can use semi-sweet or dark chocolate, depending on your preference.
Dietary Adjustments: For those following a gluten-free diet, use a gluten-free flour blend as a substitute for all-purpose flour. Additionally, coconut oil can replace the butter for a dairy-free option, and bird’s egg or aquafaba can be used instead of chicken eggs for a vegan alternative.
Peanut Butter Banana Cake: Adding mashed ripe bananas to the batter not only enhances flavor but also keeps the cake moist. Replace half the peanut butter with banana puree for a fruity twist; just be aware this may change the texture slightly.
Layered Cake: For a more elaborate dessert, you can turn this recipe into a layered cake. Plan to bake three layers instead of two; this adds height and delicious extra frosting layers. Consider alternating between vanilla and chocolate frosting between the layers for visual appeal.
Mini Cupcakes: Turn this cake into mini cupcakes for bite-sized treats! Simply fill cupcake liners with batter and reduce the baking time to about 15-20 minutes. These are perfect for parties or lunchboxes and will travel beautifully.
Common Mistakes to Avoid
The journey to a perfect cake is often accompanied by pitfalls. One common mistake is overmixing the batter, which can lead to a dense cake. Always remember to mix until just combined for a light and fluffy texture.
Another common issue is underbaking the cake. To avoid this, make sure to check for doneness using a toothpick. If it comes out with wet batter, give it a few more minutes in the oven. On the other hand, leaving it in too long can lead to a dry cake, which no one enjoys.
Lastly, not allowing the cake to cool properly can make frosting difficult and cause it to slide off. Always let it cool completely on a wire rack before frosting; this ensures that the frosting stays intact and doesn’t melt into oblivion.
Also, be cautious with the quantity of frosting. While a thick layer may look appealing, it can overpower the cake itself. Find a good balance to ensure both cake and frosting shine.
Storage, Freezing & Reheating Tips
To properly store your Decadent Peanut Butter Cake, use an airtight container to keep it fresh for up to 4 days at room temperature. If you live in a humid area, it is best to refrigerate the cake to prevent spoilage. Just be sure to let it come to room temperature before serving to retain its moist texture.
For longer storage, you can freeze individual slices or the entire cake. Wrap slices tightly in plastic wrap and aluminum foil, then place in a freezer-safe bag for up to three months. When you’re ready to enjoy it again, simply thaw in the refrigerator overnight and serve at room temperature.
When reheating, if you prefer a warm slice, pop a single piece in the microwave for about 15-20 seconds. Just be cautious not to overheat, as it can change texture.
It’s important to remember that frostings can sometimes lose their texture when frozen, but this cake maintains its charm nicely even after freezing and reheating.
Frequently Asked Questions
How do I ensure my cake rises perfectly?
To guarantee that your cake rises beautifully, make sure to measure your baking powder accurately. Using an expired or incorrect amount can hinder the rising process. Additionally, room temperature ingredients incorporate better and create more air pockets necessary for rising.
Can I make this cake ahead of time?
Absolutely! This Decadent Peanut Butter Cake can be made a day ahead. You can bake the layers and store them wrapped in plastic wrap in the refrigerator. Frost the cake right before serving for the best presentation.
What can I serve with this cake?
This cake pairs wonderfully with a scoop of vanilla ice cream or a drizzle of chocolate sauce for extra sweetness. Whipped cream also complements the flavors beautifully.
Can I use natural peanut butter?
Yes, natural peanut butter can be used in the recipe. Just keep in mind that it can alter the cake’s texture slightly due to its oil content. If using natural peanut butter, give it a good stir before measuring to ensure even distribution of oils.
What’s the best way to cut this cake?
For a clean cut, use a sharp serrated knife and warm it slightly under hot water before slicing. Wipe the knife clean between cuts to maintain a nice finish on each slice.
Conclusion:
This Decadent Peanut Butter Cake with Frosting is a delightful treat that combines ease with impressive results. The combination of creamy peanut butter and rich chocolate frosting creates a symphony of flavors that everyone will adore. Feel free to customize the recipe with various variations or toppings to suit your taste. I encourage you to try baking this cake; whether for a special occasion or just because, it is sure to be a hit. Happy baking!