Prep time: 15 minutes
Cook time: 40 minutes
Total time: 55 minutes
Servings: 8
Have you ever craved a dessert that feels just as comforting as a warm hug? The **Classic Yogurt Cake** perfectly embodies that tender embrace, offering a light and fluffy texture that will have you reaching for seconds, or perhaps even thirds. Many remember this delightful cake from their childhood, often baked in family kitchens filled with warmth and laughter. It’s simple to make and incredibly forgiving, which is why it’s often referred to as foolproof. Today, you’ll discover not only how to make this delicious treat but also how to personalize it to suit your taste.
In this article, you will learn how to prepare the **Classic Yogurt Cake** with ease, while also uncovering tips for achieving the perfect bake with a beautiful golden crust. We will dive into various variations, allowing you to experiment with flavors, and share common pitfalls so you can avoid them. No matter your cooking experience, this recipe welcomes everyone—whether you are a busy parent trying to whip something up quickly or a beginner in the kitchen looking to build your confidence. Let’s get started!
What Is Classic Yogurt Cake Light Soft and Foolproof?
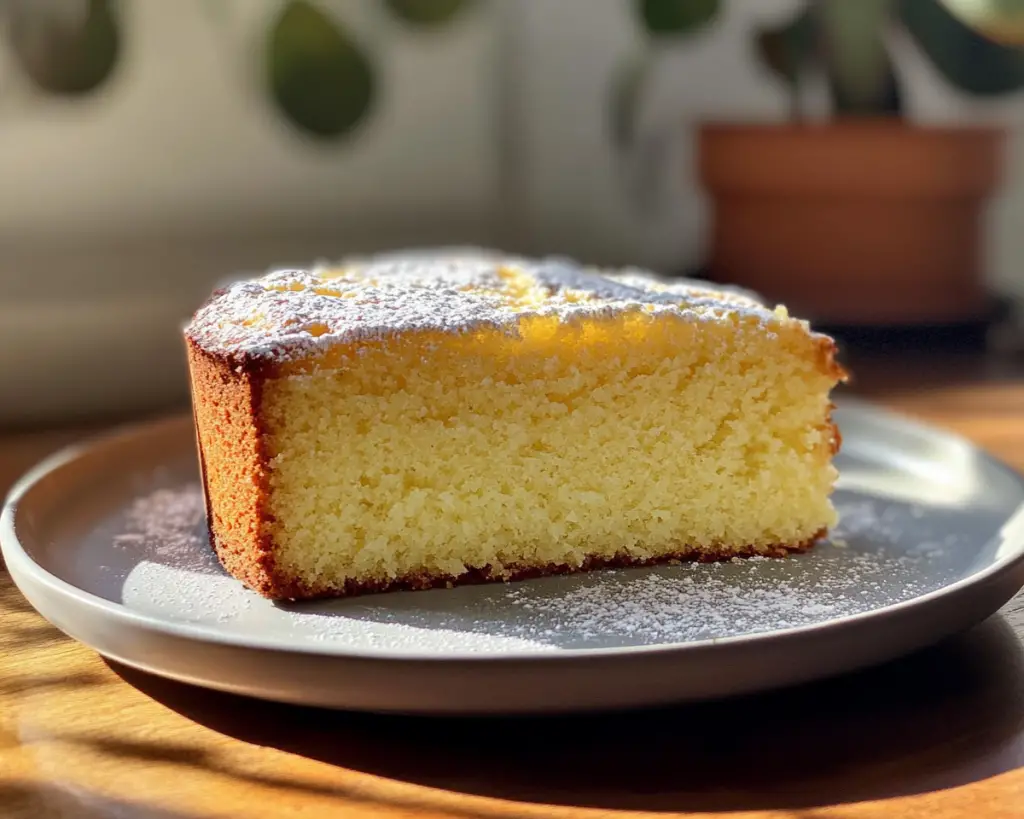
**Classic Yogurt Cake** is a traditional French dessert known for its exceptional **lightness** and **moisture**, which comes primarily from the yogurt itself. Originating in the kitchens of rustic French homes, this cake has gained popularity due to its adaptability and ease of preparation. The texture is fluffy and soft, making it perfect for an afternoon tea or as a light dessert after a meal. It embodies a simple, yet profound flavor profile that balances sweetness with a subtle tang from the yogurt.
The beauty of this cake lies in its basic ingredients—yogurt, sugar, eggs, flour, and a leavening agent. The yogurt not only contributes to the cake’s moisture but also helps it rise beautifully. As it bakes, the **aroma** of the cake fills the kitchen, enticing everyone nearby. It’s a versatile recipe, allowing for numerous adaptations and flavors, making it a staple in many households. You’ll find it as a base for various toppings, glazes, or mix-ins, allowing you to easily customize it to your liking.
What makes the **Classic Yogurt Cake** truly special is its balance of simplicity and flavor. It’s the kind of cake you can whip up on a whim and impress your guests at the same time. Whether you serve it as a simple afternoon treat or dress it up with fresh fruits, glazes, or whipped cream, this cake has a way of making any occasion feel special.
Why You’ll Love This
One of the primary reasons you’ll love this **Classic Yogurt Cake** is its incredible **taste**. The cake is not overly sweet, allowing the natural flavors of the yogurt to shine through. When combined with hints of vanilla or lemon zest, you get a cake that is both uplifting and satisfying. Not only does it taste great, but it is also **cost-effective**. The ingredients are common kitchen staples, making it an ideal choice for budget cooking.
Another wonderful aspect of this cake is its **versatility**. You can enjoy it plain, or you can dress it up with toppings such as fresh berries, a light glaze, or even a dollop of whipped cream. It pairs wonderfully with coffee or tea, making it a perfect candidate for easy entertaining, especially for busy parents looking to create delectable snacks for their children’s lunches or parties.
Despite its charming simplicity, making this cake can often feel intimidating, especially if you are a new home cook. Understanding the basics of measuring ingredients and following simple techniques can elevate your baking game. With only a few straightforward steps and minimal equipment needed, this cake allows anyone, even those who claim they “can’t bake,” to create something beautiful. That’s why it truly earns its title as a foolproof recipe.
Ingredients You’ll Need
To make the **Classic Yogurt Cake**, gather the following ingredients:
- Yogurt: 1 cup (any flavor, plain Greek yogurt works excellently)
- Granulated sugar: 1 cup (adds sweetness and moisture)
- Eggs: 3 large (acts as a binding agent and adds richness)
- All-purpose flour: 1 ½ cups (provides structure and texture)
- Baking powder: 2 teaspoons (leavening agent that helps the cake to rise)
- Vegetable oil: ⅓ cup (adds moisture and softness)
- Vanilla extract: 1 teaspoon (enhances flavor)
- Salt: ½ teaspoon (balances sweetness)
- Zest of 1 lemon (optional): (adds a fresh, zesty flavor)
Each ingredient plays a vital role in achieving the cake’s signature texture. The **yogurt** not only keeps the cake moist but also helps create that soft, tender crumb that everyone loves. If you want to try a healthier twist, you can substitute Greek yogurt; it will provide a richer flavor while still maintaining that essential moisture.
For the **sugar**, you can experiment with alternatives like coconut sugar or even honey, but keep in mind that this may affect the cake’s overall sweetness and texture. Eggs contribute crucial binding properties, but if you’re looking for an egg-free version, you can use flaxseed meal or applesauce as a substitute.
Remember, the quality of your **vanilla extract** can significantly influence the flavor, so always opt for pure vanilla if possible; synthetic varieties just don’t compare. Finally, if you wish to add an elegant zing, infusing your cake with lemon zest will brighten the overall flavor profile.
How to Make
Now that you have all your ingredients ready, it’s time to create this delightful **Classic Yogurt Cake**. Follow these step-by-step instructions:
- Preheat the oven: Start by preheating your oven to 350°F (175°C). This step ensures that your cake will bake evenly. While the oven heats, prep your cake pan by greasing it with cooking spray or butter, and optionally, dust it with flour to prevent sticking.
- Mix wet ingredients: In a large bowl, whisk together the yogurt, sugar, eggs, oil, and vanilla extract. It’s important to whisk thoroughly, as this helps to aerate the mixture, resulting in a fluffier cake. The aim here is to blend the wet ingredients until they are smoothly combined and the sugar dissolves.
- Combine dry ingredients: In a separate bowl, whisk together the flour, baking powder, and salt. This step is crucial as it helps ensure that the leavening agent is evenly distributed throughout the flour, preventing any clumps. If you are using lemon zest, don’t forget to add it here to enhance the aroma.
- Combine wet and dry mixtures: Gradually add the dry mixture to the wet ingredients, gently folding with a spatula or wooden spoon. You want to create a batter that is just combined; avoid overmixing as this can lead to a dense cake. You should no longer see any dry flour, but it’s okay if there are a few small lumps.
- Pour into the pan: Carefully pour the cake batter into your prepared cake pan, ensuring an even spread. Tap the pan gently on the counter to remove any air bubbles that may have formed during mixing. This will lead to a more uniform texture.
- Bake: Place the cake in the preheated oven and bake for 35 to 40 minutes or until a toothpick inserted into the center comes out clean or with a few moist crumbs attached. Keep an eye on the cake after the 30-minute mark; ovens can vary, and you want to avoid overbaking.
- Cool the cake: Once baked, remove the cake from the oven and let it cool in the pan for about 10-15 minutes. Then, transfer it to a wire rack to cool completely. This step allows your cake to reach the perfect texture and prevents it from becoming gummy.
- Serve: Once cool, you can serve the cake as is or dress it up with toppings of your choice, like powdered sugar, fresh fruit, or a light glaze. Enjoy the aroma and flavor as you take the first bite!
This simple step-by-step guide ensures that even novice bakers can achieve success with this **Classic Yogurt Cake**. Don’t be discouraged if it takes you a few tries to achieve the perfect texture; baking is as much an art as it is a science.
Variations & Substitutions
Flavor Enhancements: One of the best parts about the **Classic Yogurt Cake** is its versatility. You can easily adapt the recipe by adding spices like cinnamon or nutmeg to create a more seasonal flavor profile. Adding finely chopped nuts can also introduce a delightful crunch, making it even more appealing.
Fruit-Infused Yogurt Cake: Consider adding fruits such as blueberries, raspberries, or diced apples directly into the batter for a burst of flavor with each bite. Berries not only add color but also a natural sweetness, making the cake feel a bit more indulgent. If you’re going the fruit route, toss your fruits in a little bit of flour before folding them into the batter; this helps prevent them from sinking to the bottom while baking.
Cocoa Variation: For a chocolatey twist, you can incorporate cocoa powder into the recipe. Replace about ¼ to ½ cup of flour with unsweetened cocoa powder. This variation creates a rich and decadent dessert that can easily satisfy any craving for chocolate.
Dairy-Free Option: If you’re looking for a dairy-free version, you can substitute traditional yogurt with a plant-based yogurt. Options such as almond, coconut, or soy yogurt can yield fantastic results while accommodating various dietary needs. Just ensure that the yogurt you choose has a similar consistency to dairy yogurt for the best texture.
Gluten-Free Alternative: For those maintaining a gluten-free diet, you can replace the all-purpose flour with a gluten-free blend. There are various blends available, and using one designed for 1:1 substitution will allow you to maintain the cake’s fluffy texture without compromising flavor.
Each variation unlocks a new take on the **Classic Yogurt Cake**, allowing you to craft a dessert that fits the moment, mood, or dietary requirement while keeping the spirit of the original recipe intact.
Common Mistakes to Avoid
When baking the **Classic Yogurt Cake**, there are a few common pitfalls to be aware of:
Overmixing the batter: Be gentle when folding the wet and dry ingredients together. Overmixing can lead to a tough cake instead of a tender one. Aim for just combined; a few lumps are perfectly acceptable.
Not measuring correctly: Baking is a precise science, so be diligent about measuring your ingredients. Use the spoon-and-level method for flour to avoid packing it down, which can lead to a dry cake. Use dry measuring cups for solids and liquid measuring cups for liquids.
Skipping the cooling time: It’s tempting to cut into the cake as soon as it comes out of the oven, but allowing it to cool completely helps it set properly. Not cooling the cake adequately can result in a gummy or undercooked texture.
Using cold ingredients: Ensure your ingredients, especially eggs and yogurt, are at room temperature. This allows for better emulsification, leading to a lighter, fluffier cake. A quick tip is to place the eggs in warm water for about five minutes or take the yogurt out before starting your prep.
By avoiding these mistakes, you’ll be well on your way to perfecting the **Classic Yogurt Cake** every time you make it.
Storage, Freezing & Reheating Tips
The **Classic Yogurt Cake** can be a wonderful treat to have on hand, especially during busy weeks. To keep it fresh, store your cooled cake in an airtight container at room temperature for up to 3 days. If you live in a warm climate, it might be best to store it in the refrigerator.
If you’re looking to save some for later, this recipe freezes wonderfully. Wrap the cake tightly in plastic wrap or aluminum foil and place it in a freezer-safe container. It can last in the freezer for up to three months. When you’re ready to enjoy it, let it thaw in the refrigerator overnight before bringing it to room temperature.
For reheating, you can enjoy it cold, or if you prefer it warmed, pop a slice in the microwave for around 10-15 seconds. You can also reheat slices in the oven at a low temperature (around 300°F) for about 5-10 minutes. Just be cautious about overheating as that can dry it out.
Practicing proper food storage and reheating methods not only helps preserve the cake’s flavor and texture but also maximizes your enjoyment.
Frequently Asked Questions
Can I use whole wheat flour instead of all-purpose flour?
Yes, you can substitute some or all of the all-purpose flour with whole wheat flour. Just keep in mind that the texture might be slightly denser. For a lighter cake, you might want to use half whole wheat and half all-purpose.
How can I tell when the cake is done?
The best way to check for doneness is to insert a toothpick into the center of the cake. If it comes out clean or with just a few moist crumbs, the cake is done. Additionally, the cake will pull away slightly from the sides of the pan.
Can I make this cake ahead of time?
Absolutely! This cake not only sits well but can also be made a day in advance. Just be sure to cover it well to prevent it from drying out. It tastes even better the next day as the flavors continue to develop!
What is the best way to serve the cake?
You can serve the cake plain, or dress it up with a light glaze, fresh seasonal fruits, or a sprinkle of powdered sugar. Pair it with whipped cream or a scoop of ice cream if you want to indulge further!
Can I replace the yogurt with something else?
Yes, you can use sour cream or a dairy-free yogurt as a substitute. Each will impart a slightly different flavor and texture but will still keep the cake moist and delicious. Just ensure the substitute has similar consistency to yogurt.
Conclusion:
The **Classic Yogurt Cake** is an incredible addition to any home baking repertoire. Its delightful flavor, light texture, and adaptability make it a go-to dessert for various occasions, whether you’re hosting a party or need a quick snack. Don’t hesitate to customize it based on your flavor preferences or dietary requirements. I encourage you to give this recipe a try—it’s foolproof and perfect for everyone from beginners to seasoned bakers. Share your creations with friends and family, and most importantly, enjoy the process of baking and indulging in this delightful treat!