Prep time: 10 minutes
Cook time: 15 minutes
Total time: 25 minutes
Servings: 12 cookies
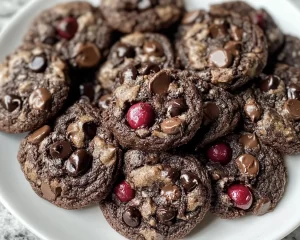
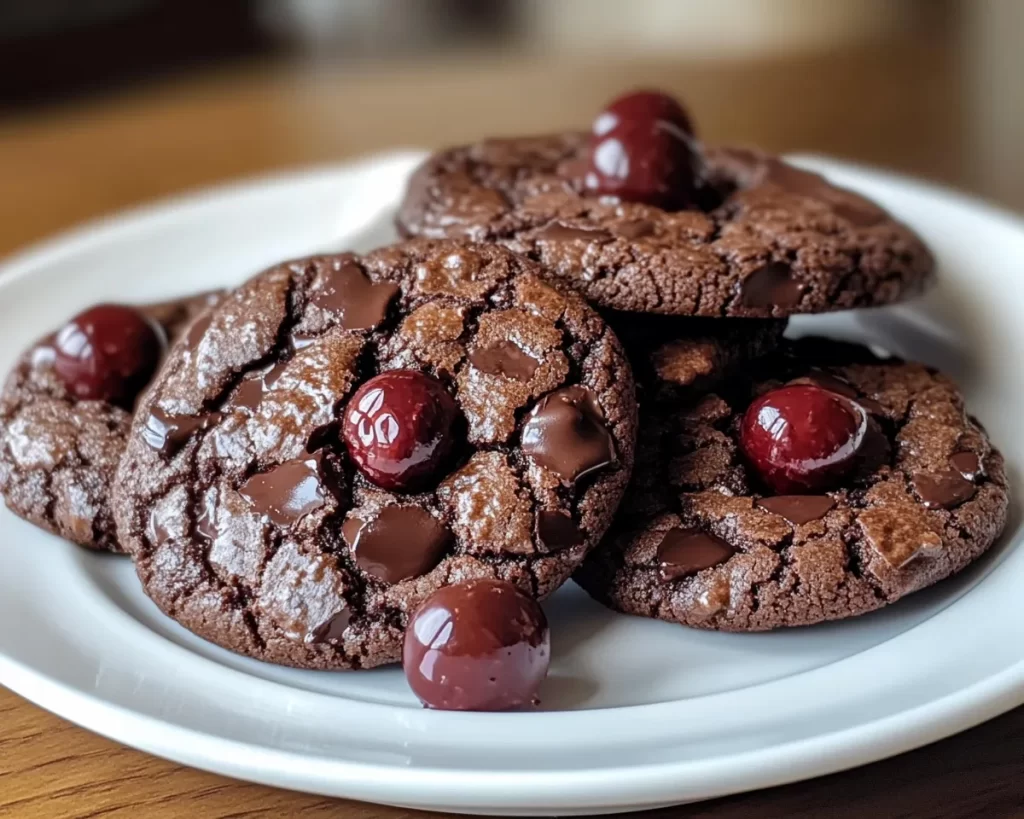
Black Forest Cookie: Chocolate Covered Sour Cherry Cookies is the perfect blend of rich chocolate, tart cherries, and a delightful cookie base, all coming together in just 25 minutes. This recipe is not only quick but also a guaranteed crowd-pleaser! Imagine serving these delectable cookies at a family gathering, a birthday party, or even just enjoying them with a cup of coffee on a cozy afternoon. The combination of flavors and the visual appeal of these cookies will leave everyone at the table wanting more. So, put on your apron, and let’s get started!
What Is Black Forest Cookie: Chocolate Covered Sour Cherry Cookies in 25 Minutes?
Black Forest Cookies are a delightful twist on the classic Black Forest cake. This recipe includes chocolate cookies loaded with dried sour cherries, coated in a rich chocolate glaze, making them both sweet and slightly tart. The dried cherries not only enhance the flavor but also provide a chewy texture that pairs perfectly with the soft, melt-in-your-mouth chocolate cookie. This recipe allows you to experience the rich taste of a Black Forest dessert in cookie form, perfect for any occasion.
Why You’ll Love This
You will adore these cookies because they are not just quick to make, they are incredibly delicious and visually appealing as well.
- Quick Preparation: With a total time of only 25 minutes, these cookies are ready in a flash—ideal for when you have unexpected guests.
- Rich Flavor: The combination of chocolate and tart cherries creates a flavor profile that is both diverse and satisfying, making each bite exciting.
- Versatile Treat: Whether it’s a holiday gathering, a simple tea party, or just a sweet indulgence while watching your favorite show, these cookies fit right in.
- Easy to Make: Even if you are a beginner in the kitchen, this recipe guides you step-by-step to create a cookie that looks and tastes like a gourmet treat.
Ingredients You’ll Need
- All-purpose flour (1 ¾ cups): This is the base of your cookie, providing structure. Make sure to spoon the flour into the measuring cup and level it off for accuracy.
- Cocoa powder (½ cup): Unsweetened cocoa enhances the chocolate flavor and gives the cookies their rich color. It’s essential for achieving that deep, chocolate taste.
- Baking soda (1 tsp): This is a leavening agent that helps the cookies rise slightly, making them tender and soft.
- Salt (¼ tsp): A small amount of salt will balance the sweetness and enhance the overall flavor of the cookies.
- Butter (½ cup, softened): Using unsalted butter, softened to room temperature, adds richness and moisture to the cookie dough.
- Sugar (1 cup, granulated): Granulated sugar sweetens the cookies and contributes to their perfect texture. Don’t skip this ingredient!
- Brown sugar (¼ cup, packed): Brown sugar adds moisture and a slight caramel flavor to the cookies.
- Egg (1 large): Eggs bind the ingredients together and add moisture; it’s crucial for achieving the ideal texture.
- Vanilla extract (1 tsp): This adds a depth of flavor and a delightful aroma to the cookies.
- Dried sour cherries (1 cup): These lend a burst of tartness and a chewy texture that pairs beautifully with the rich chocolate.
- Chocolate for coating (8 oz, dark or semi-sweet): This is used to cover the cookies for that delicious chocolatey finish.
How to Make
- Preheat the Oven: Start by preheating your oven to 350°F (175°C). This ensures an even baking process right from the start, contributing to the perfect texture of your cookies.
- Mix Dry Ingredients: In a bowl, combine the all-purpose flour, cocoa powder, baking soda, and salt. Whisk them together until they are evenly mixed; this step helps in distributing the leavening agents properly throughout the dough.
- Cream Butter and Sugars: In a separate large bowl, use an electric mixer to cream together the softened butter, granulated sugar, and brown sugar until light and fluffy. This step is essential for achieving a light texture, and it usually takes about 3-4 minutes.
- Add Egg and Vanilla: Beat in the egg and vanilla extract into the butter mixture until fully combined. You should see a smooth and creamy batter forming, which forms the base of your cookie dough.
- Combine Wet and Dry Ingredients: Gradually add the dry ingredients into the wet mixture, mixing until just combined. Be careful not to overmix; you want just enough to incorporate everything into a soft dough.
- Fold in Dried Cherries: Gently fold in the dried sour cherries. This adds delightful bursts of flavor in every bite. Make sure they are evenly distributed in the dough.
- Shape the Cookies: Scoop tablespoon-sized amounts of dough and place them on a parchment-lined baking sheet. Make sure to leave enough space between each cookie, as they will spread while baking.
- Bake: Place the baking sheet in the preheated oven and bake for 10-12 minutes. You want the edges to be set but the centers to remain slightly soft; they will firm up as they cool.
- Cool Down: Once baked, allow the cookies to cool on the baking sheet for 5 minutes before transferring them to a wire rack to cool completely.
- Coat with Chocolate: While the cookies are cooling, melt the chocolate using a microwave or double boiler. Once melted, dip each cooled cookie partially into the chocolate, letting excess chocolate drip off. Place them back on the wire rack until the chocolate hardens.
Variations & Substitutions
White Chocolate Drizzle: Instead of dipping the cookies in dark chocolate, consider using white chocolate. This adds a sweet and creamy contrast to the tart cherries. Simply melt white chocolate and drizzle it over the cooled chocolate-covered cookies for a decorative touch.
Nutty Addition: Add some chopped walnuts or pecans to the cookie dough for an added crunch. This will provide an interesting texture and a subtle nutty flavor that complements the chocolate and cherries.
Gluten-Free Version: Substitute all-purpose flour with gluten-free flour blend. Ensure that you are using certified gluten-free ingredients, and the final cookies will be just as delicious without gluten.
Different Fruits: Instead of dried sour cherries, use dried cranberries or chopped dried apricots for a different flavor profile. Each fruit will create a unique taste but still maintain the cookie’s overall appeal.
Common Mistakes to Avoid
Overmixing the Dough: Overmixing can lead to tough cookies, rather than the soft and chewy texture we all desire. Mix just until combined, and you’ll be on the right track to the perfect cookie.
Using Incorrect Measurements: Precision is key in baking. Make sure to measure your flour and other ingredients correctly, as too much or too little can greatly affect the cookie’s texture and flavor. Use the spoon-and-level method for the best results.
Baking at Incorrect Temperatures: An oven that’s too hot can lead to burnt cookies, while an oven that’s too cold might produce dry cookies. Always check your oven’s accuracy with an oven thermometer if unsure.
Storage, Freezing & Reheating Tips
These cookies can be stored in an airtight container at room temperature for 3-5 days. If you want to extend their shelf life, consider freezing them. Place the cooled cookies in a single layer on a baking sheet to freeze for about an hour, then transfer them to a freezer-safe bag, sealing out as much air as possible. They can be stored this way for up to 3 months. To enjoy, simply thaw at room temperature or warm in the microwave for a few seconds, bringing them back to that delightful soft texture.
Frequently Asked Questions
Can I use fresh cherries instead of dried? Fresh cherries contain more moisture and can disrupt the cookie’s texture, making them less stable. If fresh cherries are desired, consider drying them slightly or finding a recipe specifically designed for fresh fruit.
What is the best way to melt chocolate without burning it? The microwave method is effective and quick, but it’s crucial to do it in short bursts, stirring in between. Alternatively, using a double boiler can provide more control, ensuring gentle melting without burning.
How can I make these cookies more visually appealing? To enhance the appearance, consider sprinkling some coarse sea salt on top of the chocolate coating before it hardens. This adds a beautiful contrast and additional flavor that delights the palate.
Can I skip the chocolate dipping? Absolutely! If you prefer a lighter snack or want to reduce sugar content, you can enjoy the cookies without chocolate. The cookies are still wonderfully flavorful on their own, thanks to the cherries.
How do I know when the cookies are done? Look for set edges and soft centers; the cookies will continue baking slightly once removed from the oven. They may appear underbaked, but they will firm up as they cool, creating the perfect chewy texture.
Conclusion: Enjoy the rich flavors and delightful textures of these Black Forest Cookies. With their quick preparation time, you can easily whip these up for any occasion, and the variations allow for endless creativity in the kitchen. As you bake these cookies, delight in the aroma that fills your home and the smiles they bring to those who enjoy them.