Prep time: 20 minutes
Cook time: 45 minutes
Total time: 1 hour 5 minutes
Servings: 8
There’s something magical about fall; the air turns crisp, leaves burst into vibrant colors, and the aroma of warm desserts fills your kitchen. If you’re like me, you begin to crave the comforting flavors of autumn, and nothing says “fall” quite like a delicious cobbler. This Salted Caramel Pear Cobbler recipe is not just a delightful dessert; it’s a heartfelt embrace in the form of food. Sweet, juicy pears mingle with rich salted caramel, all nestled under a golden, buttery topping that creates the perfect balance of flavors and textures.
What makes this recipe truly special is how easy it is to prepare, making it perfect for busy parents and beginner bakers alike. With simple ingredients and straightforward instructions, you can whip up this cobbler in no time, leaving you free to enjoy those cozy evenings with your loved ones. If you’ve ever felt intimidated by cooking, this cobbler will show you just how rewarding and enjoyable the process can be. So grab your apron, and let’s dive into this delightful recipe that is sure to become a family favorite.
What Is Salted Caramel Pear Cobbler (Easy Fall Dessert)?
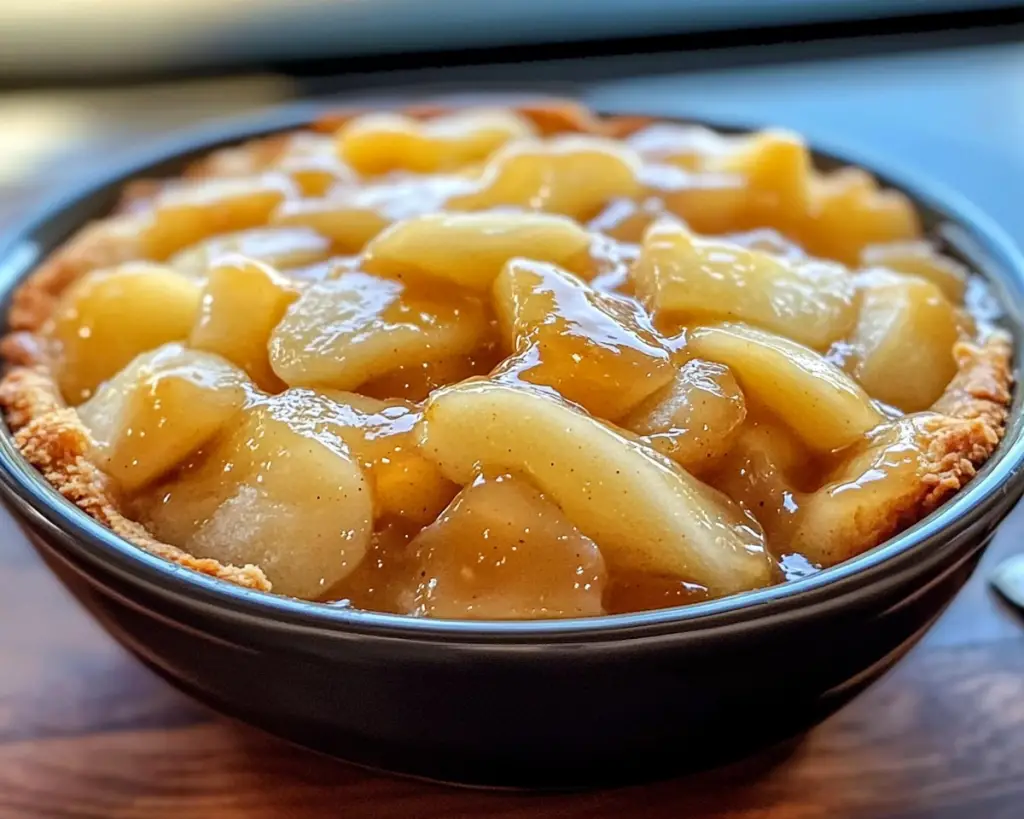
Salted Caramel Pear Cobbler is a warm dessert that blends the aromatic sweetness of fresh pears with the decadent allure of salted caramel. The origins of cobblers can be traced back to the United Kingdom, where fruits were baked under a layer of dough, creating a perfect harmony of flavors. The mixing of sweet and salty in this recipe elevates it from a traditional cobbler into a luxurious experience, making it perfect for special occasions or a cozy night in.
The texture of this cobbler is a story of contrasts. On the one hand, you have the tender, luscious pears, bubbling with their sweet juices. On the other, there’s the golden, crispy topping that provides a satisfying crunch with each bite. The rich salted caramel drizzled over the top melts into the dessert, adding a glossy sheen and an extra layer of sweetness that ties everything together. Whether you serve it warm, a la mode, or just on its own, this cobbler is sure to leave you craving more.
Why You’ll Love This
There are countless reasons to fall in love with this Salted Caramel Pear Cobbler. For starters, the combination of flavors is simply heavenly. The sweetness of the pears is perfectly complemented by the salted caramel, creating a dessert that is rich but not overly sweet. It’s a dish that captures the essence of autumn, with its warm, inviting flavors that make you feel right at home.
In terms of ease, this recipe stands out as accessible for everyone—from busy parents to those just beginning their culinary journey. The steps are straightforward, allowing you to focus more on the joy of cooking rather than getting bogged down by complicated techniques. Plus, it’s a budget-friendly dessert that uses ingredients you likely already have on hand, making it a perfect option for those who want to cook deliciously without breaking the bank.
Another benefit is its versatility. Not only can you make this cobbler with different fruits, but you can also make it your own with various spice combinations. Whether you’re looking for a warm dessert to impress guests or an easy weeknight treat, this cobbler fits the bill perfectly. The simplicity of the recipe means you can customize it to your tastes, making it a delightful addition to any meal.
Ingredients You’ll Need
- Fresh Pears: Choose firm, ripe pears like Bosc or Anjou. They hold their shape well during baking and provide a delightful sweetness.
- Sugar: Granulated sugar is used for both the caramel and the fruit. It enhances natural sweetness while creating a syrupy consistency.
- Salted Caramel Sauce: Pre-made or homemade, this sauce is the star ingredient that adds richness. If you prefer, you can make it from scratch for a more personalized touch.
- All-Purpose Flour: Essential for the cobbler topping; it gives structure while still keeping it light and fluffy.
- Baking Powder: This leavening agent helps the topping rise and become beautifully fluffy.
- Butter: Unsalted butter not only adds flavor but ensures a tender cobbler topping.
- Milk: Whole milk will give the topping a creamy texture. You can substitute with almond or oat milk if desired.
- Cinnamon: A warm spice that enhances the flavor of the pears and brings a cozy aroma to your kitchen.
Each ingredient serves a unique purpose, creating a cohesive and comforting dish. Keeping them fresh and high-quality, especially the pears and caramel, is crucial for achieving the best results.
How to Make
1. **Preheat Your Oven**: Start by preheating your oven to 350°F (175°C). This ensures that your cobbler will bake evenly, resulting in that golden, crisp topping and perfectly tender pears. While the oven heats, you can prepare your ingredients.
2. **Prepare the Pears**: Peel and slice the pears into bite-sized pieces. Aim for uniformity in size to ensure consistent cooking. Place them in a mixing bowl, and toss with sugar and cinnamon. The sugar will draw out the natural juices of the pears, creating a flavorful base for your cobbler.
3. **Combine the Dry Ingredients**: In a separate bowl, mix the all-purpose flour, baking powder, and a pinch of salt. This mixture creates the foundation for the topping. Use a whisk to combine the ingredients thoroughly, breaking up any clumps of flour so that everything is evenly distributed.
4. **Create the Cobbler Topping**: In another mixing bowl, cream the softened butter with sugar until it becomes light and fluffy. This process incorporates air into the mixture, which is key to achieving a light texture. Gradually add the dry mixture, alternating with milk, until fully combined. The batter should be thick but spreadable.
5. **Assemble the Cobbler**: In a greased baking dish, spread the prepared pears evenly across the bottom. Drizzle half of the salted caramel sauce over the pears to infuse them with flavor. Next, spoon dollops of the cobbler topping over the fruits, allowing some of the pears to peek through. This layering creates a beautiful visual and ensures that every bite has a combination of flavors.
6. **Bake to Perfection**: Place your assembled cobbler into the preheated oven and bake for approximately 45 minutes. Keep an eye on it; you want the topping to turn a beautiful golden brown and the fruit juices to bubble around the edges. As it bakes, the aroma filling your kitchen will truly be irresistible.
7. **Cool and Serve**: After baking, allow the cobbler to cool for about 10 minutes before serving. This cooling time allows the cobbler to set, making it easier to scoop. When you serve, add a generous drizzle of the remaining salted caramel sauce for an extra indulgent experience.
Enjoy the warm, comforting flavors that envelop you with each spoonful. A scoop of vanilla ice cream can elevate it further, offering a delightful contrast of temperatures.
Variations & Substitutions
Chocolate Chip Variation: If you’re a fan of the rich flavors of chocolate, consider adding semi-sweet chocolate chips to the topping. This adds a delightful contrast to the sweet pears and salted caramel. You can replace a small portion of the flour with cocoa powder to create a more chocolatey base. This variation is perfect for those who enjoy a mix of sweet and savory in their desserts.
Pecan Crunch Variation: For an added texture twist, incorporate chopped pecans into your topping. This adds an earthy crunch that pairs well with the soft pears and creamy caramel. To make this version, simply fold in your pecans before baking, and consider reducing the amount of flour slightly to maintain the topping’s fluffiness. This variation is ideal for nut lovers and provides a satisfying crunch with every bite.
Spiced Apple Pear Variation: You can easily turn this cobbler into a spiced apple and pear delight. Replace some of the pears with tart apples, like Granny Smith. To enhance the flavor, add extra cinnamon and a splash of vanilla extract. This option is great for those who want a bit more tanginess in their dessert while still keeping the warm, cozy vibes of fall.
Gluten-Free Option: For a gluten-free version of this recipe, substitute all-purpose flour with a 1:1 gluten-free flour blend. Make sure your baking powder is also gluten-free. This allows those with gluten sensitivities to enjoy this delicious dessert without sacrificing flavor or texture.
Common Mistakes to Avoid
One of the most common mistakes when making cobbler is overmixing the topping. This can lead to a dense, gummy texture instead of the light, fluffy result you want. Remember, mix until just combined; it’s okay to have a few lumps. Also, be sure not to skip the step of creaming your butter sufficiently, as this helps incorporate air into the topping.
Another issue is not allowing enough time for the cobbler to cool before serving. If you dive right in, you might end up with a gooey mess instead of perfectly set pieces. Allow it to rest for at least 10 minutes, which will make a world of difference in achieving a nice scoopable consistency.
Lastly, don’t overlook the importance of the salted caramel sauce. If it’s too runny, it might not cling to the fruit properly. Conversely, if it’s too thick, it may not distribute well throughout the cobbler. Opt for a sauce that has a nice balance—one that’s easy to drizzle but thick enough to provide richness and depth of flavor.
Storage, Freezing & Reheating Tips
For those of you who may have leftovers (if you can resist!), storing this cobbler properly is key. To keep it fresh, cover the cobbler with plastic wrap or transfer it to an airtight container. It can be stored in the refrigerator for up to five days without compromising texture or flavor.
If you want to enjoy this dessert even later, consider freezing it. Allow the cobbler to cool completely before wrapping individual portions tightly in plastic wrap, followed by aluminum foil. This double wrapping prevents freezer burn and can keep your cobbler delightful for up to three months. When you’re ready to enjoy it, simply thaw in the refrigerator overnight and reheat in the oven at 350°F (175°C) until warmed through.
When reheating, cover it with foil to prevent the topping from becoming too dry. This way, you can experience that warm, comforting taste reminiscent of its fresh-baked glory.
Frequently Asked Questions
Can I use other fruits instead of pears? Yes, absolutely! This recipe is wonderfully adaptable. You can use apples, peaches, or even berries. Just remember that different fruits will yield varying levels of sweetness and juiciness, so feel free to adjust the sugar accordingly.
What if my cobbler topping is too dry? If you find your topping is on the dry side, it may have been overmixed or lacking in moisture. Next time, ensure you’re gently mixing the ingredients until just combined. You can also add a splash more milk to achieve a better consistency.
How do I know when my cobbler is done? You’ll know it’s done when the topping is a beautiful golden brown and the fruit juices are bubbling around the sides. A toothpick inserted into the topping should come out clean, indicating that it has baked through.
Can I make this cobbler ahead of time? Yes! You can prepare the entire dish and store it in the refrigerator prior to baking. When you’re ready to enjoy, simply bake it from chilled. You may need to add an additional 10 minutes to the baking time.
Is this cobbler suitable for a gluten-free diet? Absolutely! By substituting all-purpose flour with a gluten-free chart, you can easily make this cobbler gluten-free while keeping the delicious flavors intact. Always double-check your baking powder for gluten-free certification as well.
Conclusion:
In summary, this Salted Caramel Pear Cobbler recipe is a warm hug on a plate that captures the essence of fall in every bite. The easy preparation, comforting flavors, and delightful textures make it a perfect addition to any autumn gathering or cozy family night. I encourage you to try it in your own kitchen, customize it to suit your tastes, and share it with those you love. Don’t hesitate to experiment with different variations or simply indulge in the classic version. Happy baking!


