Prep time: 10 minutes
Cook time: 0 minutes
Total time: 4 hours (includes freezing time)
Servings: 12
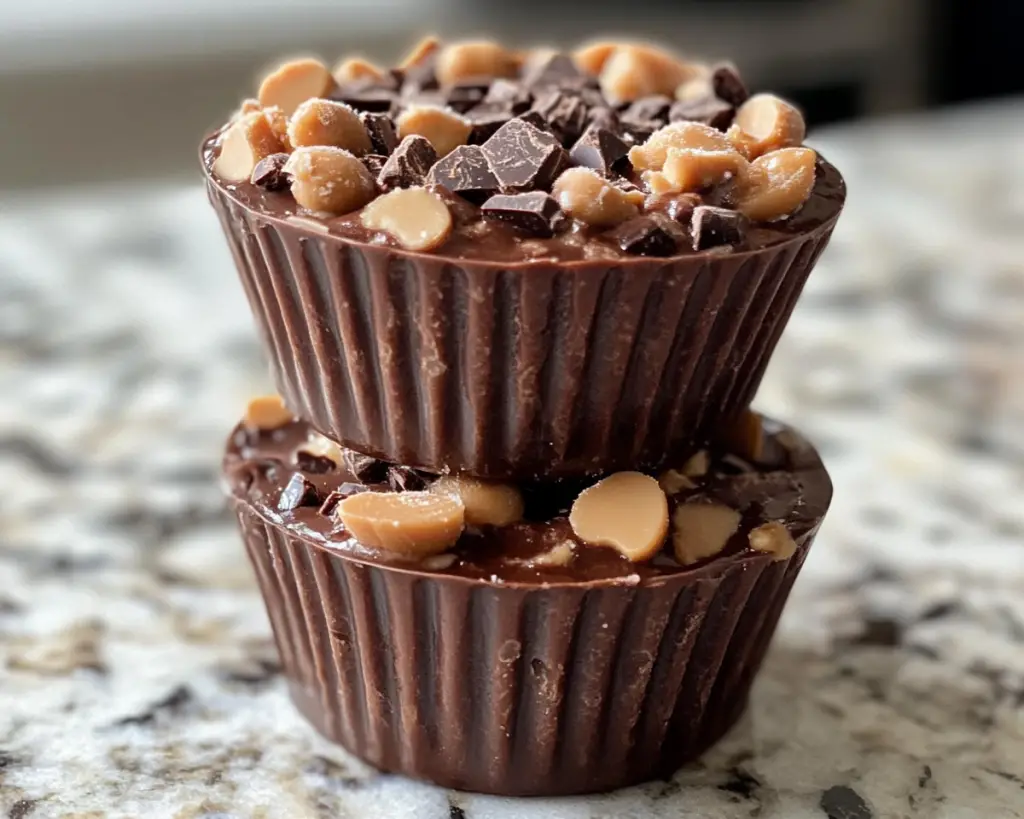
Frozen Chocolate Peanut Butter Yogurt Cups are the ultimate treat to satisfy your cravings while keeping your health goals on track. Imagine biting into a creamy cup filled with silky chocolate and rich peanut butter, melting in your mouth yet offering the crunchy pleasure of granola or nuts. This dessert isn’t just another sweet; it’s packed with nutrients, making it a guilt-free indulgence that is perfect for busy parents seeking a quick, healthy snack for their kids or anyone looking to satisfy their sweet tooth without compromising on health.
What’s more special about this recipe is how easy it is to whip together and the sheer versatility it offers. In this article, you will learn about the ingredients that go into these luscious cups, how to make them from scratch, plus delicious variations to customize them to your taste. You’ll also discover common mistakes to avoid and best practices for storage, so you can enjoy these desserts over several days. Whether you’re a seasoned cook or a beginner in the kitchen, this recipe will be your new go-to for healthy snacking.
What Is Frozen Chocolate Peanut Butter Yogurt Cups (Healthy & Cool Dessert)?
Frozen Chocolate Peanut Butter Yogurt Cups are a delightful blend of creamy yogurt, rich chocolate, and nutty peanut butter, frozen to create a refreshing treat. The idea of combining yogurt and peanut butter isn’t new; however, freezing them into cups makes this dish a standout. The origins of this dessert can be traced back to various frozen yogurt creations that popped up in health-conscious communities looking for lower-calorie alternatives to traditional ice creams.
When you take a bite of these cups, you’re greeted with a creamy texture that is both smooth and satisfying. The flavor profile is robust; the bold richness of the chocolate complements the nutty characteristics of the peanut butter very well. As you enjoy it, you’ll also notice the crunchiness from the choice of toppings, whether it’s granola, nuts, or even a sprinkle of sea salt that elevates the flavor to gourmet status. This balance between creamy and crunchy makes these cups more than just a dessert; they are a sensory experience worth relishing.
Why You’ll Love This
You’ll absolutely love this recipe for multiple reasons. First and foremost, the taste is a perfect harmony of flavors; the chocolate brings sweetness while the peanut butter offers a savory depth that melds perfectly with the yogurt. Not only is the taste amazing, but these cups are incredibly easy to prepare. With minimal ingredients and straightforward steps, you can whip them up in no time and simply let the freezer do the work.
In terms of cost, this dessert is budget-friendly. You likely have most of the ingredients already in your pantry. It’s a great way to utilize older yogurt or even leftover peanut butter that needs a new home. As for health benefits, these yogurt cups are rich in protein, probiotics, and healthy fats, making them a wholesome addition to your cooking repertoire. For anyone who believes that healthy sweets don’t taste good, this recipe will surely change your mind.
Additionally, the versatility of this dessert means you can cater it to various dietary needs—whether gluten-free, vegan, or sugar-free—making it an inclusive option for everyone at the table. There are plenty of moments where you might simply want a cool treat without feeling heavy afterward; these wholesome yogurt cups fulfill that desire. The lack of fuss in preparation further eliminates any misconceptions about healthy treats being arduous to make.
Ingredients You’ll Need
- Greek Yogurt: This creamy base is essential, providing not only texture but also probiotics. You can substitute with dairy-free yogurt for a vegan option.
- Peanut Butter: Choose natural peanut butter for a healthier alternative. This is the star ingredient that brings that nutty flavor. Alternatives can include almond butter or sunbutter.
- Honey or Maple Syrup: This will add sweetness without the refined sugars. Use pure maple syrup for a vegan option.
- Cocoa Powder: Unsweetened cocoa powder adds rich chocolate flavor without added sugar. Carob powder can serve as a substitute for those avoiding caffeine.
- Vanilla Extract: A little splash goes a long way in enhancing the overall flavor. Ensure it’s pure extract for the best taste.
- Granola or Chopped Nuts: For topping, these add an enjoyable crunch. You can use gluten-free granola for a gluten-free snack.
Each of these ingredients has a role to play, enhancing the overall taste and texture of the dessert. When you gather these items before you start, you’ll find preparation becomes an effortless task, allowing you to get right into the fun of mixing and molding your treats!
How to Make
- Mix the base: In a medium-sized bowl, combine 2 cups of Greek yogurt, ½ cup of peanut butter, ¼ cup of cocoa powder, and ⅓ cup of honey. Use a spatula or whisk to blend them together until the mixture is smooth and creamy. Make sure you scrape down the sides of the bowl to incorporate all ingredients evenly. This should take about 2-3 minutes of vigorous mixing.
- Add vanilla: After the mixture is well combined, add in 1 teaspoon of vanilla extract. This adds an aromatic depth to your chocolate and peanut butter mix. Give it a good stir for about a minute to ensure the vanilla is fully integrated.
- Prepare the cups: Line a muffin tin or small silicone cups with cupcake liners. This makes it easy to pop the cups out once they’re frozen. If you’re using silicone molds, there’s no need for liners, but they can help in cleanup.
- Fill the molds: Scoop the yogurt mixture into each cup, filling them about ¾ of the way full. You can use a spoon or an ice cream scoop for this task; just be careful not to overfill them to prevent spillage when freezing.
- Add toppings: After filling, sprinkle granola or chopped nuts on top for added texture and crunch. Consider adding a light sprinkle of sea salt for an interesting flavor contrast. This step is crucial for transforming your simple yogurt cups into a gourmet experience.
- Freeze: Place the muffin tin or molds into the freezer and allow them to freeze for at least 4 hours, or until they are fully set. It’s important to leave them long enough for a solid texture; if they’re too soft, they won’t hold their shape when removed.
- Serve and enjoy: Once frozen, carefully peel away the liners or remove from molds. You can serve them immediately or store them in a freezer-safe container for later. If you leave them out for a minute before serving, they will soften slightly for a creamier bite!
There you have it! The whole process is relatively simple, but it allows for fantastic flexibility. If you’re feeling adventurous, you can even add in small pieces of fruit or a drizzle of syrup after filling the molds to create a fun marble effect in the yogurt cups.
Variations & Substitutions
Vegan Variation: For a completely vegan-friendly treat, swap out the Greek yogurt for a plant-based yogurt alternative, such as almond milk yogurt. Replace the honey with maple syrup, which is a great natural sweetener. Using cocoa powder from a reputable brand ensures you still get that rich chocolate flavor without animal products.
Fruit-Infused Cups: Feel free to customize these yogurt cups by adding fresh fruit to the blend before freezing. For instance, mashed bananas or pureed strawberries can be mixed into the yogurt base for added sweetness and a splash of color. This not only increases the flavor but also adds vitamins, providing additional nutritional benefits.
Chocolate Swirl Variation: If you’re a true chocolate lover, consider making a chocolate swirl by melting some dark chocolate and drizzling it over the top after filling the cups. Swirl it through the yogurt mix before freezing for a delightful surprise in every bite!
Nut-Free Option: If you or someone you’re serving has a nut allergy, replace the peanut butter with sunflower seed butter. This will maintain a creamy texture and rich, nutty flavor without incorporating any nuts. Be vigilant about checking labels on all packaged ingredients to avoid cross-contamination.
Flavor Experimentation: Feel free to play around with different flavorings like almond extract instead of vanilla or even adding a hint of espresso powder to enhance the chocolate flavor. Spice lovers might enjoy adding a pinch of cinnamon or even cayenne for a unique kick. Each alteration can result in a completely different flavor profile that offers a new take on your yogurt cups.
Common Mistakes to Avoid
One common mistake is overfilling the cups. If they are too full, they could spill over while freezing, leading to messy cleanup. Ensure you leave some space at the top; it’s better to fill them ¾ full as recommended. Another potential issue arises if you do not let them freeze long enough; under-frozen cups will fall apart when you try to serve them.
Also, using an overly runny peanut butter can lead to cups that don’t hold their structure. Natural nut butter can separate; be sure to stir it well before mixing. If the peanut butter you use is too oily, the mixture may become loose, again leading to messy results. Finally, don’t skip topping with granola or nuts if you enjoy texture; that’s where much of the fun lies in eating these delicious treats!
Storage, Freezing & Reheating Tips
To keep your Frozen Chocolate Peanut Butter Yogurt Cups fresh, store them in an airtight freezer-safe container or a Ziploc bag with as much air removed as possible. When layered, consider separating each layer with wax paper to avoid sticking. They can last for up to 2 months in the freezer.
Always remember to use proper food safety practices when handling your ingredients and prepared foods. If you’re making a batch to keep for a while, label the container with the date to ensure you know when you made them. Before serving, it’s a good idea to check the texture; if they feel overly hard, let them sit at room temperature for a few minutes to soften slightly before enjoying.
Frequently Asked Questions
Can I make these yogurt cups ahead of time?
Absolutely! These cups store well in the freezer for up to two months, making them a perfect make-ahead treat. You can prepare them on the weekend and enjoy a sweet snack throughout the week without any hassle.
What if I don’t have Greek yogurt?
If you don’t have Greek yogurt on hand, regular yogurt can be substituted. Just keep in mind that regular yogurt may yield a slightly thinner consistency, but it will still work well for this recipe. For a thicker consistency, you might want to strain the regular yogurt through a cheesecloth for a few hours to achieve that creaminess.
Can I use flavored yogurt?
Using flavored yogurt can be a fun way to add variety to your yogurt cups. However, do be mindful of the sweetness; you may want to reduce the amount of honey or syrup you add to avoid making your cups too sweet.
How do I know when they are fully frozen?
The best indicator is to feel the texture; they should feel solid to the touch and should not yield when pressed. If you see that there’s any softness or they leave a dent when touched lightly, they need additional freezing time.
Can I use other nut butters?
Definitely! Feel free to replace peanut butter with almond butter, cashew butter, or even sunflower seed butter for those with nut allergies. Each option will impart its unique flavor while keeping the creamy texture that makes these cups delightful.
Conclusion:
These Frozen Chocolate Peanut Butter Yogurt Cups are not only a delicious treat, but they also offer incredible health benefits, making them a unique combination of indulgence and nourishment. Perfect for sharing with family or keeping all to yourself, this dessert is adaptable enough to suit a variety of dietary needs and taste preferences. So why not give this recipe a try and explore all its possibilities? Customize your ingredients, play with toppings, and share your creations with loved ones! There’s nothing more satisfying than enjoying a healthy sweet treat, especially when it’s homemade. Go ahead, indulge, and enjoy the delightful experience these yogurt cups bring!