Prep time: 15 minutes
Cook time: 25 minutes
Total time: 40 minutes
Servings: 4
Buffalo Cauliflower Wraps have become a favorite among those looking for a delicious, spicy, and satisfying meal that is both vegetarian and easy to make. Imagine taking a bite of a crispy cauliflower floret drenched in tangy buffalo sauce, nestled in a warm wrap, and complemented by fresh veggies. This is not just a meal; it is a celebration of texture and flavor that caters to spicy food lovers and health-conscious eaters alike. Whether you are a busy parent looking for a quick weeknight dinner or someone who enjoys prepping for the week ahead, this recipe is perfectly suited to your needs.
What makes Buffalo Cauliflower Wraps so special is their versatility. They can be customized to suit various dietary preferences, whether you are vegan, gluten-free, or simply looking to reduce your meat intake. You can enjoy these wraps in several ways, making them a staple in any household. In this article, you will learn about the essential ingredients, step-by-step instructions on how to prepare them, variations to keep things fresh, and tips to prevent common mistakes.
What Is Buffalo Cauliflower Wrap?
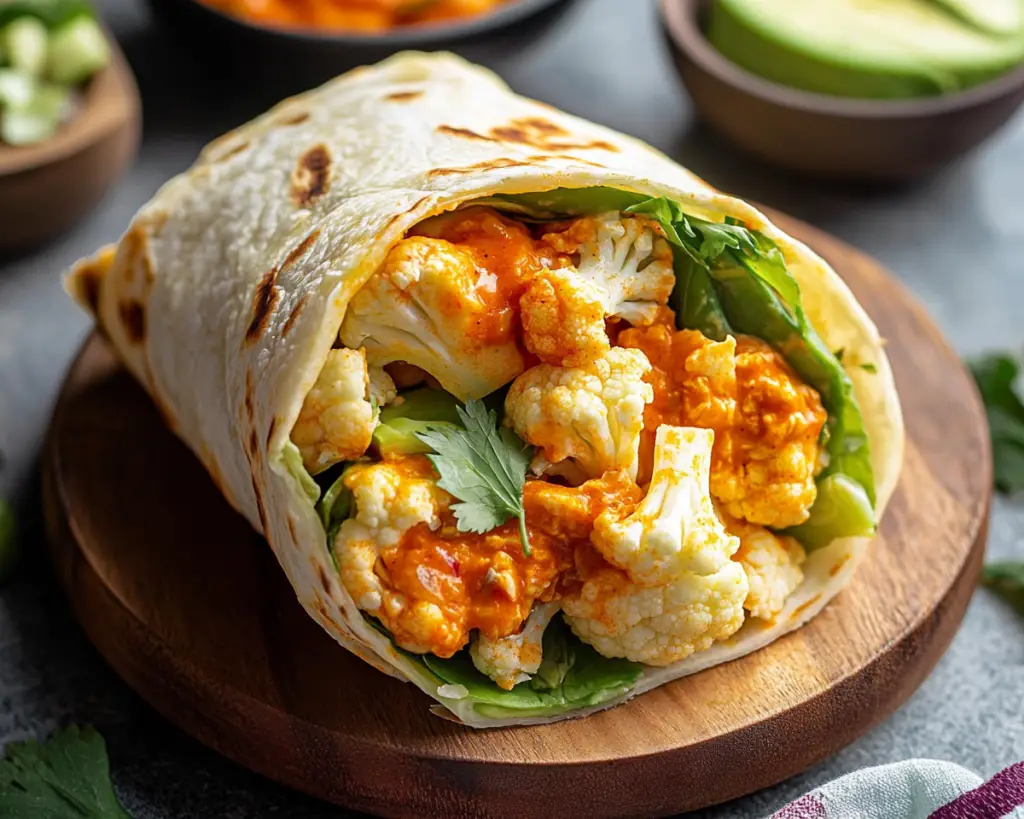
Buffalo Cauliflower Wrap is a delicious and innovative spin on traditional buffalo wings. Originating from the classic American buffalo wing recipe, which features crispy, fried chicken coated in spicy buffalo sauce, the vegetarian version replaces chicken with cauliflower, offering a lighter option packed with flavor and crunch. The cauliflower florets are battered and baked until golden and crispy, providing that satisfying crunch you crave.
In addition to the crispy buffalo cauliflower, the wraps typically include a spread of creamy dressing, fresh vegetables such as lettuce and tomatoes, and sometimes cheese for those who enjoy it. The combination results in a meal that is not only satisfying but also visually appealing with a beautiful array of colors. The wraps are great for lunchtime meals, picnics, or serving at gatherings with friends.
The texture contrasts are one of the most delightful features of these wraps. Imagine sinking your teeth into a crunchy exterior followed by the tender warmth of the cauliflower inside, all enhanced by the bold flavor of buffalo sauce. This dish offers an enjoyable balance of heat and freshness that is sure to tantalize your taste buds.
Why You’ll Love This Buffalo Cauliflower Wrap
There are countless reasons to fall in love with Buffalo Cauliflower Wraps. The primary draw is the flavor profile; the tangy buffalo sauce paired with the subtle sweetness of roasted cauliflower creates an irresistible combination. Additionally, the wraps are incredibly easy to make, making them perfect for busy weeknight dinners or meal prepping.
Another fantastic aspect of this dish is its health benefits. By using cauliflower instead of meat, you reduce calories and fat while boosting fiber and nutrient content. Cauliflower is known for its high vitamin C content and antioxidant properties, contributing to overall well-being. Unlike traditional buffalo wings, this recipe is much lighter, allowing you to indulge without the guilt.
Buffalo Cauliflower Wraps are also versatile and can be customized to fit your taste preferences and dietary needs. If you are looking for gluten-free options, simply use gluten-free wraps. For a vegan version, replace the dressing with a non-dairy alternative or avocado spread. The possibilities are endless, ensuring that everyone at the table can enjoy these delightful wraps.
Moreover, you can serve them alongside a variety of sides, such as sweet potato fries, a refreshing salad, or even homemade coleslaw. Feel free to experiment with flavor and texture combinations, giving you the chance to make these wraps your own.
Ingredients You’ll Need
- Cauliflower: The star of this recipe. You’ll need one medium head of cauliflower, cut into florets. It provides the main body of the wrap, and its neutral flavor beautifully absorbs the buffalo sauce. If you cannot find cauliflower or want a change, you can use broccoli or even tofu for a different texture.
- Buffalo Sauce: About 1 cup of your favorite buffalo sauce is required to coat the cauliflower. This adds the signature spicy flavor. For a milder version, use a barbecue sauce or a homemade yogurt sauce mixed with spices.
- Flour: You can use all-purpose flour or whole wheat flour for how the batter adheres to the cauliflower. If you want a gluten-free version, substitute with almond flour or chickpea flour.
- Water: Used to create a batter when mixed with flour. It binds the flour to the cauliflower before baking.
- Optional Seasonings: Such as garlic powder and paprika to enhance the flavor profile. This will add warmth and depth to each bite.
- Wraps: Whole wheat or gluten-free tortillas serve as the base of your wrap. You can choose any type of wrap based on your dietary preferences.
- Fresh Vegetables: Typically, lettuce, tomatoes, and cucumbers are included for freshness and crunch. Feel free to add your favorites or what you have on hand.
- Cheese: Optional, but crumbled blue cheese or shredded cheddar can add creaminess that complements the spicy buffalo flavor. Opt for a vegan alternative if you prefer.
How to Make Buffalo Cauliflower Wrap
1. **Preheat the Oven:** Begin by preheating your oven to 450°F (230°C). A hot oven is crucial for achieving that beautifully crispy texture on the cauliflower.
2. **Prepare the Cauliflower:** Clean your cauliflower and break it into bite-sized florets. Make sure they are roughly similar in size to ensure even cooking. Place the florets in a mixing bowl.
3. **Make the Batter:** In a separate bowl, combine the flour and water. You want a thick but pourable consistency that can coat the cauliflower. Add optional seasonings at this stage, such as garlic powder or paprika, to infuse a depth of flavor into the batter.
4. **Coat the Cauliflower:** Dip each cauliflower floret into the batter, making sure to coat it well. Allow excess batter to drip off and then spread the florets on a parchment-lined baking sheet. The parchment helps to prevent sticking and makes cleanup a breeze.
5. **Bake the Cauliflower:** Place the baking sheet in the preheated oven and bake for about 20 minutes, or until the cauliflower is golden brown and crispy. Halfway through, give them a toss to ensure all sides crisp up nicely.
6. **Add Buffalo Sauce:** Once the cauliflower is done baking, remove it from the oven and drizzle the buffalo sauce over the hot florets. Toss them gently to ensure they are thoroughly coated. If you like it extra spicy, add more sauce at this stage.
7. **Assemble the Wraps:** Take your wraps and spread your choice of dressing or sauce along the center. Begin layering with fresh lettuce, tomatoes, and cucumbers. Top it with the spicy buffalo cauliflower and cheese if using.
8. **Wrap and Serve:** Fold in the sides of the tortilla and roll it up tightly from the bottom. Cut in half if desired, and serve immediately while hot. Enjoy your hearty meal that bursts with flavor and texture!
3 Variations & Substitutions
Baked Buffalo Cauliflower Bites: Instead of making wraps, you can serve the buffalo cauliflower florets as bites on their own. Adjust the baking time to ensure they are extra crispy. Pair them with celery sticks and a side of ranch or blue cheese dressing for the ultimate snack. This version is perfect for parties or game day, making them an impressive yet easy appetizer.
Buffalo Cauliflower Bowl: For a grain-based variation, consider serving the buffalo cauliflower over a bed of cooked quinoa or brown rice. Add avocado slices and your favorite veggies for a healthier bowl option. Drizzling with tahini sauce or a yogurt-based dressing can enhance the flavors even more, providing a nutritious and filling meal.
Vegan Buffalo Cauliflower Wrap: To cater to plant-based eaters, simply replace any dairy ingredients with vegan alternatives. Use vegan mayonnaise for the dressing and non-dairy cheese options if desired. You can also load up on nutrient-dense vegetables like shredded carrots or spinach to boost the wrap’s healthiness while keeping the flavor profile intact.
Common Mistakes to Avoid
One common mistake when making Buffalo Cauliflower Wraps is overcrowding the baking sheet. If the cauliflower florets are too close together, they will steam instead of roast, leading to a soggy texture rather than the desired crispiness. Ensure that you spread the florets out in a single layer, allowing room for proper air circulation during baking.
Another pitfall to be wary of is undercooking the cauliflower. A properly baked cauliflower should be tender inside and crispy outside. Pay close attention to the baking time and test for doneness. To enhance the crispiness, consider turning on the broiler for the last few minutes but watch carefully to prevent burning.
Finally, be mindful of how much buffalo sauce you use. While it’s tempting to slather on a generous amount, using too much can make the wraps soggy. Aim for a balanced flavor, ensuring that the sauce adds spice without overpowering the crunch of the cauliflower florets.
Storage, Freezing & Reheating Tips
To store leftover Buffalo Cauliflower Wraps, place them in an airtight container in the refrigerator. They will keep well for up to 3 days but are best consumed fresh for optimal texture and flavor. If you find them a bit soggy when reheating, consider putting them in the oven for a few minutes to regain some of their crispness.
For longer storage, you can freeze the baked cauliflower bites separately. Spread them out on a baking sheet to freeze individually; once they are frozen, transfer them to a freezer bag or container. This way, you can easily take out a portion whenever you desire a spicy snack.
When reheating frozen buffalo cauliflower, you can bake them directly from frozen for about 20 minutes at 400°F (200°C) or until heated through. This method maintains their crisp texture while allowing them to regain warmth.
Frequently Asked Questions
Can I use frozen cauliflower instead of fresh?
Absolutely! Frozen cauliflower florets can be a convenient alternative. Just thaw them and pat dry to remove excess moisture before coating them with the batter. This will help achieve that crispy finish when baked.
Is buffalo cauliflower spicy?
Yes, the level of spiciness largely depends on the type of buffalo sauce you use. If you’re sensitive to heat, opt for a milder sauce or dilute your buffalo sauce with some olive oil or non-dairy yogurt. You can always adjust the spice level to suit your taste.
Can I make these wraps gluten-free?
Yes! Simply use gluten-free flour for the batter and gluten-free wraps. Additionally, check the label of your buffalo sauce to ensure it is gluten-free, as some brands may contain gluten.
How can I make these wraps even healthier?
For a wholesome twist, consider adding more veggies! You can include spinach, shredded carrots, or bell peppers inside the wrap. Using whole-grain or high-fiber tortillas will also contribute to a healthier meal.
Can I prepare the cauliflower in advance?
Yes, you can prepare the cauliflower ahead of time. Simply coat the florets in batter, refrigerate them, and bake just before serving. This way, you can enjoy fresh wraps with minimal preparation during meal times.
Conclusion:
The Buffalo Cauliflower Wrap is not only a fun and delicious dish, but it is also a fantastic way to indulge in bold flavors while being mindful of health. Each bite brings tantalizing spices, crunchy veggies, and satisfying textures that make it a delightful meal for any occasion. Feel free to customize this recipe with your favorite ingredients, and don’t hesitate to share your creations with friends and family.
Now it’s your turn to whip up this amazing dish! Gather your ingredients, roll up those wraps, and bring a little magic to your dinner table tonight. Enjoy the flavors, the crunch, and the joy of cooking homemade meals!