Prep time: 20 minutes
Cook time: 30 minutes
Total time: 50 minutes
Servings: 12
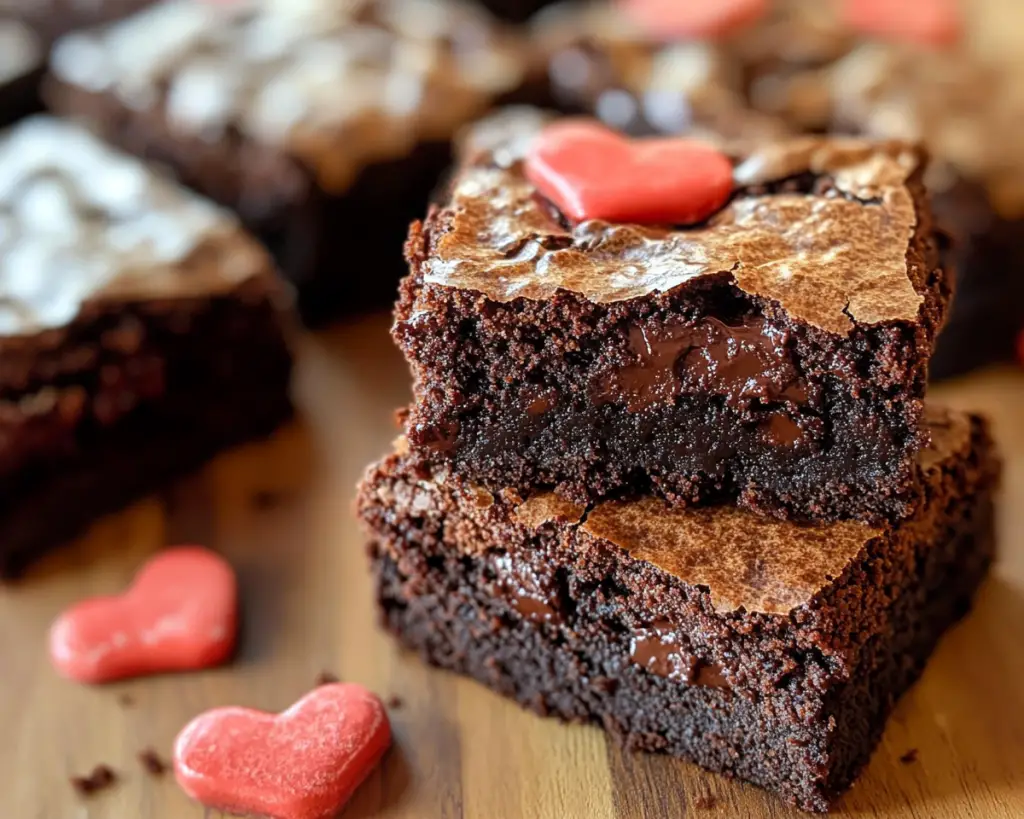
There’s something undeniably special about Valentine’s Day that compels us to indulge in delightful treats that express love and affection. This year, why not take your dessert game to a new level with homemade Valentine’s Day Brownies with a gooey chocolate center? These brownies are rich, fudgy, and topped off with a luscious chocolate center that oozes with every bite. Imagine cutting into a square of brownie to discover that warm, melty chocolate – it’s a moment that makes both the cook and the tastes experience a kind of joy that’s hard to put into words.
This recipe is not only delicious but also incredibly easy to prepare, making it perfect for busy parents or baking beginners looking to impress. You’ll learn how to master the art of brownie-making and perhaps even a few secret tips along the way to achieve that renowned chewy texture and gooey center. Get ready to make a dessert that’s as delightful to prepare as it is to eat.
What Are Valentine’s Day Brownies?
Valentine’s Day Brownies are a classic dessert with a romantic twist. Derived from the traditional brownie recipe, these brownies are elevated with a gooey chocolate heart at the center that perfectly embodies the sweetness of love. Originating in the United States in the late 19th century, brownies have courted hearts for generations. Their rich, fudgy texture and intense chocolate flavor are what make them so irresistible.
When you indulge in these brownies, you’re not just enjoying a treat; you’re experiencing a delightful balance of flavors and textures. The brownies are crispy on the outside with a soft, chewy interior, while the center is laced with a warm, melted chocolate that creates a decadent surprise. It’s a way to articulate feelings you might find hard to express – and who can resist such a charming dessert on a day dedicated to love?
Why You’ll Love This Valentine’s Day Brownies
These brownies are perfect for a multitude of reasons. Firstly, they are incredibly delicious; the combination of rich chocolate and fudgy brownie creates a decadent dessert that is hard to resist. They’re simple to make and require minimal ingredients, which is perfect for those short on time but big on taste.
You might think making brownies involves complicated steps, but this recipe is designed for simplicity without compromising flavor. Plus, they’re excellent for sharing. Whether you’re whipping them up for your partner, a gathering with friends, or your child’s classroom party, everyone will surely appreciate this sweet gesture. Many people worry that brownies can become too dry, but with our method, you’ll achieve a perfectly moist and gooey brownie every time.
Ingredients You’ll Need
- 1 cup (2 sticks) unsalted butter – This will lend richness and a creamy texture to your brownies.
- 2 cups granulated sugar – Adds sweetness and helps create that crispy top layer.
- 4 large eggs – These act as binding agents and contribute to the chewy texture.
- 1 teaspoon vanilla extract – Enhances the chocolate flavor.
- 1 cup all-purpose flour – Provides structure to your brownies.
- 1 cup unsweetened cocoa powder – This is the key ingredient for that rich chocolate flavor.
- 1 teaspoon baking powder – Helps the brownies rise slightly.
- 1/2 teaspoon salt – Balances sweetness and enhances flavor.
- 1 cup chocolate chips – For that gooey center; options include dark, semi-sweet, or even white chocolate!
- Additional chocolate for drizzle (optional) – Melted chocolate can be drizzled on top for extra flair.
Each ingredient serves an essential purpose in making your brownies delicious. Use high-quality chocolate and cocoa powder for the best flavor; this is *not* the time for cheap substitutes. If flour isn’t in stock, you can substitute with almond flour for a gluten-free version, but keep in mind the texture will be a bit different. Feel free to swap out the chocolate chips for an equal measure of your favorite nuts or even candies, depending on your preferences!
How to Make Valentine’s Day Brownies
1. **Preheat your oven** to 350°F (175°C) and prepare your 9×13-inch baking dish by greasing it or lining it with parchment paper, leaving some overhang for easy removal. This step ensures that your brownies won’t stick and makes for a hassle-free cleanup.
2. **Melt the butter** in a medium saucepan over low heat. Once melted, remove the butter from the heat and allow it to cool slightly. This will help prevent the eggs from cooking when you mix everything together.
3. **Combine sugar and melted butter** in a bowl mixing well until the mixture is creamy. This helps to dissolve the sugar and will result in a nice, shiny top on the finished brownies.
4. **Incorporate the eggs** one at a time, ensuring that each egg is fully blended in before adding the next. Stir in the vanilla extract. This adds a depth of flavor that complements the chocolate wonderfully.
5. **Sift together the dry ingredients**: flour, cocoa powder, baking powder, and salt. Sifting prevents lumps and incorporates air, making your brownies more lush and tender. Gradually add the dry mix to the wet ingredients, stirring until just combined.
6. **Fold in the chocolate chips** gently, ensuring an even distribution without overmixing. You want those chocolate pieces to create pockets of gooey goodness throughout your brownies.
7. **Pour half of the batter** into the prepared baking dish, spreading it evenly. **Add a layer of chocolate chips** or even small dollops of chocolate, then pour the rest of the batter on top. Do not swirl; instead, leave as is for a gooier center.
8. **Bake in the preheated oven** for about 30-35 minutes. *Important*: A toothpick should come out slightly sticky, indicating that the center is perfectly gooey. Keep an eye on them toward the end, as every oven can vary in temperature.
9. **Let the brownies cool** in the pan for about 10-15 minutes, then lift them out using the parchment paper. Allow to cool on a wire rack before slicing. *Note*: It’s easier to cut the brownies when they’re cooled, ensuring clean slices.
10. **Serve warm**, if desired, drizzled with melted chocolate for extra indulgence and topped with fresh berries or whipped cream for a beautiful presentation.
5 Variations & Substitutions
Nutty Chocolate Brownies: If you’re a fan of textures, try adding 1 cup of your favorite nuts, such as walnuts or pecans. The nuts add a lovely crunch and an additional depth of flavor to the chewy brownie while providing healthy fats. Toasting them lightly in a dry skillet before using can enhance their flavor even more.
Minty Chocolate Brownies: For a refreshing twist, incorporate 1 teaspoon of peppermint extract along with the vanilla. This will transform your brownies into a mint chocolate paradise, perfect for those who love a minty flavor in their desserts. You might even consider adding some chopped mint candies for an added surprise.
Gluten-Free Brownies: Substitute all-purpose flour with a gluten-free blend that includes rice flour and tapioca starch. You’ll achieve a similar texture, making them suitable for gluten-sensitive eaters. Be sure to double-check the blend’s properties as some may require additional binding agents.
Espresso Brownies: Add 1 tablespoon of instant espresso powder to your sugar mixture. This will intensify the chocolate flavor without compromising sweetness, appealing to coffee lovers. Pairing dark chocolate chips will enhance this variation’s richness even more.
Swirled Cheesecake Brownies: For a decadent take, prepare a cheesecake batter using 8 oz. of cream cheese, 1/3 cup sugar, and 1 egg. Dollop spoonfuls of this cream cheese mixture on top of the brownie batter before baking and swirl with a knife for an elegant cheesecake brownie combination.
Common Mistakes to Avoid
When making brownies, there are *certain pitfalls* to watch out for to achieve the ultimate gooey, fudgy brownie. One common mistake is over-baking; always keep a watchful eye as ovens can vary. A toothpick should come out with some moist crumbs but not fully clean – overbaking will lead to dry brownies.
Another issue can arise from **mismeasuring ingredients**; baking is science, and precise measurements matter. Always spoon flour into your measuring cup and level off with a knife rather than packing it down, which can lead to too much flour in your mixture, making the brownies drier.
Lastly, don’t forget to allow the brownies to cool before slicing. Cutting while they are warm can lead to a messy, crumbly disaster. Wait for them to completely set to enjoy well-shaped, appealing squares that taste divine.
Storage, Freezing & Reheating Tips
To store leftover brownies, place them in an airtight container at room temperature for up to 3 days. To maintain freshness, store them in the refrigerator for up to a week. For longer storage, you can freeze brownies. Wrap them tightly in plastic wrap and then in aluminum foil or a freezer bag, and they will last up to 3 months in the freezer.
When you’re ready to enjoy them, simply remove from the freezer and let them thaw at room temperature for a few hours. If you’d like, you can warm them in a microwave for 10-15 seconds to regain that gooey texture.
Be sure to practice food safety by ensuring brownies are fully cooled before packaging them for storage or freezing to prevent condensation from forming, which can lead to a soggy outcome.
Frequently Asked Questions
Can I use other types of chocolate for these brownies?
Absolutely! You can experiment with different types of chocolate chips, such as dark, semi-sweet, or even white chocolate for a different flavor profile. Each type will bring its sweetness and richness, creating a unique brownie experience.
What can I use instead of eggs for a vegan version?
To make these brownies vegan, you can use ripe bananas, unsweetened applesauce, or flaxseed meal mixed with water as an egg substitute. Use 1/4 cup of mashed banana or applesauce per egg, or mix 1 tablespoon of flaxseed meal with 3 tablespoons of water, letting it sit until it becomes gelatinous.
How do I add a chocolate center without mixing it into the batter?
By pouring half of the brownie batter into the baking pan, adding chocolate chips or small chunks on top, and then pouring the remaining batter over it, you allow for a chocolate center without fully mixing it in. This creates pockets of gooey chocolate.
Can I double this recipe to make a larger batch?
Yes, you can double the recipe! Simply use a larger baking dish, about 13×18 inches, and extend the baking time by a few minutes, checking for doneness regularly.
Why are my brownies too cakey?
If your brownies come out cakey, it could be due to over-mixing the batter or adding too much flour. Combine the ingredients until just mixed, and make sure to measure accurately for the best texture.
Conclusion:
In summary, these Valentine’s Day Brownies with a gooey chocolate center offer a delightful treat that is perfect for sharing with loved ones or enjoying solo. Their rich flavors, combined with a luxurious texture, make for a dessert that truly captures the essence of the season. Whether you decide to customize this recipe with variations or stick to the classic, feel free to make it your own!
So, gather your ingredients, share some love this Valentine’s Day, and indulge in the warm, gooey goodness of these exceptional brownies. Don’t hesitate to customize, experiment, or even share your baking triumphs. Happy baking!