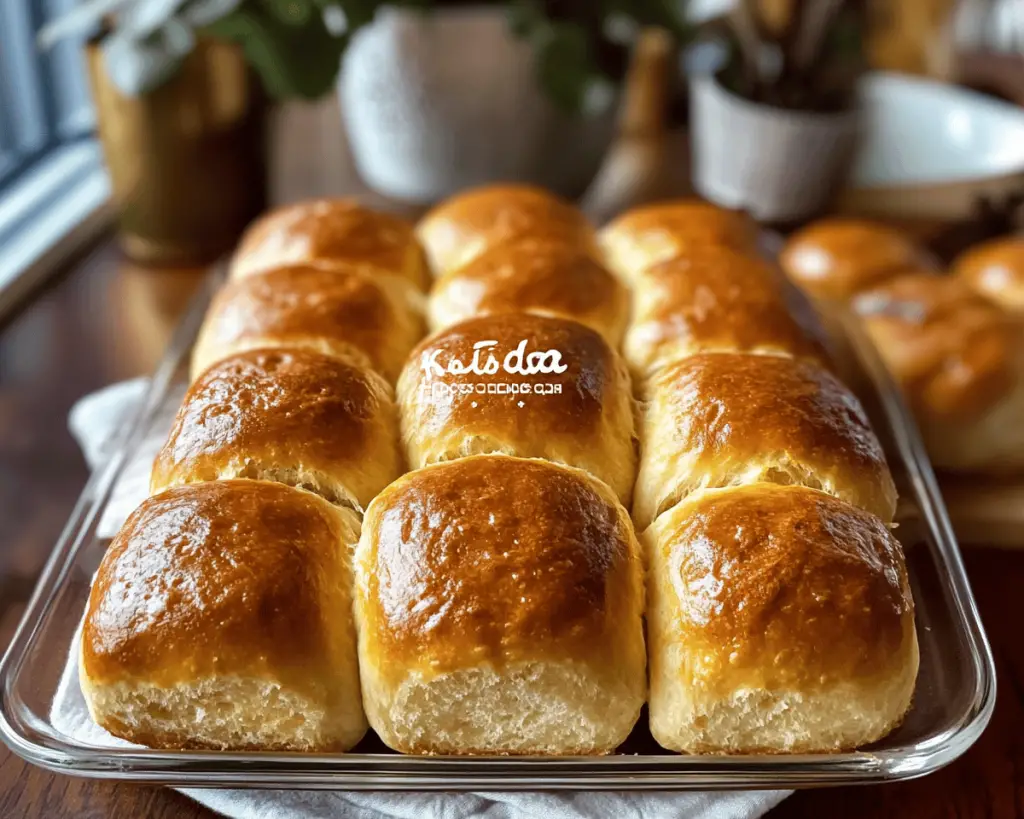
There’s something supremely comforting about home-baked bread, isn’t there? I mean, you know that warm, toasty fragrance that wafts through the air and wraps around you like a favorite blanket? It’s sheer magic. And when you transform humble ingredients into something soft, pillowy, and slightly sweet, well, it feels like you’ve captured a piece of happiness right in your kitchen. That’s exactly what my journey with **Sweet Potato Yeast Rolls** has been all about.
Now, I’ll be honest with you: the first batch of these rolls were a bit of a happy accident. I had some leftover sweet potatoes from a family dinner, and instead of just mashing them into a side dish, I thought, why not throw them into some bread? I was feeling adventurous, or maybe just a little reckless—who really knows? I mixed everything up, not being entirely sure it would even work, but lo and behold, when I pulled those rolls out of the oven, the golden-brown tops shone like little pieces of treasure. My family was hooked! Honestly, they even tasted like a warm hug, and from then on, these Sweet Potato Yeast Rolls became a staple in my household.
These rolls aren’t just the stuff of everyday meals; they’re part of my family’s story, too. Each time we bake them, it feels like a gathering, a celebration of cozy moments shared over buttered rolls and steaming cups of tea. I remember one Thanksgiving when my sister and I set out to impress everyone with a homemade feast. The turkey was great, the cranberry sauce was zesty, but these rolls? They were the star of the show. Seeing everyone tearing off pieces and slathering them with whipped butter filled me with joy. Gosh, I even caught my cousin sneaking extras when she thought no one was watching!
So, if you’re ready to embark on your own sweet potato roll adventure, grab your apron and let’s get started. Trust me, these little bites of heaven are just waiting to happen, and I can’t wait to share all my tips with you!
What Goes Into Sweet Potato Yeast Rolls?
This recipe isn’t just about the rolls; it’s about the love and care you put into every ingredient. Let’s break down the stars of the show:
– **Sweet Potatoes**: Honestly, these little gems are where the magic begins. Roasted or boiled, they add a natural sweetness and moisture that makes these rolls soft and irresistible. I usually roast mine, letting them caramelize a little; it deepens the flavor wonderfully.
– **All-Purpose Flour**: This is the backbone of the recipe. I’ve sometimes experimented with whole wheat flour for a nuttier flavor, and while it changes the texture a bit, it can be just as delightful. You’ll be incorporating this in stages and kneading it into a pliable dough.
– **Yeast**: Yeast is like that friend who always brings the fun to the party. It helps the dough rise and gives those rolls that delightful fluffiness. I generally use instant yeast for convenience, but don’t be afraid to use active dry yeast if you have it; just let it bloom in warm water first!
– **Milk**: Skip the skim milk; I love using whole milk for that rich taste. Some days, I even mix in a splash of buttermilk for a subtle tang! Plus, warm milk helps activate the yeast.
– **Sugar**: A little sprinkle of sugar encourages the yeast to work its magic. Don’t worry; it’s not overly sweet, just enough to balance the earthiness of the sweet potatoes.
– **Salt**: Here’s a kitchen secret: don’t forget the salt! It’s an essential ingredient that enhances all the other flavors. I always eyeball the amount, but when in doubt, a teaspoon usually does the trick.
– **Butter**: I mean, butter makes everything better, right? It adds richness and a lovely flavor. I sometimes use unsalted butter so I can control the saltiness, but feel free to use whatever you have on hand!
– **Egg**: The egg not only adds moisture but also gives the rolls a beautiful color and a slight richness. If you’re feeling adventurous, skip it for a vegan version and increase the sweet potato a bit for binding.
Each ingredient plays a crucial role, making the process feel almost like a symphony as they come together to create something truly beautiful and delicious.
Is Sweet Potato Yeast Rolls Actually Good for You?
Okay, let’s talk straight here: these rolls are not your everyday health food. But, and it’s a big but, they do come with some perks! Sweet potatoes are packed with vitamins and fiber, which can ease the guilt a little, right? Plus, they give your body a natural energy boost. The thing is, yes, they’re a tad indulgent; they’re all about that fluffy texture and comforting flavor.
When I think about these rolls, I like to think they strike a balance between comfort and nourishment. They’re like a heartwarming hug that you can also feel good about sharing with loved ones. After all, isn’t food best enjoyed when it comes from a place of joy, rather than guilt? So, let that sweet potato fill your soul and your belly; go ahead and own that second roll.
Here’s What You’ll Need
– 2 medium **sweet potatoes** (about 1 cup mashed)
– 4 to 4.5 cups **all-purpose flour**
– 1 packet (2.25 tsp) **instant yeast**
– 1 cup **whole milk**, warmed
– 1/4 cup **sugar**
– 1 teaspoon **salt**
– 1/4 cup **unsalted butter**, melted
– 1 **large egg**
This makes about 12 rolls, which, if you’re anything like me, won’t last long at all. They’re heavenly fresh out of the oven, but they do freeze beautifully if you manage to save some!
How to Make Sweet Potato Yeast Rolls Step-by-Step
Now, let’s get to the fun part. Making these rolls is easier than it sounds, and the joy of pulling them out of the oven is absolutely worth it!
1. **Prep Your Sweet Potatoes**: Start by boiling or roasting your sweet potatoes until tender. If roasting, I usually skin them, chop them into chunks, and toss them with a dash of olive oil and a pinch of salt to enhance that sweet flavor. Roast at 400°F for about 25-30 minutes, until they’re fork-tender. Let them cool a bit before mashing.
2. **Mixing the Flour and Yeast**: In a large bowl, mix 4 cups of **all-purpose flour**, **instant yeast**, and **salt**. The mixture should smell lively, almost like a hint of bread-making enchantment is in the air!
3. **Combine the Wet Ingredients**: In a separate bowl, whisk together the warmed **milk**, **sugar**, the cooled, mashed **sweet potatoes**, and **melted butter**. Don’t add the egg just yet; we want it to add richness at the right moment.
4. **Bringing it All Together**: Now, pour the wet mixture into the dry ingredients, and mix until it starts coming together. If it’s too sticky, add a bit more flour, a little at a time. The dough should be soft but not overly tacky. After that, toss in the beaten **egg** until combined.
5. **Kneading the Dough**: Time to get your hands dirty! On a floured surface, knead the dough for about 8-10 minutes. It should become smooth and elastic. Trust your instincts here; if it feels too wet, sprinkle more flour until it’s just right.
6. **First Rise**: Form it into a ball and place it in a greased bowl, covering it with a cloth. Let it rise in a warm spot for about an hour until it doubles in size. This is where the yeast gets all excited about life!
7. **Shape the Rolls**: Once your dough has risen, gently punch it down (always satisfying!) and divide it into 12 equal pieces. Shape them into little balls and place them in a greased baking dish, leaving a little space in between. They’ll expand and become best friends in the oven.
8. **Second Rise**: Cover them with a towel again and let those little beauties puff up for another 30-40 minutes. You want them to be puffy and cozy.
9. **Bake**: Preheat your oven to 375°F. When the rolls have risen, pop them into the oven for about 20-25 minutes, or until they’re golden brown. Keep an eye on them — every oven is a bit different, and you want to know when they’re singing that perfect golden tune.
10. **Cool and Enjoy**: When they’re out of the oven, let them cool a bit but not for long—nothing beats those rolls fresh while still warm! Brush with a bit of melted butter for the finishing touch, and you’re ready to dig in!
Little Extras I’ve Learned Along the Way
Ah, the wisdom of trial and error! Over the years, I’ve gathered a few gems I’d love to share.
– **Make It Ahead**: If you’re preparing for a big meal, you can make the dough ahead of time, let it rise, then shape the rolls and stick them in the fridge overnight. Just take them out and let them rise again in the morning before baking.
– **Flavored Butter**: For a fun twist, whip up some herb-infused butter to slather on those rolls. A little garlic or honey could add some zing!
– **Sweet Potato Variations**: You can also experiment with the flavor by mixing in spices! A dash of nutmeg or cinnamon can give them the warm, cozy flair everyone loves.
– **Freezing**: If you somehow manage to have leftover rolls (kudos to you), let them cool completely before freezing them in an airtight container. Pop them in the oven at 350°F for a quick reheating session, and they’ll taste as fresh as they did the day you baked them.
These tips have helped me navigate those early mistakes and some minor flops, which is all part of the learning experience, right?
So there you have it! Baking these **Sweet Potato Yeast Rolls** has woven itself into the fabric of my home. Every time I whip up a batch, I’m reminded of laughter, family gatherings, and, most importantly, love. I hope you’ll give this recipe a try, letting the sweet potato magic work in your own kitchen. This one means a lot to me, and I can’t wait to hear all about your twists and turns in the comments. Let’s chat—back to you, my friend!