Let’s Get Real
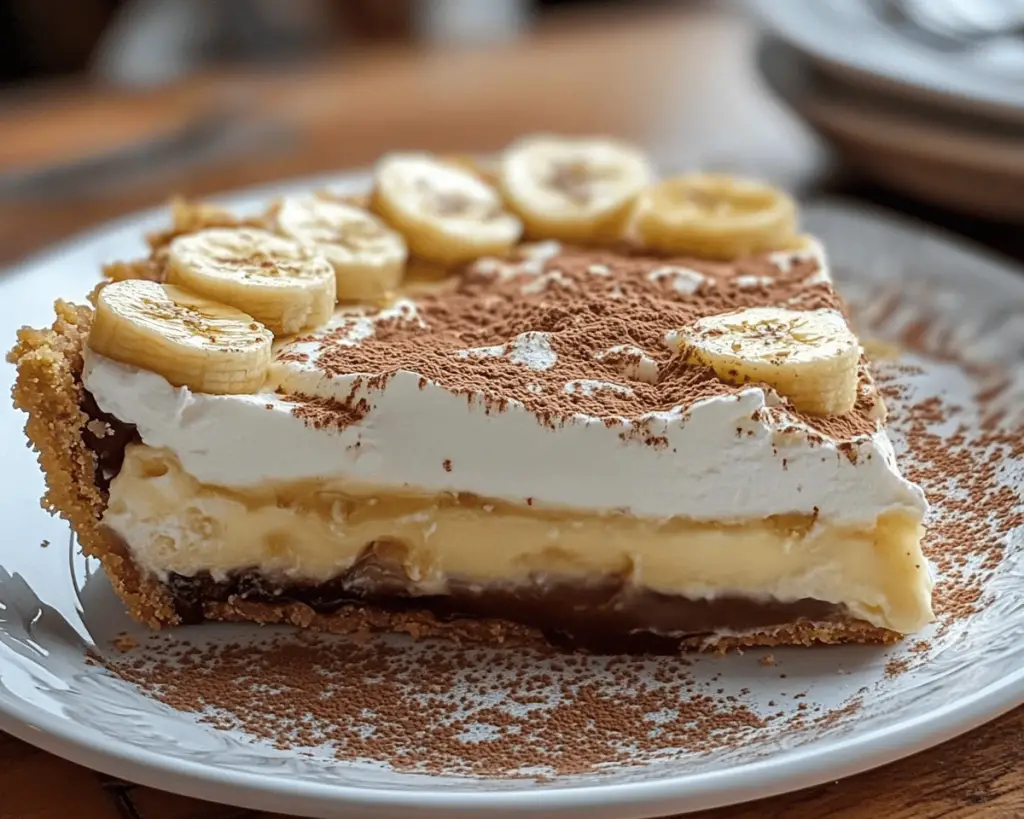
Oh, banoffee pie! Where have you been all my life? I’ve always had a complicated relationship with desserts. As a kid, I was a full-on chocolate addict – a Twix bar in each hand was my idea of a balanced diet (don’t judge, you know you’ve been there). But then came this delectable dessert, and suddenly I was hooked. It was almost like breaking up with chocolate and finding out that maybe, just maybe, caramel and banana could fill that sweet void. I mean, what is there not to love about layers of gooey caramel, perfectly ripe bananas, and whipped cream all crammed into a buttery biscuit crust? Honestly, if that doesn’t spell perfection, I don’t know what does.
Now, let’s be clear: I didn’t have a clue about banoffee pie until my early twenties. One day, my friend invited me over for a “casual slice of pie,” and, spoiler alert, it was anything but casual. That first bite? It was like a sweet symphony playing just for me. But back then, I had no idea what went into it. It could have been a witch’s brew for all I knew. I secretly thought it sounded fancy, even though it’s likely one of the easiest desserts I’ve ever made. After years of experimenting (and mildly embarrassing missteps), I finally perfected my banoffee pie game. So let’s dive deep into this glorious banana-filled wonder that makes all other desserts feel inadequate.
Ingredients, Unfiltered
What’s Really in Banoffee Pie
Digestive Biscuits: This is the crust, baby! You know, basic but hearty. Some might say you can swap these for graham crackers (who are we kidding, they taste great too), but I’m a traditionalist in this regard. You’ve got that sugary crunch that holds it all together, and trust me, it’s the happy marriage of a solid base and the rest of the toppings. Pro tip: don’t even think about using stale biscuits. You want fresh ones or consider it a fail.
Butter: Not just the regular ol’ butter, but unsalted, of course! Every recipe author ever claims they’re “artisanal” butter, but you know what? I say go for what’s on sale. Butter is butter, and it adds that to-die-for richness to the crust. It’s like a warm hug but for your pie.
Bananas: Ripe bananas, my friends! We’re talking almost slightly too ripe for regular eating bananas, but don’t let them go yellow past the point of no return. When you slice them, they should just about smile up at you, ready to join the party. And yes, this is the part of the pie that I shamelessly eat while cooking. Don’t judge.
Sweetened Condensed Milk: Let’s get a little saucy – this is your golden ticket to making gooey caramel without the whole “standing over a stove while sweating bullets” drama. Just pop open that can, pour it into a saucepan, and watch it transform under heat into a miraculous sauce that makes you question why we don’t have condensed milk on everything.
Heavy Cream: We’re going to whip this stuff. Get the good stuff – none of that light nonsense. You want luscious, velvety cream that’ll swirl and drape over the pie in the most Instagrammable way possible. If you don’t whip this until it forms peaks, are you really living?
Cocoa Powder: For the finishing touch! This may seem optional, but resist the urge to skip it. A light dusting adds beautiful contrast and just enough bitterness to balance out the sweetness. Plus, it looks super posh, and who doesn’t want to feel fancy when serving?
Let’s Talk Health (or Not)
Is This Even Healthy? Let’s Discuss
Alright, let’s just dive right in here. If you’re seeking a “health-conscious” option, this dessert is not for you. I mean, come on, we’re working with sweetened condensed milk, heavy cream, and butter here. Sure, it sounds like a dieter’s nightmare, but I care not. I choose joy, and joy comes in pie form, especially when it’s gooey and made with love.
I once had a friend try to convince me that banoffee pie could be healthy if you substituted vital wheat gluten and avocado for the cream. I stared at her like she’d just asked me to put ketchup on a croissant. Nope. Not happening. If you want to have a “healthy” alternative, just have a banana and call it a day. Life is too short not to indulge in the desserts that make your taste buds tingle.
Your Grocery List
Here’s What You’ll Need
– 200g digestive biscuits
– 100g unsalted butter, melted
– 3 ripe bananas
– 1 can (397g) sweetened condensed milk
– 300ml heavy cream
– Cocoa powder, for dusting
This recipe serves about 8 generous slices, depending on whether or not you’re feeling particularly generous. Let’s face it; most of us will be diving in for seconds, right?
The Actual Cooking Part
Okay, Let’s Make This
1. **Let’s Start With the Crust** – Grab those digestive biscuits and put them in a food processor. You want them crushed into a fine crumb that almost resembles sand. If you don’t have a food processor (why, how could you?!), go old school and throw them in a zip-lock bag and smash them with a rolling pin. Just make sure to release any pent-up frustration!
2. **Combine the Biscuit Crumbs & Butter** – In a bowl, mix your crushed biscuits with the melted butter until it’s all combined. This is the part where you remember that you have the power to create magic. It should feel like wet sand. If it’s too dry, add a little more butter. Get a round 9-inch pie dish (don’t ask why I have a collection of pie dishes; it’s a mystery even to me), and press the crumb mixture into the bottom and up the sides. Don’t panic if this looks messy — it’s supposed to! Just make sure it makes a nice, even layer. You’re basically sculpting here, and the masterpiece won’t appreciate if you half-ass the effort.
3. **Baking the Crust** – If you’re in a hurry, you can skip this step (yes, I just encouraged rebellious baking). Just let the crust cool in the refrigerator for about 30 minutes. But if you want to toast that crust to perfection and really sett those flavors, pop it into a preheated oven at 180°C (350°F) for about 10 minutes. Let it cool completely before proceeding to the next step.
4. **Make the Caramel** – Now, you’ll combine the sweetened condensed milk with some patience and heat. Pour the can into a saucepan and gently warm it over medium heat. Stir it consistently for about 10-15 minutes until it thickens and turns golden. This is where the magic happens. Don’t panic if it bubbles or seems like it’s going to boil over – just go with it. You’re one step closer to luscious caramel land! Once it’s done, ladle it over your pie crust and smooth it out like you’re spreading happiness.
5. **Slice Those Bananas** – It’s banana time! Slice your ripe bananas into rounds and layer them over the caramel filling like it’s a cozy blanket of fruity goodness. I like to go a bit extra here and cover the whole caramel surface; some may dislike the bananas turning brown, but it’s a risk worth taking for maximum flavor!
6. **Whip the Cream** – Grab your heavy cream and incorporate it into a bowl. Whisk the daylights out of it until you get lovely soft peaks that hold their shape. You can add a teaspoon of sugar if you want, but I find the sweetness of the caramel is plenty. Now, spread the whipped cream over the bananas. If you want it Airbnb-level fancy, you can even pipe it on instead! Your call — life’s all about choices, right?
7. **Finish With Cocoa** – It’s time for the cocoa powder dusting! The last step for that chocolatey finish. Take a fine sieve (please don’t use your old sock) and dust it lightly over the whipped cream. Voilà! Your masterpiece is complete.
8. **Chill Out** – This glorious creation needs some time to chill in the fridge for at least 1 hour (it’s hard, but you can do it). This will help all the flavors mingle and settle down. Just trust the process. Friends don’t let friends rush the chill.
Side Notes & Sassy Hacks
Bonus Tips You Didn’t Ask For
– The banana slices can be tossed with a bit of lemon juice if you’re worried about browning, but I find it adds a citrusy tang that you might not want.
– If you’re feeling lazy (who isn’t sometimes?), you can even use store-bought caramel sauce. But please, don’t blame me if it’s a scandalously vast emotional betrayal! Real homemade caramel is where the happiness is.
– Got leftover whipped cream? Use it for a coffee enhancer or as a topping for hot cocoa. No wastage here, folks!
– If you want a fun yet slightly chaotic twist, try adding a pinch of sea salt to the whipped cream. It’s like getting hit with a flavor tornado!
– Try different cookie crusts! If you’re feeling experimental, try a crushed Oreo crust for a chocolatey version. It’ll be like a tropical vacation for your taste buds!
Final Words of (Culinary) Wisdom
If you’ve stuck with me through this wild banoffee ride, kudos! You’re well on your way to becoming the dessert genius of the block. This pie brings joy like few others do. Whether you’re serving it at a dinner party or simply enjoying a slice on the couch while binge-watching your favorite show (guilty), it’s all about the experience, my friends. If you try it, tag me in your food pics or just send me a mental high-five from the other side of the screen. Happy baking, and may your banoffee pie bring you endless bliss!