Prep time: 10 minutes
Cook time: 15 minutes
Total time: 25 minutes
Servings: 8 servings
There’s something wonderfully nostalgic about the combination of chocolate, cherries, and whipped cream, isn’t there? This Black Forest Cookie is your ticket to indulgence, blending all those iconic flavors into a single giant skillet cookie that is not only quick to make but also perfect for sharing. Imagine gathering around the kitchen, the aroma of melting chocolate enveloping you as this delightful cookie bakes to perfection in just 25 minutes!
What Is Black Forest Cookie: Giant Black Forest Skillet Cookie in 25 Minutes?
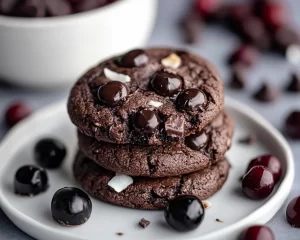
The Black Forest Cookie is a delightful fusion of the classic German dessert, Black Forest cake, and a cookie in skillet form. Think of it as a cookie version of your favorite cake, featuring rich chocolatey goodness paired with sweet, tangy cherries. This dessert is baked in one pan, making it easy to whip up for family gatherings, parties, or any time you’re craving something sweet and satisfying. The joy of the Black Forest Cookie lies in its gooey center and crispy edges, all complemented by a scoop of vanilla ice cream or whipped cream for that extra touch of indulgence.
Why You’ll Love This
One of the loves of this dish is its *simplicity*. Perfect for busy parents or kitchen beginners, this cookie requires minimal steps while delivering maximum flavor. Plus, the skillet format means less mess and fewer dishes to wash, appealing to those looking for convenient and *budget-friendly* dessert options. The versatility of this recipe allows you to customize it to your liking, making it an enjoyable adventure for your taste buds. It’s a warm treat to share during chilly evenings, a sweet surprise for a surprise date night, or an easy dessert after a weeknight dinner.
Ingredients You’ll Need
- 1 cup unsalted butter: Softened, this provides a rich base and ensures a moist cookie.
- 1 cup brown sugar: For a deep caramel-like flavor and extra chewiness.
- 1/2 cup granulated sugar: It balances the richness and helps with the cookie’s structure.
- 2 large eggs: They bind the ingredients together and create that lovely texture.
- 2 teaspoons vanilla extract: Adds a warm, aromatic flavor to enhance the chocolate.
- 2 cups all-purpose flour: The foundation of the cookie, providing structure.
- 1/2 cup cocoa powder: Unsweetened, it’s responsible for the intense chocolate flavor.
- 1 teaspoon baking soda: This helps the cookie rise and become fluffy.
- 1/2 teaspoon salt: A crucial ingredient that enhances all flavors.
- 1 cup chocolate chips: Semi-sweet or dark chocolate; for melty pockets of chocolate goodness.
- 1 cup cherries: Pitted and chopped, these should be drained if using canned or frozen ones.
- Whipped cream: Optional, but highly recommended for serving on top!

How to Make
- First, preheat your oven to 350°F (175°C). Then, grease a large skillet with non-stick spray or butter. This is essential to prevent sticking and for easy serving later.
- In a mixing bowl, cream together the softened butter, brown sugar, and granulated sugar until it’s light and fluffy. This usually takes about 2-3 minutes. A fluffy texture here will help ensure your cookie is light and chewy rather than dense.
- Add the eggs one at a time, mixing well after each addition. Follow this with the vanilla extract. This step is crucial for creating a cohesive batter, helping the flavors meld beautifully.
- In a separate bowl, whisk together the flour, cocoa powder, baking soda, and salt. This ensures even distribution of dry ingredients, preventing clumps of cocoa or salt in your cookie.
- Gradually add the dry mixture to the wet mixture. Mix just until combined; overmixing can lead to a tough cookie. Remember, the dough should look thick and chocolatey!
- Fold in the chocolate chips and chopped cherries with a spatula, ensuring they’re evenly distributed throughout your dough.
- Spread the cookie dough evenly in the prepared skillet. This will help it bake uniformly, ensuring every bite is equally delicious!
- Bake in your preheated oven for 15 minutes, or until the edges are set but the center remains slightly soft. This texture is key for that gooey interior.
- Allow the cookie to cool slightly before slicing it into wedges and serving. Top with whipped cream if desired, and enjoy your delightful creation!
Variations & Substitutions
Nutty Delight – If you love nuts, consider adding 1/2 cup of chopped walnuts or pecans to the dough. They will provide a crunchy contrast to the cookie’s soft texture and enhance the flavors beautifully. Just fold them in with the cherries and chocolate chips for that perfectly delightful bite.
Fruit Fusion – Can’t find cherries? No problem! You can substitute the cherries for other fruits like raspberries or blueberries. Keep in mind that the baking times may vary slightly based on the moisture content of the fruit you choose, so watch closely as it bakes!
Gluten-Free Option – To make this cookie gluten-free, replace the all-purpose flour with a gluten-free 1:1 baking flour blend, ensuring that it contains xanthan gum for the right texture. This way, you can enjoy the same rich flavors while accommodating dietary preferences.
Common Mistakes to Avoid
Overmixing the Dough – One common mistake is overmixing the batter once the flour is added. This can lead to a tough cookie texture. Mix just until you see no more flour streaks for the best results.
Using Cold Ingredients – Ensure your butter is softened and eggs are at room temperature. This helps create an emulsion that leads to a tender and moist cookie. If the butter is too cold, it will not cream well with the sugars.
Storage, Freezing & Reheating Tips
To store your Black Forest Cookie, first allow it to cool completely. Wrap it in plastic wrap or aluminum foil, and store it in an airtight container at room temperature. For best quality, it can last for up to 3 days. If you want to extend its life, you can freeze it by slicing it into wedges, wrapping each piece individually, and placing them in a freezer-safe container. It should stay fresh for up to 3 months. When you’re ready to enjoy it again, simply thaw at room temperature or warm it in the microwave for a few seconds until heated through.
Frequently Asked Questions
Can I make this cookie ahead of time?
Absolutely! This cookie can be made ahead of time and stored. Once it’s completely cooled, wrap it well in plastic wrap or foil and place it in an airtight container. It will last for several days at room temperature or longer if frozen. Just remember to reheat it before serving for that fresh-baked taste.
How do I ensure my cookie doesn’t burn on the edges?
A good practice is to monitor the baking time closely. It’s essential to check for doneness towards the end of the baking time. If you notice the edges beginning to brown too quickly, consider covering them lightly with aluminum foil until the center has cooked through. This way, you get a nicely baked cookie without overdoing the edges.
What’s the best way to serve the cookie?
Serving your Black Forest Cookie warm is the best! You can cut it into wedges directly from the skillet and top it with a generous dollop of whipped cream or a scoop of vanilla ice cream. This elevates the indulgence and adds a refreshing contrast to the rich chocolate flavor.
Can I use a different kind of chocolate?
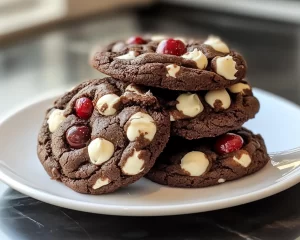
Yes! You can absolutely substitute semi-sweet chocolate chips with milk or dark chocolate chips, or even go for white chocolate if that’s your preference. Each chocolate type brings a unique flavor profile, creating a different experience with each bake.
Is it possible to make this cookie healthier?
To make this cookie a bit healthier, consider using cocoa powder with a lower sugar content. You can also swap some of the butter for unsweetened applesauce to reduce the fat. Additionally, using whole grain flour instead of all-purpose flour can increase the fiber content. However, making too many substitutions may impact the texture, so find a balance that works for you!
Conclusion: Embrace the joy of baking with this Black Forest Cookie: a delicious, *decadent* treat perfect for any occasion. Whether you’re whipping it up for a family gathering, welcoming friends over for coffee, or simply treating yourself, this quick and easy recipe will have everyone coming back for seconds! You’re not just making a cookie; you’re crafting sweet memories.