Prep time: 30 minutes
Cook time: 45 minutes
Total time: 1 hour 15 minutes
Servings: 12
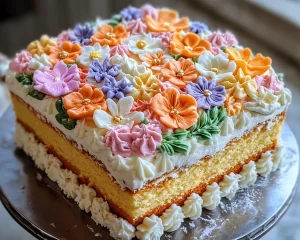
If you’ve ever craved a cake that’s not only a visual masterpiece but also a delight to your taste buds, then the Pastel Drip Cake is the perfect choice for you. Imagine a cake that is as vibrant as spring itself, emanating joy and celebration with every slice. As you embark on this baking adventure, you’ll discover that this cake is perfect for celebrating life’s special moments, from birthdays to picnics and everything in between. This recipe offers a fusion of flavor and fun, encouraging you to allow your creativity to shine through in every layer and drip.
What makes this Pastel Drip Cake so special is its stunning appearance paired with a simple yet flavorful base. The silky smooth layers, adorned with colorful drips and toppings, create an inviting presentation. As you slice into the cake, you’ll be met with a tender crumb and a delicate flavor that dances on your palate. Throughout this article, you’ll learn everything you need to know about crafting this delightful cake, including tips, variations, and how to prevent common mistakes.
What Is Spring Cake Designs: Pastel Drip Cake (Easy Look)?
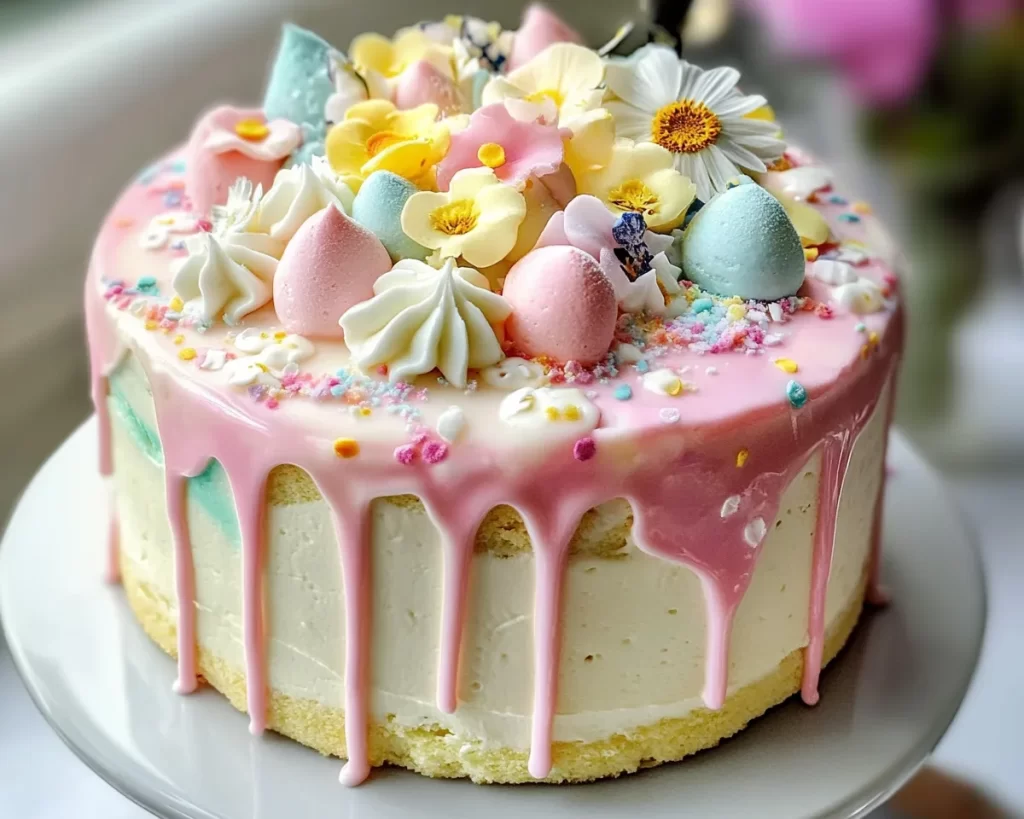
The Pastel Drip Cake is a charming dessert that combines the classic appeal of a layered cake with an enchanting modern twist. Originating from the trends of beautiful, Instagram-worthy dishes, this cake features a soft sponge, usually made from a combination of balanced ingredients, creating a light and fluffy texture. This delightful cake often uses pastel-hued frostings that impart a sweetness that’s just right—not too heavy, allowing the flavors to shine through without overwhelming the eater.
The traditional drip typically involves a glossy chocolate ganache or colorful glaze that cascades down the sides of the cake, creating an elegant and playful visual effect. In essence, it’s a cake that not only tastes fantastic but also catches the eye and uplifts the spirit. Whether you’re a seasoned baker or just starting out, this cake is adaptable and easy to customize, making it a wonderful endeavor for any occasion.
Why You’ll Love This
There are countless reasons to fall in love with this Pastel Drip Cake. First and foremost, the flavors are intensely comforting: the combination of buttery cake with light frosting creates a harmony of textures. Moreover, from a practical standpoint, the recipe is straightforward, making it accessible for both novices and experienced bakers alike. You won’t need to scour the shelves for funny ingredients. Most of what you need can be found in your pantry already, allowing you to create this beautiful dessert without breaking the bank.
One common misconception about cakes like these is that they require professional-level skills. That’s simply not true! While advanced decorating can certainly impress, the fundamental methods are within reach for everyone. A few handy decorating tips, combined with a little patience, will allow you to create a cake that looks like it came straight from a bakery window. To sum it up, you’ll enjoy the delightful taste, manageable preparation, and the pride that comes from creating something so beautiful.
Ingredients You’ll Need
- 2 cups all-purpose flour: This is the foundation of your cake, providing structure. Consider a gluten-free blend for a gluten-free alternative.
- 1 ½ cups granulated sugar: This adds sweetness and contributes to the cake’s moisture.
- 1 cup unsalted butter (softened): Butter gives richness and flavor. Use margarine or a plant-based substitute for a dairy-free version.
- 4 large eggs: Eggs act as a binding agent, giving your cake the perfect rise. Eggs can be replaced with flax eggs for a vegan option.
- 1 cup whole milk: Milk keeps the cake moist and adds creaminess. Substitute with almond milk for a dairy-free variation.
- 2 teaspoons baking powder: This is a crucial leavening agent that helps the cake rise, making it fluffy and light.
- ½ teaspoon salt: Salt enhances the flavor, balancing the sweetness.
- 2 teaspoons vanilla extract: The aromatic quality of vanilla provides a lovely depth of flavor.
- 1 cup heavy cream: Used for making the ganache, it provides richness and an incredible texture. Coconut cream makes a great dairy-free substitute.
- 1 cup chocolate or colored candy melts: For the drip effect, adding a whimsical touch to your cake. You can choose different colors depending on your desired theme.
- Decorative sprinkles and fresh fruits: For garnishing your cake, these add a playful element. Choose seasonal fruits for a fresh touch.
Each ingredient plays a crucial role in the overall flavor and texture of your cake, ensuring that every slice is enjoyable. Be sure to read through the ingredient list so you can make any necessary substitutions that align with your dietary preferences.
How to Make
Follow these step-by-step instructions to create your own Pastel Drip Cake.
- Preheat your oven: Begin by preheating your oven to 350°F (175°C). This step is crucial as it allows your cake to rise evenly. While the oven heats up, you can prepare your baking pans.
- Prepare the baking pans: Grease and flour two 9-inch round cake pans. You can also line them with parchment paper to ensure easy removal. This will prevent your cake from sticking while baking.
- Mix the dry ingredients: In a medium bowl, sift together the all-purpose flour, baking powder, and salt. This process aerates the flour and ensures a light texture in the cake.
- Cream the butter and sugar: In a large mixing bowl, cream the softened butter and granulated sugar together using an electric mixer until the mixture is light and fluffy, which should take about 3-5 minutes. This step is important as it incorporates air and adds volume to your batter.
- Add the eggs: Add the eggs one at a time, mixing well after each addition. It’s essential to ensure they’re fully incorporated before adding the next one. Don’t forget to scrape down the sides of the bowl to incorporate all ingredients.
- Incorporate dry ingredients and milk: Slowly add the dry mixture and milk alternately, beginning and ending with the dry ingredients. Mix until just combined, being careful not to overwork the batter, as this can result in a dense cake.
- Add vanilla extract: Stir in the vanilla extract gently to infuse your batter with a warm flavor. Take a moment to appreciate the aroma that fills your kitchen!
- Pour batter into pans: Divide the batter evenly between the prepared cake pans. Smooth the top with a spatula to ensure an even rise.
- Bake the cakes: Place the pans in your preheated oven. Bake for 25-30 minutes or until a toothpick inserted into the center comes out clean. Keep an eye on the cakes so you don’t overbake!
- Cool the cakes: Once baked, remove the pans from the oven and allow them to cool in the pans for about 10 minutes. Then, turn the cakes out onto wire racks to cool completely.
- Prepare the ganache: In a small saucepan, heat the heavy cream over medium heat until it just begins to simmer. Pour it over the chocolate or candy melts in a bowl, letting it sit for a few minutes to melt before stirring until smooth.
- Assemble your cake: Place one layer of cake on a serving platter. Spread a layer of frosting (use your favorite buttercream recipe) on top, then add the second layer of cake. Frost the top and sides of the cake smoothly.
- Drip the ganache: Allow the ganache to cool slightly before using it for the drip effect. Use a spoon or piping bag to gently drizzle the ganache over the edges, letting it drip down the sides of the cake. Keep the drips even, and don’t be afraid to be generous!
- Add decorations: Finally, top your cake with decorative sprinkles and fresh fruits. This not only adds color but offers a refreshing contrast to the sweet cake.
- Slice and serve: Your beautiful Pastel Drip Cake is ready! Slice into it and enjoy the fruits of your labor. Don’t forget to capture that Instagram-worthy shot before it disappears!
Baking this cake is not only fun but also allows you to connect with friends or loved ones. Feel free to play around with flavors or color schemes to create a custom masterpiece that reflects your style.
Variations & Substitutions
Vegan Pastel Drip Cake: To make this cake vegan, you can replace the eggs with flax eggs by mixing one tablespoon of ground flaxseed with three tablespoons of water and letting it sit until it thickens. Use a plant-based butter and substitute whole milk with an almond or coconut milk. The ganache can be made with dairy-free chocolate chips and coconut cream to ensure it remains rich and creamy.
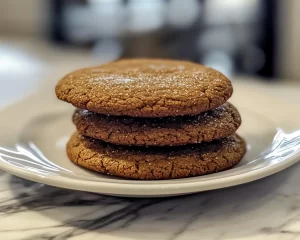
Chocolate Pastel Drip Cake: If you are a chocolate lover, consider making a chocolate version of this cake. Simply replace half of the all-purpose flour with unsweetened cocoa powder for a rich chocolate base. You can also incorporate chocolate ganache or add chocolate chips to the frosting for an extra chocolatey experience.
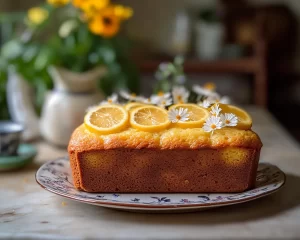
Citrus Infusion: For a refreshing twist, add the zest of one lemon or orange to the batter and frosting. This adds brightness to the flavor and pairs wonderfully with the pastel drips. You could also consider using a citrus-flavored frosting or syrup to complement the cake beautifully.
Gluten-Free Option: If you’re catering to gluten-sensitive guests, swap out the all-purpose flour for a gluten-free flour blend. Ensure your baking powder is also gluten-free. The taste and texture might slightly vary, but it will still be delicious!
Mini Pastel Drip Cakes: Instead of making a large cake, consider making mini cakes using six-inch pans. This is great for portion control and makes for a fun dessert at parties. Just remember to reduce the baking time accordingly.
Each variation allows you to make this cake your own. Explore your creative side and feel free to mix and match ingredients and flavors to fit your preferences, dietary needs, or seasonal inspirations.
Common Mistakes to Avoid
One of the most common mistakes is **underbaking the cake**, which can lead to a gooey center. Always use the toothpick test to check for doneness. Insert a toothpick into the center; it should come out clean or with a few crumbs but not wet batter. Additionally, overmixing the batter after adding flour can lead to a dense cake. Mix until just combined to ensure a light, fluffy texture.
Another mistake is forgetting to **let the cakes cool entirely before frosting**. If the cake is warm, the frosting can melt and slide off, ruining your beautiful creation. Take your time, and allow at least a couple of hours for cooling.
**Not using the right temperature for the ganache** can result in an unmanageable drip. Ideally, the ganache should be poured at a warm temperature; if it’s too hot, it may run right down the cake; too cold, and it won’t create a nice drip effect. Always monitor your ganache’s temperature as you prepare it.
Finally, be creative with your **toppings but don’t overdo them**. Ensure that whatever you place on top is balanced and won’t cause the cake to topple. The final look is important, so take a moment to step back and assess your decorations.
Storage, Freezing & Reheating Tips
To keep your Pastel Drip Cake fresh, store it in an airtight container at room temperature for up to three days. If you live in a particularly hot or humid environment, it’s better to refrigerate it, where it can last up to a week. Before serving leftover slices, let them come to room temperature for the best flavor and texture experience.
If you want to prepare this cake ahead of time, you can freeze it. Wrap the cooled cake layers tightly in plastic wrap and aluminum foil, ensuring air doesn’t reach them. They can last in the freezer for up to three months. When ready to use, allow the cakes to thaw overnight in the refrigerator before frosting.
As for reheating, you won’t need to reheat the cake itself, but you can warm up individual slices in the microwave for about 10-15 seconds if you want a warm treat. This will slightly melt the frosting, making it extra delicious.
Always remember to follow safe food handling practices when storing and reheating to ensure you enjoy your creation at its best.
Frequently Asked Questions
Can I make this cake in advance? Yes, you can make this cake in advance. Store the unfrosted cake layers in the freezer for up to three months. Just make sure to wrap them well. Frosting can also be made ahead and stored in the fridge for up to a week. Assemble the cake just before serving for the freshest taste.
What can I use instead of heavy cream for the ganache? If you want a lighter option, use a 50/50 mixture of whole milk and butter. However, for a dairy-free alternative, try using full-fat coconut milk or any non-dairy creamer. Both options work well and maintain a creamy texture.
What type of frosting is best for this cake? A classic buttercream is an excellent choice as it complements the pastel colors well. However, cream cheese frosting or whipped cream can also be great options. It all comes down to personal preference and the flavor profile you desire.
How can I ensure my cake layers come out evenly baked? An excellent way to ensure even baking is to rotate your cake pans halfway through the baking time. This allows for a more consistent temperature throughout. Additionally, make sure your oven is correctly preheated before adding the cakes.
What can I do if my ganache is too thick? If you find that your ganache is too thick, you can add a splash of milk or cream to loosen it. Gently heat it again on low while stirring until you achieve the desired consistency. Always remember to let it cool slightly before use to ensure you get that perfect drip.
Conclusion:
The Pastel Drip Cake is not just a dessert; it’s a testament to your creativity in the kitchen. The soft, flavorful layers contrasted with the colorful drips create a stunning presentation that can elevate any occasion. You now have the tools to make this delightful cake and the freedom to customize it to your liking. I encourage you to try your hand at making this cake, delight in the decorating process, and share it with friends and family. Let your imagination run free and create a piece of art that’s as delicious as it is beautiful! Happy baking!