Prep time: 20 minutes
Cook time: 10 minutes
Total time: 30 minutes
Servings: 12
There’s something undeniably magical about the arrival of spring, where the flowers bloom and the sun starts to shine a little brighter. One delightful treat that embodies this vibrant season is the Spring Cookies: Cadbury Egg Cookie Cups. These sweet morsels not only look gorgeous but also pack a delightful burst of flavor. Imagine sinking your teeth into a chewy cookie cup filled with creamy Cadbury Egg goodness! If you’re looking for an exciting dessert that is simple to whip up, this is the one. In this article, you will learn the secrets to crafting these indulgent cookie cups, including tips and variations that will suit every palate.
What Is Spring Cookies: Cadbury Egg Cookie Cups?
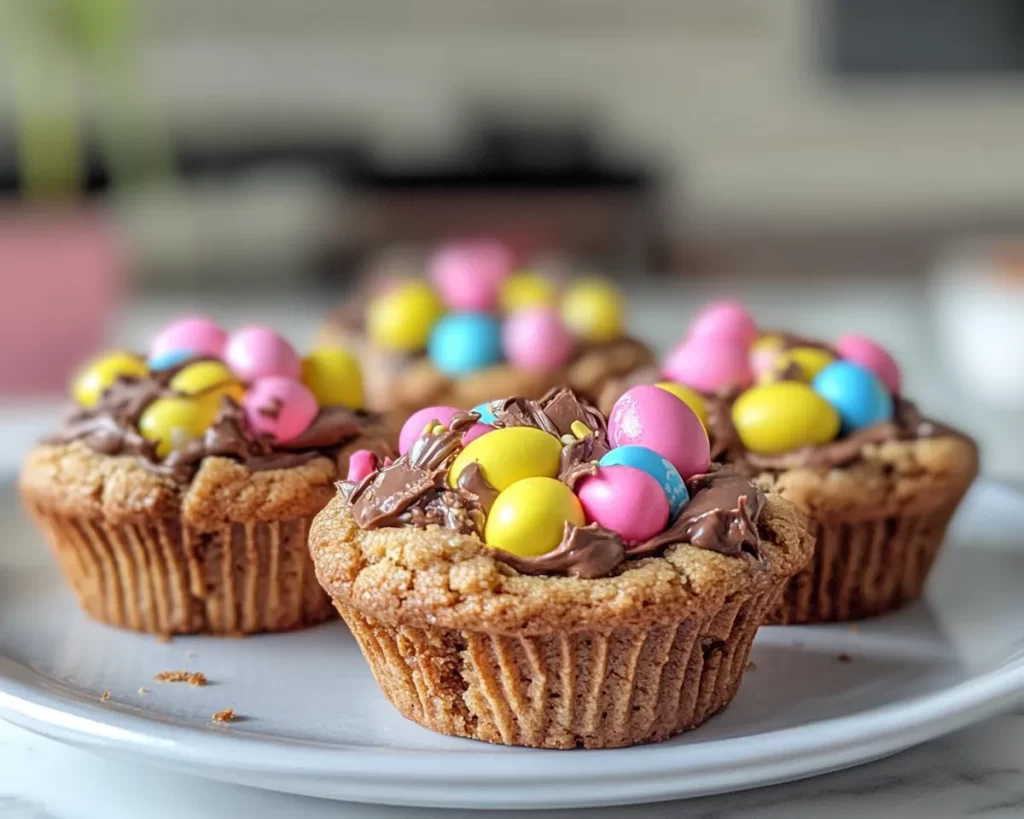
Spring Cookies: Cadbury Egg Cookie Cups are a delightful confection that merges two popular elements: classic cookie bases and the iconic Cadbury Egg candy, which is a staple of springtime treats. Originating from British traditions, Cadbury Eggs have become synonymous with Easter and are now a beloved ingredient in many dessert recipes. These cookie cups are soft, buttery, and perfectly baked to create a delightful vessel for the creamy, sweet filling.
The flavor profile of these cookie cups is a harmonious blend of rich chocolate, sweet vanilla, and the unique, creamy filling of the Cadbury Egg. You’ll experience a lovely texture contrast—the outer cookie is crisp and buttery, while the inside is gooey and bursting with flavor. Each bite transports you to a springtime picnic, reminding you of joyful moments, perfect for celebrating the season with family and friends.
In this recipe, you’ll discover not only how to make these irresistibly good cookie cups but also learn tips and tricks to make them uniquely yours. Whether you’re prepping for a party or simply want to indulge in a sweet treat, this recipe brings joy and comfort in every bite.
Why You’ll Love This
First and foremost, the taste is phenomenal! These cookie cups combine the richness of chocolate cookies with the sweet filling of the Cadbury Egg, creating an experience that is truly hard to resist. The creamy filling perfectly complements the cookie’s texture, resulting in a cookie cup that is deliciously satisfying. Plus, they’re visually appealing, making them perfect for any gathering.
You’ll also appreciate how easy they are to prepare. With just a few straightforward steps, you can create a gourmet-style dessert that impresses even the pickiest eaters. The ingredients are generally affordable and easy to find, so you won’t break the bank creating these treats. This is particularly beneficial for busy parents or novice bakers who may want to wow their friends without spending hours in the kitchen.
Some may think that cookies require complex techniques or specialty ingredients, but that is not the case here. By using common kitchen staples and a simple cookie cup method, anyone can successfully make these delightful Spring Cookies. Even beginners have a high chance of success with this straightforward recipe—you’ll be amazed at how easy it is to create something that looks and tastes like it came from a professional bakery.
Ingredients You’ll Need
- 1 cup all-purpose flour – The base of your cookie, contributing structure and texture.
- 1/2 cup unsalted butter, softened – This adds moisture and richness to the cookie.
- 1/3 cup granulated sugar – Sweetens the cookie and helps create a crisp texture.
- 1/3 cup brown sugar – Adds a rich molasses flavor and moisture.
- 1 large egg – Binds the ingredients together and contributes to the overall texture.
- 1 tsp vanilla extract – Enhances the flavor of the cookie.
- 1/2 tsp baking soda – Helps the cookie rise and become fluffy.
- 1/4 tsp salt – Balances the sweetness and enhances flavor.
- 12 Cadbury Eggs (mini or regular) – The showstopper that makes these cookie cups unique!
Each ingredient plays a vital role in the success of your cookie cups. The flour is the backbone, while the butter enriches the dough. The combination of sugars not only sweetens but also ensures the right texture. For substitutes, you can use margarine instead of butter or even a dairy-free alternative if needed. When using different types of sugar, consider that brown sugar will yield a moister cookie, while white sugar creates a crispier outcome. Ensuring each ingredient is at room temperature can also make a significant difference in your final product.
How to Make
- Preheat your oven to 350°F (175°C). This step is crucial as it ensures even baking. While the oven is heating up, prepare your cookie dough so that it stays fresh.
- In a mixing bowl, cream together the softened butter, granulated sugar, and brown sugar until light and fluffy. This process usually takes about 2-3 minutes. Make sure there are no lumps of butter remaining. Creaming your butter and sugar properly incorporates air, which is essential for a light texture.
- Add the egg and vanilla extract to the creamed mixture. Mix until fully combined. Scratch the sides of the bowl to ensure every ingredient is well incorporated. The mixture should appear smooth and creamy.
- In a separate bowl, whisk together the flour, baking soda, and salt. Mixing these dry ingredients beforehand helps evenly distribute the baking soda and avoids clumping.
- Gradually add the dry ingredients to the wet mixture, mixing until just combined. Be careful not to over-mix; this will keep your cookies tender and prevent them from becoming tough.
- Scoop the dough using a cookie scoop or tablespoon and place them in a greased muffin tin. Make sure to press the dough down slightly to form a cup shape but leave enough room for the cookies to expand. A proper portioning tool will ensure uniformity in your cookie cups.
- Bake the cookie cups in the preheated oven for about 8-10 minutes. The edges should appear golden, while the centers may look slightly under-baked; this is okay as they will continue to cook in the muffin tin once removed.
- Immediately after taking them out of the oven, gently press a Cadbury Egg into the center of each cookie cup. The heat will soften the chocolate, creating a gooey center.
- Allow the cookie cups to cool in the muffin tin for 5 minutes before transferring them to a wire rack to cool completely. This will help them maintain their structure while they cool.
Each step takes you closer to elevating your dessert game. Always monitor the baking time, as ovens can vary; start with the lower time range and adjust as necessary. If you’re preparing these cookie cups for a special occasion, you might also want to consider garnishing them with some colorful sprinkles or drizzling chocolate on top for an added visual appeal.
Variations & Substitutions
Chocolate Lovers Variation: If you are a true chocolate enthusiast, consider enhancing the chocolate flavor by using chocolate chips instead of traditional Cadbury Eggs. You can mix in some dark chocolate chunks or even swirl in some chocolate sauce before baking for an added rich flavor. This variation is perfect for those who crave a more intense chocolate experience and is a great option for gluten-free individuals—just substitute the all-purpose flour with a suitable gluten-free mix.
Nutty Delight Variation: For a nutty twist, you can incorporate chopped walnuts or pecans into your cookie dough. This gives a wonderful crunch and pairs beautifully with the sugary filling of the Cadbury Egg. Just chop the nuts finely and fold them into the dough along with the flour. Nut lovers will rejoice with every bite of these cookie cups, which add an additional layer of texture.
Colorful Candy Cups Variation: To infuse a sense of fun and nostalgia, feel free to swap Cadbury Eggs for other seasonal candies like jelly beans or mini chocolate eggs. The bright colors and different textures will not only appeal to kids but adults alike. This is an excellent way to transform your cookie cups into a festive spring treat, ideal for Easter gatherings or birthday parties.
Healthier Option: If you are looking for a healthier alternative, consider substituting the all-purpose flour with whole wheat flour, and using coconut sugar or maple syrup in place of regular sugars. While these adjustments will change the texture slightly, they introduce additional nutrients without sacrificing too much flavor. This option offers a better nutritional profile while still being a sweet indulgence.
When exploring these variations, don’t hesitate to mix and match ingredients based on your taste preferences or dietary needs. Each twist brings its unique flair to the classic cookie cup, ensuring it remains an exciting treat for everyone.
Common Mistakes to Avoid
One common mistake that could affect your results is using cold butter straight from the fridge. It’s essential to ensure your butter is softened to room temperature for proper creaming with sugar; this step is crucial for a light and fluffy cookie texture. If you accidentally use cold butter, your cookie cups may turn out dense and heavy.
Another problem could arise from overmixing the dough after adding the flour. Doing so can develop the gluten, leading to tough cookies. To achieve the ideal consistency, mix only until the ingredients are combined. Keep in mind that lumps in the flour mixture are perfectly fine.
Lastly, make sure to keep an eye on the baking time. Every oven is different, and removing the cookie cups just as the edges begin to brown will yield the best texture. Overbaking can result in hard, dry cookies—nobody wants that! Always trust your instincts and check for doneness slightly earlier than the suggested time.
Storage, Freezing & Reheating Tips
For optimal storage, allow your cookie cups to cool completely. Once cooled, you can store them in an airtight container at room temperature for up to three days. If you prefer to extend their shelf life, consider refrigerating them, where they can last for about a week. However, note that the texture may change slightly due to refrigeration.
You can also freeze these cookie cups for longer storage. Simply place them in a single layer in a freezer-safe container or bag. To prevent sticking, use parchment paper between layers. They can be frozen for up to three months. To enjoy them later, allow them to thaw at room temperature or reheat them in the oven at a low temperature just until warm. This will help revive their initial gooey texture.
When it comes to reheating, be sure not to overdo it—15 to 20 seconds in the microwave often suffices. However, for a fresh-baked feel, reheating in the oven will help restore their crispiness.
Frequently Asked Questions
Can I use a different filling instead of Cadbury Eggs?
Absolutely! While Cadbury Eggs are the star of this recipe, other fillings like chocolate chips, peanut butter cups, or seasonal candies can work beautifully. Just remember to adjust the baking time as needed for different fillings.
How can I make these cookies gluten-free?
To make these cookie cups gluten-free, simply substitute the all-purpose flour with a gluten-free flour blend. Ensure that the blend you choose contains a binding agent, like xanthan gum, to maintain the structure of the cookies.
Can I make this cookie dough ahead of time?
Yes, you can prepare the dough in advance! Wrap it tightly in plastic wrap and store it in the refrigerator for up to 24 hours. You can also freeze the dough for later use. Just make sure it’s shaped into cookie cup forms before freezing for ease.
Can I add food coloring to the dough?
Certainly! For a festive touch, you can incorporate food coloring into the dough, especially if you’re making these for special occasions. Just be cautious not to add too much, as it can affect the dough’s texture.
What temperature should I bake these cookie cups at?
These cookie cups should be baked at 350°F (175°C). This temperature ensures they cook evenly without burning, resulting in a perfectly baked cookie that is soft on the inside and slightly crisp on the edges.
Conclusion:
These Spring Cookies: Cadbury Egg Cookie Cups are not just a treat; they are a delightful way to celebrate the arrival of spring. The combination of chewy cookie cups with a creamy filling creates an unforgettable dessert experience, perfect for gatherings, family treat nights, or even just a personal indulgence. As you venture into making these for yourself, don’t hesitate to customize them with various ingredients and flavors that suit your taste. Whether you follow the recipe to a T or experiment with variations, you’re guaranteed a sweet success. So gather your ingredients, roll up your sleeves, and enjoy the simple pleasure of baking delicious cookie cups that everyone will adore!