Prep time: 20 minutes
Cook time: 65 minutes
Total time: 1 hour 25 minutes
Servings: 12
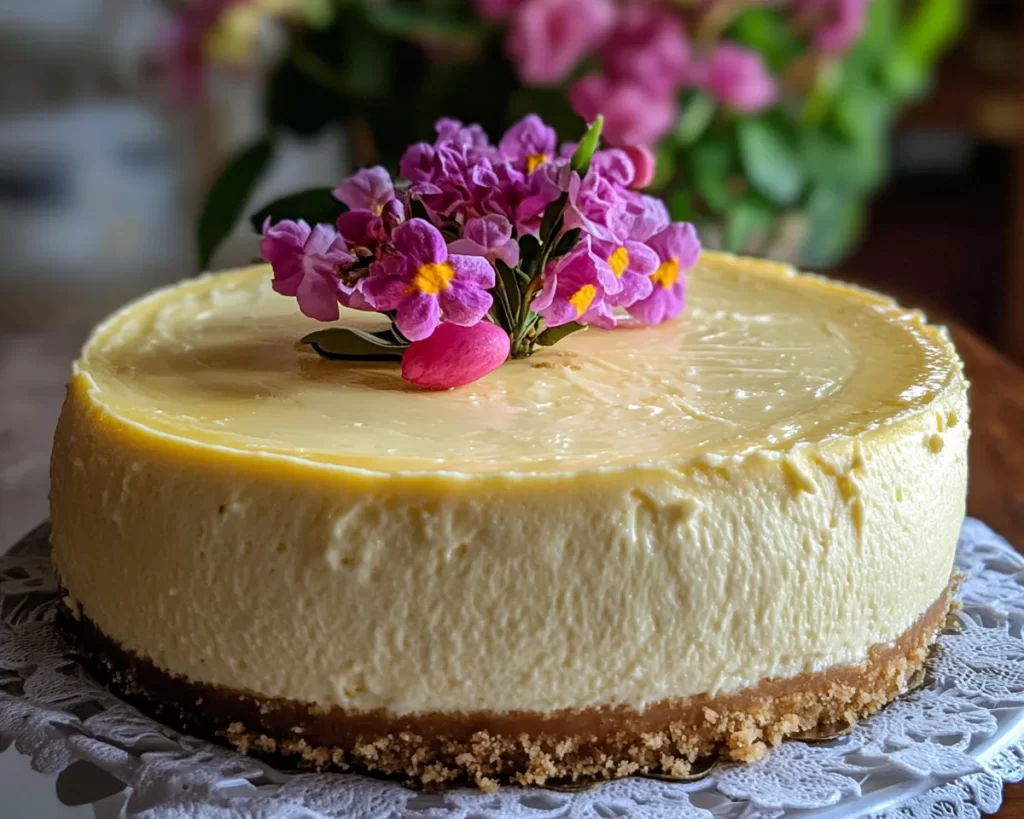
There’s something magical about the first bite of a perfectly set cheesecake, especially when it’s a flavor as irresistible as vanilla bean. Picture a creamy, rich texture enveloping your taste buds, evoking cherished memories of family gatherings and festive occasions. The **Easter Vanilla Bean Cheesecake** transcends mere dessert; it becomes a centerpiece, a celebration of flavors and experiences that lives on in everyone’s memory.
What makes this recipe special is its incredible balance of flavor. The sweet yet slightly nutty notes of the vanilla bean paired with a buttery graham cracker crust create a harmonious symphony of textures and tastes. As you read on, you’ll discover the familiar and comforting steps to create this dessert, practical tips, and exciting variations that will keep your Easter celebration lively and delicious.
What Is Easter Vanilla Bean Cheesecake?
**Easter Vanilla Bean Cheesecake** is a delightful dessert that originates from the classic cheesecake, which traces back to ancient Greece. It features a smooth, velvety filling made from cream cheese, sugar, and eggs, enhanced with the aromatic flavors of vanilla bean. This cheesecake is special, particularly for Easter celebrations, as it mirrors the essence of spring—sweet, vibrant, and fulfilling.
The texture of this cheesecake is one of its standout qualities. Imagine slicing through the firm yet creamy filling, revealing a luscious interior that melts in your mouth. The **vanilla bean**, with its tiny black specks, not only signifies high quality and authenticity but also adds a delightful visual appeal, making it perfect as an Easter centerpiece. Each bite is not just about taste; it’s an experience—a combination of comfort and sophistication that elevates any gathering.
What sets this cheesecake apart is the nostalgic feelings it evokes. Whether it’s the traditional family recipe passed down through generations or a new twist you’ve put on an old favorite, it instantly conjures memories of laughter, love, and the joy of gathering around the table with loved ones.
Why You’ll Love This
There are numerous reasons to fall in love with **Easter Vanilla Bean Cheesecake**. First and foremost, the **taste** is simply divine—lush, rich, and subtly sweet with a hint of warmth from the vanilla bean, making it an **irresistible dessert** that appeals to both young and old. The textures play a significant role here as well; the creamy filling contrasts beautifully with the crispness of the graham cracker crust, providing a delightful crunch with each bite.
Additionally, this recipe is surprisingly **easy to make**, even for those who might consider themselves beginners in the kitchen. The method involves simple steps that yield impressive results. With just 20 minutes of prep time and minimal fuss during the cooking process, you can create a dessert that looks and tastes like it came from a high-end bakery.
Furthermore, concerning **budget**, you’ll find that most of the ingredients are affordable and can often be found in your pantry or local grocery store. In terms of **versatility**, this cheesecake allows for creative adaptations; you can easily customize it based on dietary needs or personal preferences.
Misconceptions around cheesecakes often lead to the belief that they are overly rich or challenging to prepare. However, this recipe reassures you that a cheesecake can be both indulgent yet not overwhelmingly heavy. With the right proportion of ingredients and cooking methods, a perfectly balanced cheesecake is achievable.
Ingredients You’ll Need
- Crust: 1 ½ cups of graham cracker crumbs – This will form the foundation of your cheesecake. Opt for plain graham crackers or flavored ones for a unique twist.
- Granulated Sugar: 1/3 cup – This is for sweetness and aiding in the binding of the crust.
- Butter: ½ cup, melted – Adds richness and flavor, holding the crust together.
- Filling:
- Cream Cheese: 24 ounces, softened – The star of this recipe; ensure it’s softened to room temperature for a lump-free mix.
- Granulated Sugar: 1 cup – Balances the tang of the cream cheese and contributes to the silky texture.
- Large Eggs: 4 – Essential for structure; bring them to room temperature for even mixing.
- Sour Cream: 1 cup – Adds tanginess and a creamy texture.
- Vanilla Bean: 2 whole beans, seeds scraped out – This gives the cheesecake its signature flavor and beautiful speckled look. You can use vanilla extract as a substitute in a pinch.
- All-purpose Flour: 2 tablespoons – Helps to stabilize the filling, preventing cracks.
How to Make
- Start by preheating your oven to 325°F (160°C). Ensuring your oven reaches the right temperature is crucial, as this will provide even cooking for your cheesecake.
- In a mixing bowl, combine the graham cracker crumbs, granulated sugar, and melted butter. Use your hands or a fork to mix thoroughly until the mixture resembles wet sand.
- Press the crumb mixture firmly into the bottom of a 9-inch springform pan to create an even layer. Make sure to pack it down tightly to avoid a crumbly crust. Bake this crust in the preheated oven for about 10 minutes, then remove it and let it cool while you prepare the filling.
- In a large mixing bowl, beat the softened cream cheese with an electric mixer on medium speed until smooth. This process is vital to eliminate lumps, creating a creamy filling.
- Add in the sugar and continue mixing until fully incorporated, scraping down the sides of the bowl as needed to ensure an even consistency.
- Next, add in the eggs one at a time, mixing well after each addition. Be careful not to over-mix as you want to keep the filling light and airy.
- Incorporate the sour cream, scraping the seeds from the vanilla bean into the mixture. This is where the magic happens – the bean adds sophisticated notes that truly elevate the dish.
- Finish by adding the flour and mix until just combined. The flour acts as a stabilizer, which is key to preventing cracks in the baked cheesecake.
- Pour the filling into your cooled crust, smoothing the top with a spatula. This step is crucial; a smooth surface will help your cheesecake look its best.
- Bake in the oven for about 50-65 minutes. When it’s done, the center should still slightly jiggle while being set around the edges. This indicates that you’ve achieved that coveted creamy texture!
- Once baked, turn off the oven and leave the cheesecake inside with the door slightly ajar for about 1 hour. This allows the cheesecake to cool slowly, helping prevent cracks from forming.
- After it cools, refrigerate for at least 4 hours, preferably overnight, to allow the cheesecake to set completely. The flavors deepen during this resting period, making it even more delicious.
Variations & Substitutions
Chocolate Swirl Variation: To elevate this cheesecake into something uniquely sweet, you can create a chocolate swirl. Melt 4 ounces of semisweet chocolate and swirl it gently into the filling before baking. This adds a rich chocolate flavor that pairs beautifully with vanilla. Perfect for chocolate lovers!
Fruit-Topped Variation: If you’re looking for a fresh, bright twist, consider using fresh fruits such as berries, mangoes, or peaches as a topping. After the cheesecake is fully cooled and set, you can create a vibrant fruit compote to drizzle over the top or just arrange whole fruits directly on the surface. This variation not only adds sweetness but also a beautiful pop of color.
Dairy-Free Variation: For those with dietary requirements, you can use dairy-free alternatives. Substitute the cream cheese with a dairy-free cream cheese and use coconut cream instead of sour cream. Keep in mind that this will slightly alter the flavor and texture, yet coconut pairs wonderfully with vanilla.
Mini Cheesecake Variation: Planning an event or need individual servings? Portion your cheesecake into mini springform pans or muffin tins. Adjust the baking time to around 20-25 minutes. Mini cheesecakes are perfect for parties and provide a fun twist on the traditional slice.
Common Mistakes to Avoid
One of the most prevalent issues people encounter when making cheesecakes is **overmixing the batter** after adding the eggs. This can lead to a dense texture and creates excess air bubbles, increasing the likelihood of cracks. Ensure you mix just until combined, especially when adding the eggs.
Another common mistake is not allowing the cheesecake to cool gradually. Remove it immediately after baking can lead to cracks forming as the cheesecake cools too rapidly. Always leave it in the oven to cool gradually or, if necessary, let it chill on the counter before refrigerating.
Finally, be diligent about using room temperature ingredients. Cold cream cheese or eggs can lead to lumps in the filling, negatively affecting the smoothness of your cheesecake. Take the time to prepare your ingredients beforehand to avoid this pitfall.
Storage, Freezing & Reheating Tips
Proper storage of your **Easter Vanilla Bean Cheesecake** is vital to maintain its freshness and flavor. Store leftovers in the refrigerator, covered tightly with plastic wrap or aluminum foil to prevent it from absorbing other odors. It can last for about 5 to 7 days, making it an excellent make-ahead dessert.
If you’re looking to extend its shelf life, you can freeze the cheesecake. Slice it into individual portions and wrap each slice in plastic wrap, then place them in an airtight container. This method will help keep the cheesecake fresh for up to 3 months. When you’re ready to enjoy, just take a slice out of the freezer and let it thaw in the refrigerator overnight.
*Food Safety Tip:* Always ensure your cheesecake is completely cooled before wrapping and storing it. This practice prevents condensation from forming, which can lead to a soggy crust.
Frequently Asked Questions
Can I use vanilla extract instead of vanilla bean? Yes, if you don’t have access to vanilla beans, you can substitute with 1 tablespoon of pure vanilla extract. While it won’t provide the same flecks of vanilla bean, it will still add that lovely vanilla flavor.
How do I know when my cheesecake is done baking? The cheesecake is done when the edges are set, but the center still has a slight jiggle. If the center looks firm, it may overbake and lose that creamy texture, which is the hallmark of a perfect cheesecake.
Can I make this cheesecake ahead of time? Absolutely! In fact, this cheesecake benefits greatly from being made a day in advance. It allows the flavors to meld beautifully and makes your planning ahead a lot easier.
Why does my cheesecake have cracks on top? Cracks are typically a sign of overbaking or cooling too quickly. Always bake at a lower temperature and let it cool gradually to minimize this issue. Cracks can also be hidden with a fruit topping or whipped cream.
How should I serve my cheesecake? For a beautiful presentation, consider topping it with whipped cream, fresh fruit, or a fruit sauce. Use a sharp knife to slice, wiping it clean between each cut for polished, smooth pieces.
Conclusion:
Creating this **Easter Vanilla Bean Cheesecake** is not only about making a dessert; it is about crafting an experience filled with shared moments and delightful flavors. Its creamy texture, combined with the aromatic undertones of vanilla, makes it a trinket of joy on any festive table. Whether you are celebrating Easter with family or simply treating yourself, this cheesecake should be on your must-try list. Embrace the process, customize it to reflect your own style, and don’t hesitate to share it with loved ones—we all deserve a taste of love in dessert form!