Prep time: 30 minutes
Cook time: 30 minutes
Total time: 1 hour
Servings: 12 servings
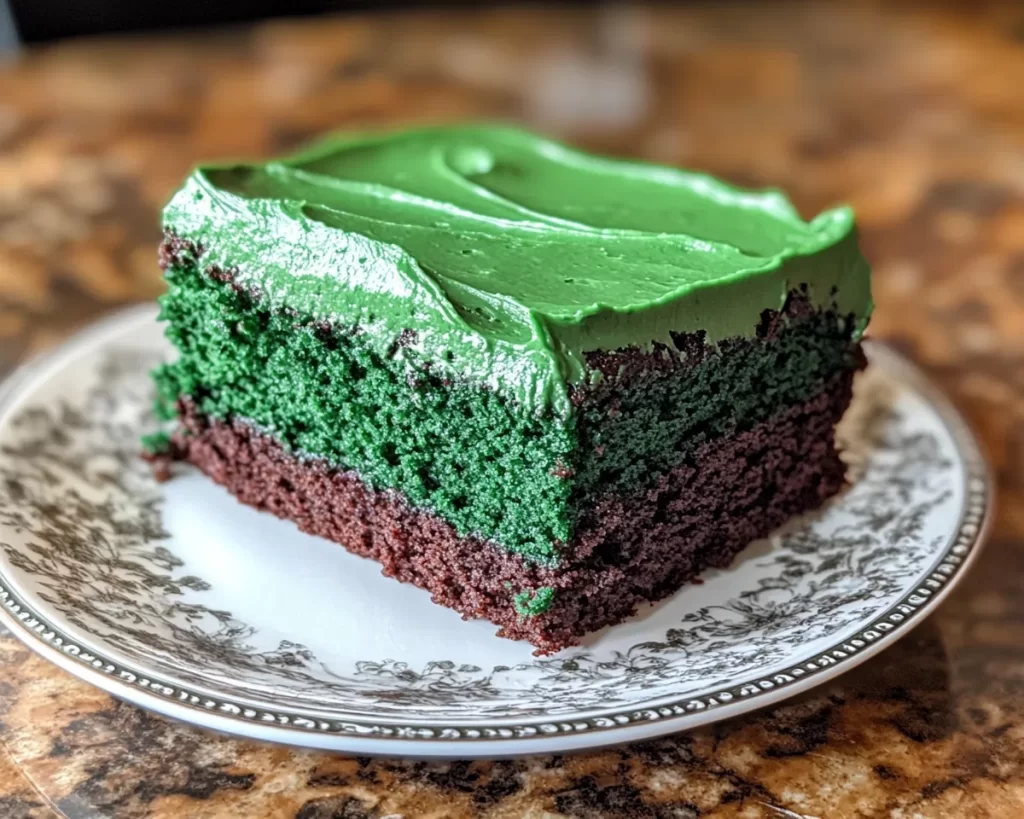
St. Patrick’s Day is not just a day to wear green; it’s also a wonderful opportunity to celebrate with a delightful feast, and what better way to do that than with a St. Patrick’s Day Green Velvet Sheet Cake? This eye-catching dessert is more than just a splash of color; it’s a scrumptious cake that combines the classic flavor of red velvet with a festive green hue.
In this recipe, you will not only learn how to make this delicious cake but also discover tips and variations that can elevate your baking experience. From mixing the batter to whipping up a luscious frosting, each step in this guide ensures you’ll end up with a cake that’s as beautiful as it is delicious. Ready your baking tools, because you’re about to embark on a sweet and vibrant journey that will surely wow your family and friends!
What Is St Patrick’s Day Green Velvet Sheet Cake?
The St. Patrick’s Day Green Velvet Sheet Cake is a fun and festive twist on traditional red velvet cake. The beautiful green color often associated with the Irish holiday symbolizes luck and prosperity. Originating from the South, the red velvet cake has captured hearts with its soft, velvety texture and subtle chocolate flavor. By introducing vibrant green food coloring, this version takes on an appealing new look that’s perfect for celebrations.
The cake itself is moist and tender, thanks to key ingredients like buttermilk and vegetable oil. With just the right amount of cocoa powder, it brilliantly balances sweetness and richness. When topped with a creamy cream cheese frosting, the result is a slice of cake that is both visually stunning and irresistibly delicious. Each bite offers a delightful combination of flavors and textures that will have everyone asking for the recipe.
Why You’ll Love This
You’re going to love this St. Patrick’s Day Green Velvet Sheet Cake for so many reasons! First, it’s incredibly easy to make, making it a fantastic choice even for beginner bakers. The simplicity of the sheet cake format means you can whip it up in no time and spend more time enjoying your celebration rather than stressing in the kitchen.
Additionally, this cake is budget-friendly. With simple ingredients that you may already have in your pantry, you can create an impressive dessert without breaking the bank. Plus, it’s a versatile recipe that allows for various adaptations, accommodating dietary restrictions such as gluten-free or vegan diets. With the option to customize the frosting or add in fun mix-ins like sprinkles or chocolate chips, you can make this cake truly your own.
Many people might think that colored cakes are just gimmicky, but rest assured that the flavor of this cake holds its own against more traditional desserts. It’s an exciting treat that stands out visually while delivering a familiar taste that everyone loves—chocolate with a hint of richness. Let’s dive into the ingredients!
Ingredients You’ll Need
- All-Purpose Flour: Essential for structure, it provides the cake’s base. You can substitute with gluten-free flour for a gluten-free option.
- Cocoa Powder: Unsweetened cocoa gives the cake a subtle chocolate flavor, balancing the sweetness.
- Baking Powder: This leavening agent helps the cake rise and become fluffy.
- Baking Soda: Works in conjunction with the baking powder to ensure the cake rises properly.
- Salt: Enhances flavor; a common but natural ingredient that brings out the sweetness.
- Vegetable Oil: Adds moisture and tenderness to the cake. For a healthier option, you can use applesauce.
- Granulated Sugar: Sweetens your cake while also contributing to its moist texture.
- Buttermilk: Adds a tangy flavor and helps tenderize the cake crumb. You can substitute with regular milk mixed with a teaspoon of vinegar.
- Eggs: Binds the ingredients together and provides richness to the cake.
- Green Food Coloring: The star ingredient that creates the beautiful green hue. You can adjust the quantity based on how vibrant you want the cake to be.
- Vanilla Extract: Adds an aromatic flavor that rounds out the taste of the cake.
- Cream Cheese: A key ingredient for the frosting, offering rich flavor and creamy texture.
- Confectioners’ Sugar: Sweetens the frosting and gives it a smooth, spreadable consistency.
- Butter: A crucial ingredient for frosting, it adds richness and helps in achieving the right texture.
Now that you have all the necessary ingredients, let’s move on to the fun part—making your St. Patrick’s Day Green Velvet Sheet Cake!
How to Make
- Preheat Your Oven: Begin by preheating your oven to 350°F (175°C) to ensure that it’s hot and ready for baking. Grease a 13×9-inch sheet cake pan with non-stick cooking spray and lightly dust it with flour, or line it with parchment paper for easier removal later.
- Mix the Dry Ingredients: In a large mixing bowl, combine the all-purpose flour, cocoa powder, baking powder, baking soda, and salt. Whisk them together until well mixed. This step ensures that the leavening agents are evenly distributed throughout the flour, preventing any clumps that could lead to an uneven rise.
- Blend the Wet Ingredients: In a separate bowl, whisk together the vegetable oil and granulated sugar until it’s light and fluffy. This process usually takes around 2-3 minutes. Then, add in the eggs one at a time, mixing well after each addition. Incorporate the buttermilk and vanilla extract into the mixture, followed by the green food coloring. Be careful not to overmix this mixture; you want to maintain its aeration for a fluffy texture.
- Combine Wet and Dry Ingredients: Gradually add the dry mixture to the wet mixture. Mix gently until just combined; a few lumps are okay, as overmixing can result in a dense cake. Use a spatula to scrape down the sides of the bowl and ensure all flour is included in the batter.
- Pour the Batter: Transfer the cake batter into the prepared sheet pan evenly, smoothing the top with a spatula. This will help the cake bake uniformly. Place it in the preheated oven and bake for approximately 30 minutes, or until a toothpick inserted into the center comes out clean.
- Cool the Cake: Once baked, remove your cake from the oven and allow it to cool in the pan for about 10 minutes. This allows it to set before transferring it to a wire rack. Once it’s cool enough to handle, carefully remove it from the pan and let it cool completely on the wire rack.
- Make the Frosting: While the cake cools, whip up your frosting. In a mixing bowl, beat the cream cheese and softened butter together until smooth and creamy. Gradually add the confectioners’ sugar, mixing to your desired sweetness and consistency. If it’s too thick, you can add a splash of milk. Once well combined, beat in a bit of vanilla extract for flavor.
- Frost the Cake: Once the cake has cooled completely, spread the cream cheese frosting evenly over the top using a spatula. For a decorative touch, use a piping bag to create borders or rosettes, or you can simply sprinkle some festive decorations like green sprinkles or shamrock designs to align with the St. Patrick’s theme.
- Slice and Serve: Once decorated, your St. Patrick’s Day Green Velvet Sheet Cake is ready to be served! Cut it into squares and present it to your eager guests. Don’t forget to snap a few pictures—they’ll want to see the festive surprise hidden within!
Variations & Substitutions
Gluten-Free Green Velvet Cake: If you’re catering to a gluten-free crowd, you can easily substitute the all-purpose flour for a gluten-free baking blend. Ensure you choose a one-to-one replacement for the best texture. This will allow everyone to enjoy the cake without worrying about gluten sensitivities, while still maintaining that delightful green color and taste.
Vegan Green Velvet Cake: To adapt this recipe for a vegan diet, replace the eggs with flaxseed meal or aquafaba. You can also switch the buttermilk for a plant-based milk mixed with apple cider vinegar. Utilize a vegan butter alternative in the frosting to keep everything animal-product free. The end result will still be a soft and tasty cake that everyone can enjoy.
Chocolate Mint Variation: For those who love the combination of chocolate and mint, consider adding peppermint extract to the batter. A teaspoon should suffice to impart a refreshing minty flavor without overwhelming the chocolate undertones. Top it off with chocolate ganache to add another layer of richness and visual appeal.
Pineapple Coconut Version: Want a tropical twist? Add crushed pineapple and shredded coconut to the batter to give it an exotic flair. This not only adds sweetness but elevates the texture as well, making each bite delightful. Pair this version with a coconut cream frosting for a truly tropical experience.
Common Mistakes to Avoid
When following a baking recipe, little mistakes can lead to less-than-desirable outcomes. One common error is overmixing the batter. This can make the cake tough and dense instead of soft and fluffy. To avoid this, mix until ingredients are just combined.
Another frequent mistake is not measuring ingredients accurately. Baking is a science, and even small deviations can affect the final product. Always use dry measuring cups for solids and liquid measuring cups for liquids.
Finally, don’t forget to check your oven’s temperature. An oven thermometer can be a useful tool, as different ovens can vary significantly in temperature. Baking at the incorrect temperature can lead to undercooked or overcooked cakes—both of which can ruin your efforts.
Storage, Freezing & Reheating Tips
To keep your St. Patrick’s Day Green Velvet Sheet Cake fresh for longer, you have a couple of options for storage. If you plan to consume it within a few days, simply cover the cake with plastic wrap or aluminum foil and store it at room temperature. If you’d like to keep it for a week or more, refrigerate it, ensuring it is well covered to avoid drying out.
For long-term storage, freezing is an excellent option. Cut the cake into squares and wrap each individually in plastic wrap, followed by aluminum foil. This double-wrapping method prevents freezer burn. When you’re ready to enjoy a slice, just thaw it in the refrigerator overnight and frost it (if you’ve frozen it without frosting) before serving.
Always follow proper food safety practices, particularly if you’ve used dairy-based frosting. If your cake has been out for more than two hours at room temperature, it’s best to either refrigerate it or dispose of it to avoid potential foodborne illnesses.
Frequently Asked Questions
Can I use different colors for the Velvet Sheet Cake?
Absolutely! While green is traditional for St. Patrick’s Day, you can use any color food dye you prefer to match a different occasion. Just follow the same steps, adjusting the amount of food coloring until you achieve your desired hue.
How long will this cake stay fresh?
If stored properly, your St. Patrick’s Day Green Velvet Sheet Cake can last up to 3 to 5 days at room temperature, and in the fridge, it can stay fresh for about a week. You can also freeze it for up to three months.
Can I make this gluten-free?
Yes, simply replace regular all-purpose flour with a gluten-free blend that is designed for baking. Ensure it includes a binding agent like xanthan gum, or you can add that separately according to the package instructions for the best results.
What kind of frosting pairs well with green velvet cake?
A classic cream cheese frosting is traditional, but a vanilla buttercream or even a chocolate ganache could complement the flavors beautifully. Feel free to experiment until you find your perfect pairing!
Can I make mini versions of this cake?
Definitely! You can bake the batter in muffin tins for individual portions. Just adjust the baking time to around 15-20 minutes, checking for doneness with a toothpick.
Conclusion:
This St. Patrick’s Day Green Velvet Sheet Cake is a delightful addition to any festive gathering, not just for its vibrant color but also for its amazing taste and textured delight. It’s easy to make, visually appealing, and perfect for anyone’s sweet cravings. After all, every celebration deserves a show-stopping dessert, and this cake is sure to be the star of the show.
Now that you have the recipe and techniques, don’t hesitate to try it out, customize it to your liking, or share it with friends and family. Trust me, once you take that first bite, your taste buds will thank you! Happy baking!