Prep time: 20 minutes
Cook time: 0 minutes
Total time: 20 minutes
Servings: 12
Indulging in a dessert that brings comfort is one of life’s simple pleasures. Remember those relaxing summer afternoons spent enjoying a perfectly creamy banana pudding? It’s one of those classic desserts that warms the heart while also tantalizing the taste buds. Now, imagine taking that unforgettable dessert and combining it with the richness of a cheesecake, all while avoiding the heat of the oven. This is where the “Irresistible No-Bake Banana Pudding Crunch Cheesecake” comes in—a heavenly combination of textures and flavors that will make you feel like a culinary genius without the usual kitchen stress.
What makes this cheesecake special isn’t just its ease of preparation but also how it incorporates the flavors of fresh bananas, velvety cream cheese, and delightful whipped cream, all topped off with a crunchy layer that adds a textural contrast that is simply irresistible. If you’re a busy parent, beginner in the kitchen, or simply someone who wants a delicious dessert without spending hours whipping it together, this recipe is going to quickly become your go-to. Let’s dive into the details to explore the taste, texture, and tips that will make your no-bake banana pudding crunch cheesecake a success.
What Is Irresistible No-Bake Banana Pudding Crunch Cheesecake?
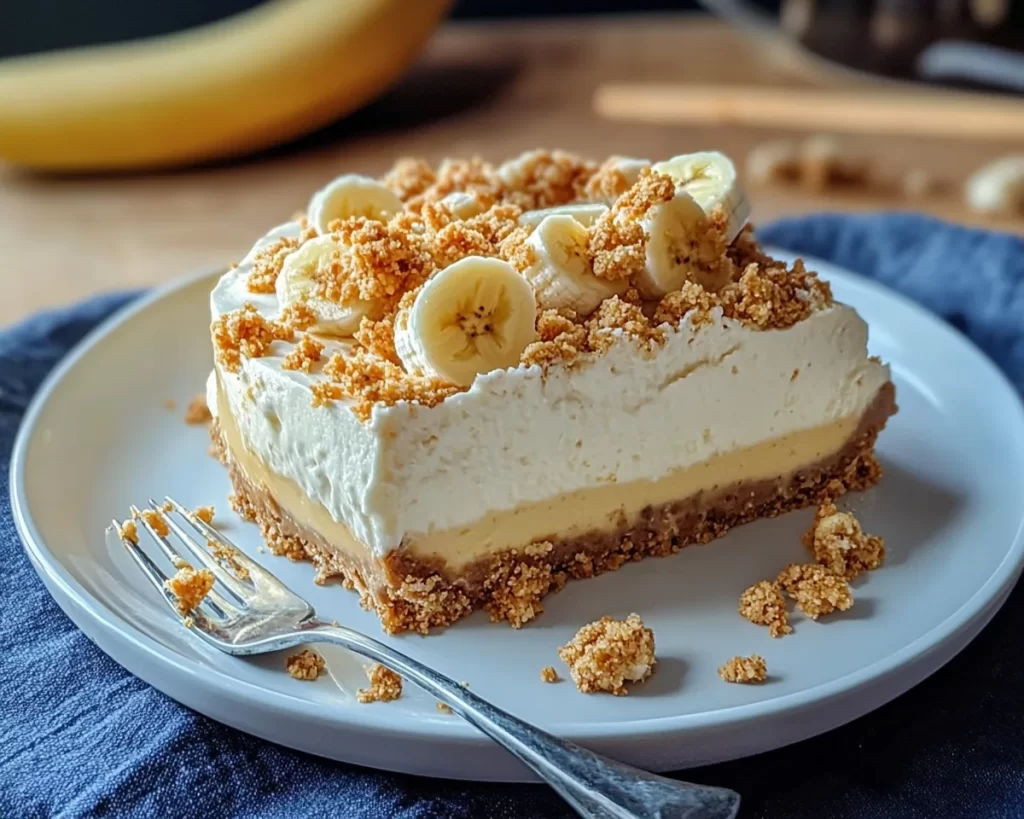
The “Irresistible No-Bake Banana Pudding Crunch Cheesecake” is a luscious dessert that marries two beloved treats: classic banana pudding and the luxurious creaminess of cheesecake. Originating from the popularity of no-bake desserts, this dish is often considered a simplified, yet indulgent option for those who crave something sweet without extensive preparation. The base consists of cream cheese mixed with whipped cream, offering a creamy texture that contrasts beautifully with the soft slices of banana layered throughout.
Imagine the delightful layers: a smooth cream cheese mixture, fresh banana slices, and crunchy cookie crumbs all combined to create a taste sensation. The cheesecake is adorned with more whipped cream and perhaps even a drizzle of caramel or chocolate, enhancing both the flavor and visual appeal. The discovery of this delightful combination transcends the boundaries of traditional desserts, bringing together different textures and tastes into a cohesive and mouthwatering experience.
Why You’ll Love This
This no-bake banana pudding crunch cheesecake brings together multiple benefits that make it a favorite among dessert lovers. First and foremost, the taste is simply divine. The harmonious blend of creamy cheesecake paired with the sweetness of bananas creates an explosion of flavors in every bite. Also, since this is a no-bake recipe, it’s incredibly easy to make, making it perfect for beginners or those with little time to spare.
Moreover, this recipe is incredibly cost-effective. With relatively inexpensive ingredients that you likely already have in your pantry, you can whip up a dessert that tastes gourmet without breaking the bank. You’ll impress your family and friends with a dessert that feels special and upscale while knowing you didn’t have to go through an extensive baking process.
However, there are a few common misconceptions surrounding no-bake desserts, especially the idea that they can’t be as delightful as their baked counterparts. Contrary to this, this cheesecake proves that you don’t need an oven to create something delectable. With the right combination of ingredients—a key factor in any successful dish—you can achieve a remarkable dessert that rivals any baked cheesecake.
Ingredients You’ll Need
– Graham cracker crumbs: This serves as the base for your crust, providing a nice crunch and flavor. If you prefer, you can substitute with digestive biscuits or even gluten-free alternatives.
– Sugar: This sweetens the crust and filling. Substitute with a sugar alternative like stevia if you are watching your sugar intake.
– Unsalted butter: Used to bind the cracker crumbs together into a crust. Always melt the butter for an even mix. If you want a dairy-free option, consider using coconut oil.
– Cream cheese: This is a crucial component, bringing creaminess and structure to the cheesecake. Opt for full-fat cream cheese for a richer flavor.
– Heavy whipped cream: This lightens the cheesecake filling and adds a delightful creaminess. Make sure to whip it just until peaks form; over-beating can turn it into butter.
– Vanilla extract: This enhances the flavor profile, adding depth to the overall mix. Real vanilla is recommended for the best results.
– Ripe bananas: Sliced bananas add natural sweetness and texture. The riper they are, the sweeter and more flavorful they become.
– Instant vanilla pudding mix: This stabilizes the cheesecake filling, ensuring a perfect set while enhancing the vanilla flavor. For a healthier option, look for natural varieties without added sugars.
– Optional toppings (whipped cream, sliced bananas, chocolate drizzle): Add these for a gorgeous presentation and extra flavor. You can customize them to fit individual preferences.
How to Make
1. **Prepare the crust**: In a medium mixing bowl, combine the graham cracker crumbs, sugar, and melted butter. Mix until the crumbs are fully coated in the butter and the mixture resembles wet sand. Press the mixture firmly into the bottom of a 9-inch springform pan. Use the bottom of a cup or your fingers to ensure an even layer. Chill in the refrigerator while you prepare the filling.
2. **Make the filling**: In a large mixing bowl, beat the cream cheese until it’s smooth and creamy. This should take about 2-3 minutes to ensure there are no lumps. Add the sugar and vanilla extract, and continue to beat until well incorporated.
3. **Incorporate the pudding**: Gradually add the instant vanilla pudding mix to the cream cheese mixture. Beat until everything is well combined, and the mixture starts to thicken.
4. **Fold in the whipped cream**: Carefully fold the whipped cream into the cream cheese mixture. Use a spatula to gently combine, ensuring you maintain the light, airy texture of the whipped cream. You want a smooth and luscious filling, so take your time with this step.
5. **Layer the cheesecake**: Retrieve the crust from the refrigerator and start layering the filling. Spread half of the cheesecake mixture over the crust. Evenly distribute banana slices on top of this layer, then add the remaining cheesecake filling on top. Smooth it out with a spatula for a neat finish.
6. **Chill the cheesecake**: Cover the cheesecake and refrigerate for at least 4 hours or, even better, overnight. This allows the flavors to meld and ensures that the filling is set properly.
7. **Prepare to serve**: Once set, gently remove the sides of the springform pan. You can top the cheesecake with additional whipped cream, sliced bananas, and a drizzle of chocolate or caramel for a stunning visual appeal.
8. **Slice and enjoy**: Use a sharp knife to cut the cheesecake into slices. For cleaner cuts, run the knife under hot water before slicing, wiping it clean between each cut. Serve cold, and watch the smiles light up as you present this delightful dessert.
Variations & Substitutions
Chocolate Banana Crunch Cheesecake: For a chocolate twist, you can replace half of the vanilla pudding mix with chocolate pudding mix. This change adds a rich, chocolatey flavor that complements the bananas beautifully. Additionally, consider incorporating chocolate cookie crumbs for the crust instead of graham crackers to enhance the chocolate flavor. This variation is perfect for chocolate lovers who still want that classic banana taste.
Vegan No-Bake Banana Pudding Crunch Cheesecake: To cater to vegan diets, swap the cream cheese for a plant-based alternative and use coconut whipped cream instead of heavy whipped cream. For the crust, opt for vegan butter or coconut oil. This version can still deliver on flavor and texture while accommodating dietary restrictions, making it a great option for gatherings with mixed dietary preferences.
Caribbean Banana Crunch Cheesecake: Spice things up by adding a hint of coconut. Mix some shredded coconut into your crust and use coconut cream for the filling in place of regular cream cheese. This variation will evoke a tropical feel, making it perfect for summer gatherings or beach parties. The tropical notes add a delightful twist, and it pairs wonderfully with the banana flavor while keeping the dessert refreshing.
Peanut Butter Banana Crunch Cheesecake: If you’re a fan of peanut butter, swirl some into the cheesecake mixture before layering. Simply mix ½ cup of creamy peanut butter with the cream cheese before adding the pudding. The combination of peanut butter and banana is a classic, and it transforms the dessert into a larger flavor experience. Don’t forget the peanut butter drizzle on top for that extra touch!
Common Mistakes to Avoid
When preparing your no-bake banana pudding crunch cheesecake, avoiding a few common pitfalls will ensure your dessert turns out perfect every time. First, don’t rush the chilling process. If the cheesecake is not set adequately, it may fall apart upon slicing. Ensure that you allow enough time for the filling to firm up in the refrigerator, preferably overnight.
Additionally, a common mistake is over-beating the whipped cream. Doing this can turn it into butter rather than keeping it airy and light. Always beat just until stiff peaks form, and then carefully fold it into the cream cheese mixture to retain that luscious texture.
Lastly, when layering the bananas, avoid cutting them too thin; this can cause them to become mushy over time. Thicker slices offer a more enjoyable texture and provide a visual appeal against the creamy cheesecake filling.
Storage, Freezing & Reheating Tips
Proper storage is vital if you want to enjoy your no-bake banana pudding crunch cheesecake over several days. After slicing, cover the cheesecake tightly with plastic wrap or aluminum foil, ensuring it’s airtight to prevent drying out. The cheesecake can be stored in the refrigerator for up to 5 days. When it comes to freezing, you can freeze slices individually, but it’s best to do so before adding toppings like whipped cream. Wrap the slices in plastic wrap and place them in an airtight container; they can last for up to 2 months in the freezer.
When it’s time to enjoy your frozen cheesecake again, thaw it in the refrigerator for several hours or overnight. It’s important to avoid defrosting it at room temperature as this could affect the texture of the cheesecake. Once thawed, you can add fresh toppings before serving to revive that delightful presentation.
Frequently Asked Questions
Can I use fresh bananas instead of instant banana pudding mix? Yes, while you can incorporate fresh bananas for added flavor, it’s essential to use the instant banana pudding mix for stabilizing the cheesecake. The pudding mix gives the structure that allows the cheesecake to set properly while providing a boost in banana flavor.
Can I make this cheesecake ahead of time? Absolutely! In fact, making the cheesecake a day ahead is highly recommended. The flavors meld beautifully as it sits in the refrigerator, and it sets better, making slicing easier. Just make sure to keep it well-covered to retain freshness.
Is it possible to adjust the sweetness in this recipe? Yes, you can easily adjust the sweetness by reducing the sugar used in the cream cheese filling or opting for sugar substitutes. Keep in mind, though, that bananas also add natural sugar, so taste as you go along to find the perfect balance.
What should I do if my cheesecake didn’t set properly? If you find that your cheesecake hasn’t set to your liking, you can try refrigerating it longer. However, if it’s still too runny after an extended chilling time, it may indicate that not enough pudding mix was used. Next time, you can also add more pudding mix to the cream cheese mixture to help it achieve a better texture.
Can this cheesecake be made gluten-free? Definitely! By substituting graham cracker crumbs with gluten-free alternatives, such as almond flour or gluten-free cookies, you can customize this dessert to cater to gluten-sensitive individuals. Always check the labels of your other ingredients to ensure they are gluten-free as well.
Conclusion:
This Irresistible No-Bake Banana Pudding Crunch Cheesecake embodies the essence of a timeless dessert while catering to modern culinary needs with its quick preparation and delightful flavors. Its unique combinations of creamy, crunchy, sweet, and slightly tangy layers create a truly unforgettable experience with every bite. Whether you opt for the classic version or choose to experiment with different variations, this cheesecake is a perfect addition to any table, be it a holiday gathering, a birthday party, or a simple family dinner.
Don’t hesitate to make this dish your own; customize it with your favorite toppings or variations. Share this delightful creation with friends and family, and watch them fall in love with its charm. So roll up your sleeves and let the joys of cooking unfold as you prepare this easy yet stunning dessert. Happy baking!