Prep time: 30 minutes
Cook time: 1 hour
Total time: 1 hour 30 minutes
Servings: 12 slices
Indulge yourself in a delightful dessert that transports you to a world filled with sweetness and nostalgia. The Delicious Cookie Monster Cheesecake is not just another cheesecake; it offers a playful twist that appeals to people of all ages. Imagine a creamy cheesecake topped with a tantalizing blend of cookie crumbles, all sitting on a buttery crust. As you take a bite, the smooth texture of the cheesecake melts in your mouth while the crunchy bits of cookie add a delightful contrast. This recipe is perfect for birthday parties, family gatherings, or just a cozy night in, making it an excellent choice for both novice bakers and seasoned chefs.
Throughout this article, you will learn how to create this fun dessert step by step, with inspiring tips and variations that cater to various tastes and dietary needs. Whether you’re looking for a rich treat to impress guests or a nostalgic dessert to enjoy with family, this recipe is versatile and adaptable, ensuring that it can meet your cravings in the most delicious way.
What Is Delicious Cookie Monster Cheesecake Recipe: Indulge in a Fun and Flavorful Dessert Delight?
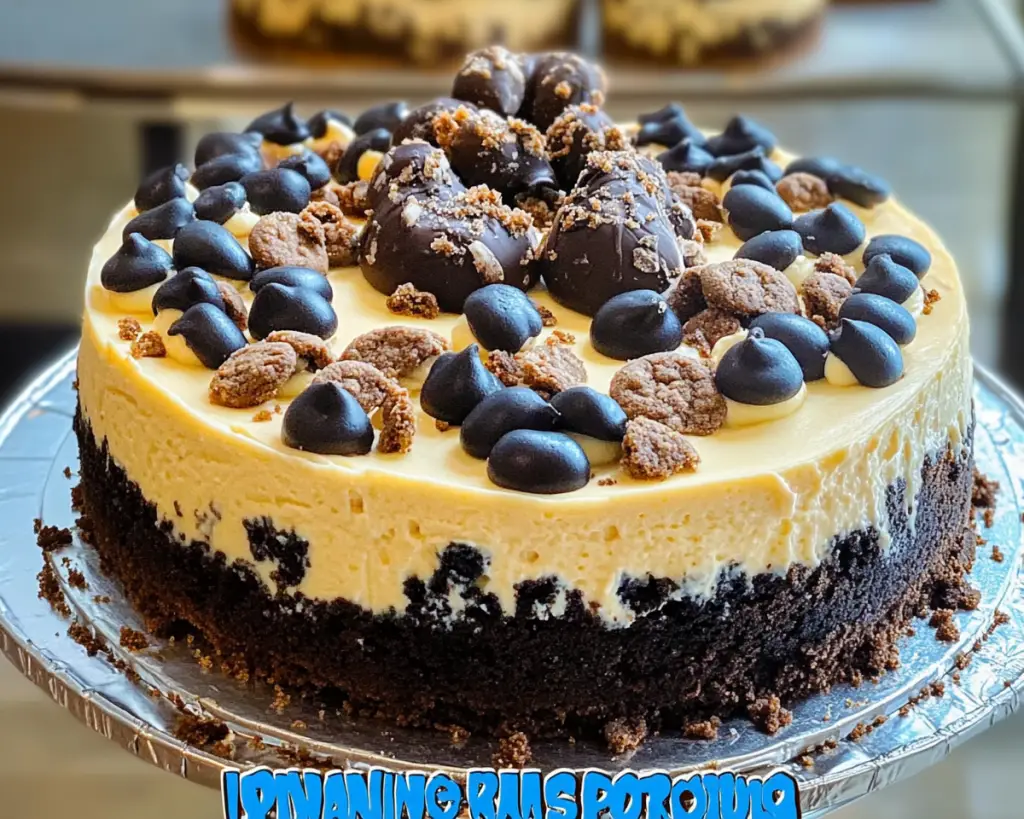
The Delicious Cookie Monster Cheesecake is a vibrant and whimsical dessert that captivates both the eye and the palate. With its origins nestled in the realm of cheesecake variations, it has taken on a distinct persona that merges childhood memories with refined flavors. The base is crafted from Cream Cheese which provides its creamy texture, while the infusion of vanilla adds significant warmth. The addition of cookie crumbs not only enhances the flavor but also introduces a delightful crunch, creating a symphony of textures that make each bite enjoyable.
The cheesecake bakes to silky perfection, achieving a subtle balance between sweetness and richness. The cookie topping is typically made from classic chocolate chip cookies or Oreos, which offer an indulgent yet nostalgic flavor profile. More than just a dessert, the Cookie Monster Cheesecake can evoke fond memories of childhood while standing as an extravagant treat suited for any occasion. It serves beautifully as the centerpiece at gatherings and is an excellent conversation starter due to its visually appealing layers of flavor and texture.
Why You’ll Love This
This Delicious Cookie Monster Cheesecake checks all the boxes — it’s scrumptious, easy to make, and wallet-friendly. The richness of the cheesecake blends seamlessly with the crispiness of the cookie crumbs to create a dessert that’s just plain fun! Unlike traditional cheesecakes that may seem daunting, this recipe is straightforward, with a structure that’s easy for beginners, ensuring that even those who are not seasoned bakers can achieve success.
Making this cheesecake doesn’t break the bank; ingredients are typically economical and easy to source, making it a delightful choice that doesn’t require extravagant spending. Additionally, this dessert invites versatility. Whether you’re a chocolate lover, a fan of citrus flavors, or even someone inclined towards healthier alternatives, this recipe can be tailored to suit varied tastes. Over the years, my own experiences with cheesecakes have shown me just how forgiving they can be, letting you experiment with different flavors without sacrificing quality.
Ingredients You’ll Need
- For the Crust: 1 ½ cups graham cracker crumbs – This forms the foundation. You can substitute with Oreos for a chocolatey twist.
- For the Filling: 3 (8 oz) packages of cream cheese – Provides a creaminess that makes cheesecake dreams come true. Look for full-fat options for the best texture.
- Granulated Sugar: 1 cup – Sweetens the filling. You can use brown sugar for a caramel-like taste.
- Vanilla Extract: 2 teaspoons – Enhances the overall flavor. Always choose pure vanilla for richer taste.
- Large Eggs: 3 – These bind the ingredients together and give structure to the cheesecake.
- For Topping: 1 cup crushed cookies (chocolate chip or Oreos) – Adds that irresistible crunch. Choose textured cookies for maximum effect.
Each ingredient plays a pivotal role in developing the final taste and mouthfeel. The cream cheese is essential for achieving that velvety texture, while the cookie topping is a fun way to contrast the rich flavor of the cheesecake base. It’s worth mentioning that the recipe is flexible; don’t hesitate to swap in different ingredients that better align with your dietary preferences or pantry staples.
How to Make
- Preheat your oven to 325°F (160°C): This temperature is crucial as it ensures a slow bake, allowing the cheesecake to retain its creamy texture. For accurate results, use an oven thermometer.
- Prepare the crust: In a medium bowl, combine the graham cracker crumbs with melted butter and sugar. Mix until the crumbs resemble wet sand. Press the mixture firmly into the bottom of a 9-inch springform pan to form an even layer. You can use the bottom of a measuring cup to compact it well, ensuring a sturdy crust that won’t crumble when served.
- Make the filling: In a large mixing bowl, beat the cream cheese until smooth, making sure there are no lumps. Gradually add in the granulated sugar and vanilla extract, mixing until well combined. This process will take roughly 2–3 minutes. Scrape down the sides of the bowl to ensure everything is evenly mixed.
- Add the eggs: Drop in one egg at a time, blending on low speed after each addition until fully incorporated. Be cautious not to overbeat, as this can introduce air bubbles that may crack the surface as the cheesecake bakes.
- Pour the filling over the crust: Once fully combined and smooth, gently pour the filling into the springform pan over the crust, smoothing the top with a spatula. You should see the layers start to form. Give it a gentle shake to eliminate air bubbles, increasing evenness.
- Bake the cheesecake: Place the springform pan in the preheated oven and bake for approximately 55-60 minutes, or until the edges are set but the center is still slightly wobbly. It’s important not to overbake, as you want the center to remain creamy. If the edges turn golden brown, that’s a sign to take it out.
- Cool and refrigerate: Allow the cheesecake to cool in the pan for at least one hour at room temperature before transferring it to the refrigerator. It’s best to cool it overnight, letting the flavors meld together. This resting period can take your dessert from good to spectacular!
- Add the topping: Once chilled, simply sprinkle the crushed cookies on top of the cheesecake. Make sure to evenly distribute them for maximum crunch and flavor. For a decorative touch, you can even whip up some whipped cream and pipe it around the edges, which adds both flair and taste.
- Serve and enjoy! Carefully remove the sides of the springform pan. Slice into 12 pieces and serve chilled. The contrast of the creamy cheesecake with the crunchy topping will entice everyone who takes a bite!
Make sure to take your time with each step — the joy is in the journey, not just the destination! Remember to enjoy the process and have fun; this recipe allows ample room for creativity and personal flair.
Variations & Substitutions
Chocolate Cookie Monster Cheesecake: For chocolate lovers, replace the graham cracker crust with an Oreo crust for an even richer flavor. Incorporate cocoa powder into the filling for a deep, chocolatey experience. This variation is perfect for anyone who can’t resist the allure of chocolate — and makes for a show-stopping dessert that will mesmerize your guests.
Gluten-Free Cookie Monster Cheesecake: If gluten sensitivities are a concern, swap the graham cracker crumbs for gluten-free cookie crumbs or almond flour mixed with a touch of melted butter. This not only keeps the dish gluten-free but adds a whole new level of richness. Your gluten-sensitive friends will adore you for this thoughtful option while you still enjoy that classic taste.
Fruit-Infused Cookie Monster Cheesecake: For a twist of fruity freshness, consider adding a fruit puree such as raspberry or lemon zest mixed into the cheesecake filling. This addition brightens the flavor profile while enhancing the dessert’s aesthetic appeal. It’s a fabulous option for summer parties when berries are in abundance!
Each variation opens up more avenues for creativity, presenting an opportunity to customize the flavors and ultimately cater to your personal preferences or the preferences of those you’re serving. Embrace experimenting with different ingredients and flavors!
Common Mistakes to Avoid
One common mistake is overmixing the cheesecake batter. This can introduce too much air into the mixture, leading to cracks during baking. To avoid this, mix gently, especially when adding eggs. You want the batter to slightly fluff but remain dense enough to hold its shape.
Another error is inadequate cooling. Rushing through the cooling and refrigerating process can lead to ineffective flavor development and a less-than-desirable texture. Always allow the cheesecake to cool completely in the pan before transferring it to the fridge. A well-chilled cheesecake has a superior mouthfeel and flavor profile.
Additionally, overbaking can transform a creamy delight into a dry dessert. Keep an eye on your cheesecake while it’s baking. Remove it from the oven when it’s still slightly jiggly in the center—this indicates the perfect level of doneness.
Lastly, don’t forget to run a knife around the edges of the pan before releasing the springform. This tiny step can save your cheesecake’s edges from sticking to the pan, giving you a beautiful, intact slice every time.
Storage, Freezing & Reheating Tips
Proper storage is key to keeping your Delicious Cookie Monster Cheesecake fresh and delightful. After allowing it to cool completely, cover the cheesecake with plastic wrap or aluminum foil. It can be stored in the refrigerator for up to 5–7 days, and it’s usually best enjoyed chilled straight from the fridge.
If you wish to keep it longer, consider freezing it. Wrap it tightly in plastic wrap and then in aluminum foil to avoid freezer burn. When properly sealed, it can last in the freezer for about 2–3 months. To thaw, move it to the refrigerator for several hours or overnight. Avoid thawing it at room temperature to maintain its texture.
Reheating cheesecake is generally not necessary. However, if you prefer a slightly warm slice, you can microwave it for 10-15 seconds, making sure not to overheat it, or use a low oven setting. Hot cheesecake can lose its signature creaminess, so it’s better to enjoy it chilled unless expressly desired otherwise.
Frequently Asked Questions
Can I make this cheesecake ahead of time?
Absolutely! This cheesecake is ideal for making ahead of time due to its resting period. In fact, making it a day in advance will enhance the flavors significantly. Just ensure it’s refrigerated properly after cooling to allow the flavors to intermingle.
Is it normal for cheesecake to crack?
Yes, it is common for cheesecakes to develop cracks, especially if overbaked. To minimize this, avoid overmixing the batter and remove it from the oven when the center still wobbles slightly. If cracks do form, don’t worry; topping it with cookies or whipped cream can elegantly cover them!
Can I use low-fat cream cheese?
While you can use low-fat cream cheese, it will result in a less creamy texture compared to full-fat options. For best results, stick with full-fat cream cheese whenever possible. However, if you’re trying to cut calories, the low-fat version would still produce a decent cheesecake.
What if I want to use a different flavor of cookies?
Feel free to experiment! Any crushed cookie can be a fun substitute, like peanut butter cookies or even ginger snaps for a holiday twist. This opens up an entire world of flavor possibilities. Just ensure the cookie pairing complements the cheesecake filling well.
How do I know when my cheesecake is done baking?
A great indicator is when the edges pull away from the pan slightly and the center retains a bit of a jiggle. Utilizing a toothpick, inserted in the center, should come out mostly clean, signaling it’s ready to be taken out of the oven.
Conclusion:
This Delicious Cookie Monster Cheesecake recipe brings joy and delight while providing an avenue for creativity in the kitchen. Not only does it offer an aesthetically pleasing experience, but it also delivers on flavor and texture, making it a staple for any dessert lover. I encourage you to try making it yourself, play with variations, and share it with loved ones. Let each slice be a reminder that the best days are often made sweeter with delicious food. Enjoy the baking adventure, and don’t forget to have a little fun!